How to Create a Register Entity
Prerequisites
We assume you have all prerequisites you may need, including:
- If needed: the VPN is configured to access the Finmars resources
- If needed: access to the Virtual Machine to work with the sensitive information
- Must have: registered in Finmars in the needed region environment (self-registered or registered by Finmars)
- Must have: having permissions set to allow continue with the Action in the Guide
Creation of Register Entity
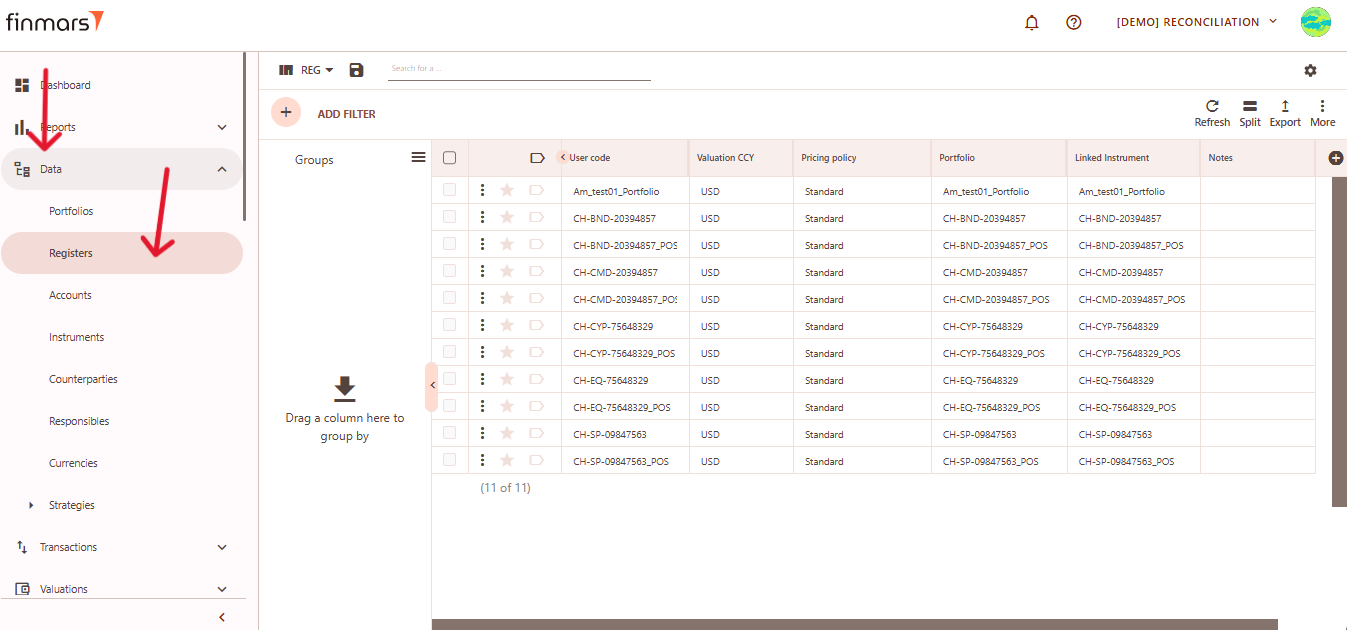
- Open the “Data” section in the left-hand side menu. Select the “Registers” entity from the list under Data.
- Click the “+ Add” button located in the top-left corner of the portfolio list view.
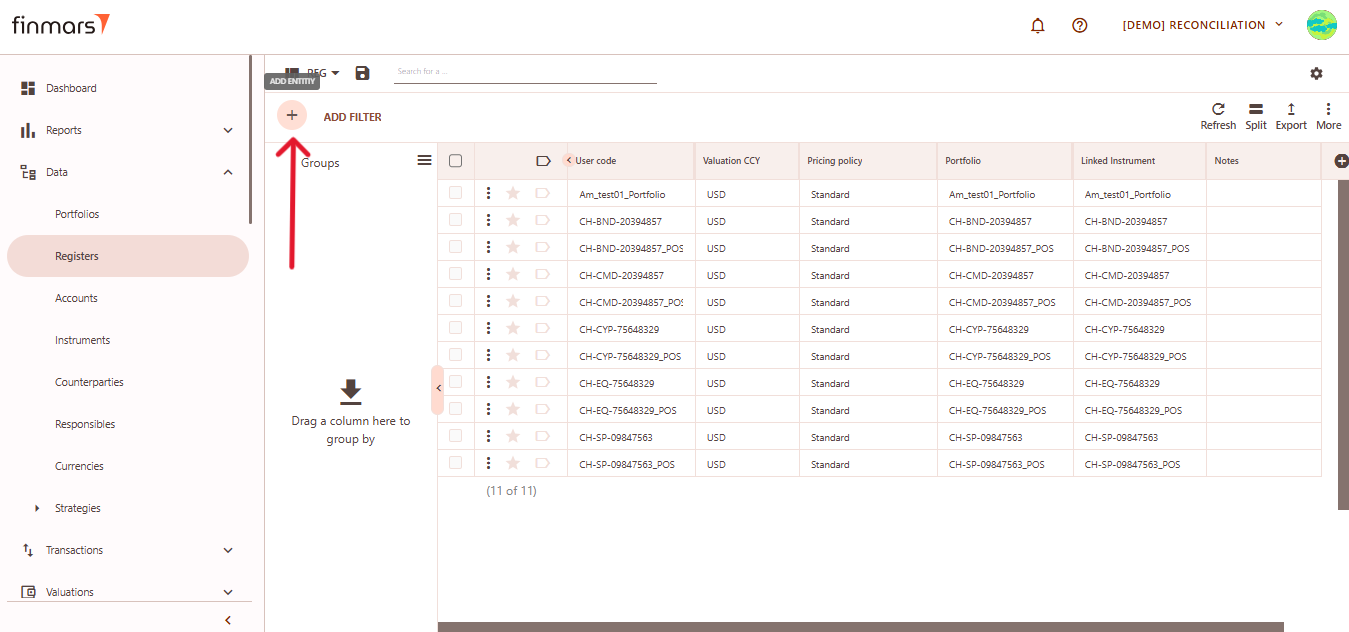
- This action opens the Add Portfolio register form.
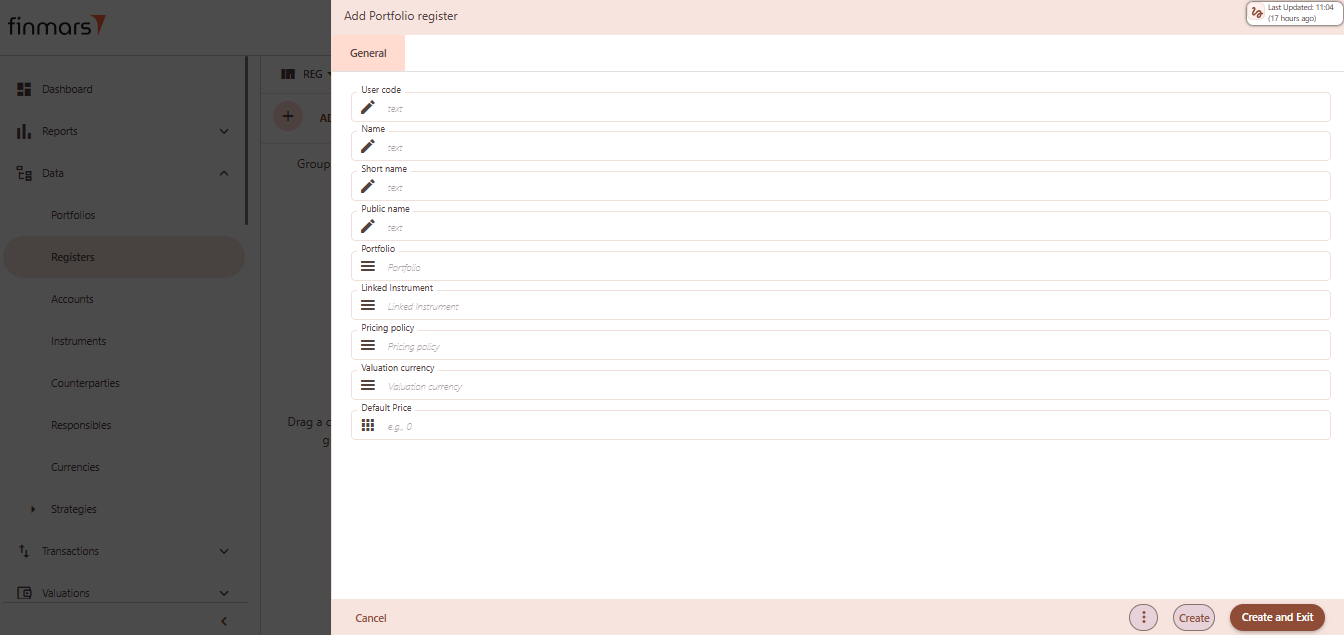
- Fill in the required fields in the creation panel:
- User code – unique identifier for the register record. Often reflects the instrument or portfolio logic (e.g.,
CH-XYZ-Portfolio_POS). - Name – descriptive name of the register, used in views and reports.
- Short name – abbreviated version of the name, useful in condensed views or exports.
- Public name – optional field for external-facing labels, if different from internal naming.
- Portfolio – select the portfolio to which this register belongs. This links the register to a specific investment structure.
- Linked Instrument – associate a financial instrument (e.g., bond, equity) to track valuation and performance.Pricing Policy – define how prices and FX rates will be sourced for this register (e.g., Standard, Rolled Master).
- Valuation Currency – the currency in which the register will be valued. Used in NAV calculations and reporting.
- Default Price – optional value to preload a fallback price when no market price is available.
- User code – unique identifier for the register record. Often reflects the instrument or portfolio logic (e.g.,
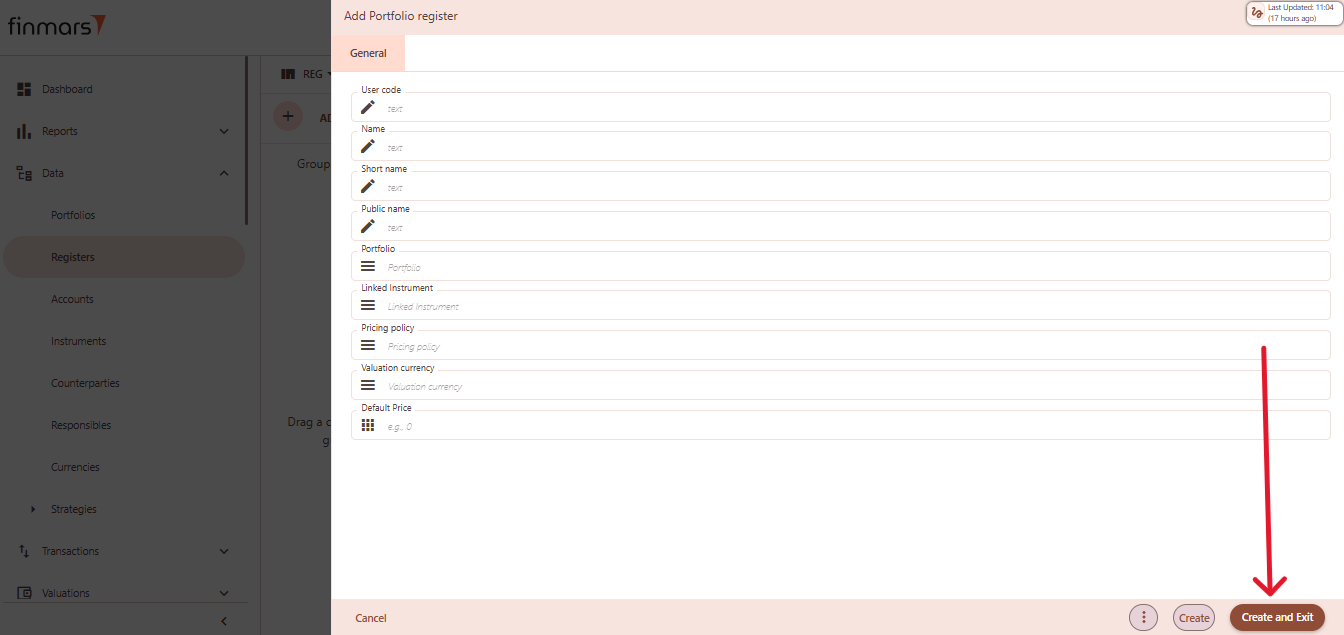
- Click “Create and Exit” to save the portfolio and return to the list view. Alternatively, use “Create” to save and continue editing.