CSS Customization (Predefined File vs. Custom CSS)
- Options:
Users can choose between:- Predefined CSS File: A ready-made file containing all custom styles.
- Custom CSS Field: An integrated code editor for directly entering CSS code.
- Step-by-Step Process:
- Identify the Required Selector or Variable:
- Open the application in your browser.
- Right-click the target element and select “Inspect Element” (or “View Code”) to open DevTools.
- Locate the relevant CSS selector or variable.
- Test Changes in DevTools:
- Modify the CSS in DevTools to preview changes in real time.
- Apply the Changes:
- For permanent updates, either upload the modified CSS file or paste the new code into the Custom CSS field.
- Verify the Result:
- Save the changes and refresh the page to ensure the new styles are applied correctly.
- Identify the Required Selector or Variable:
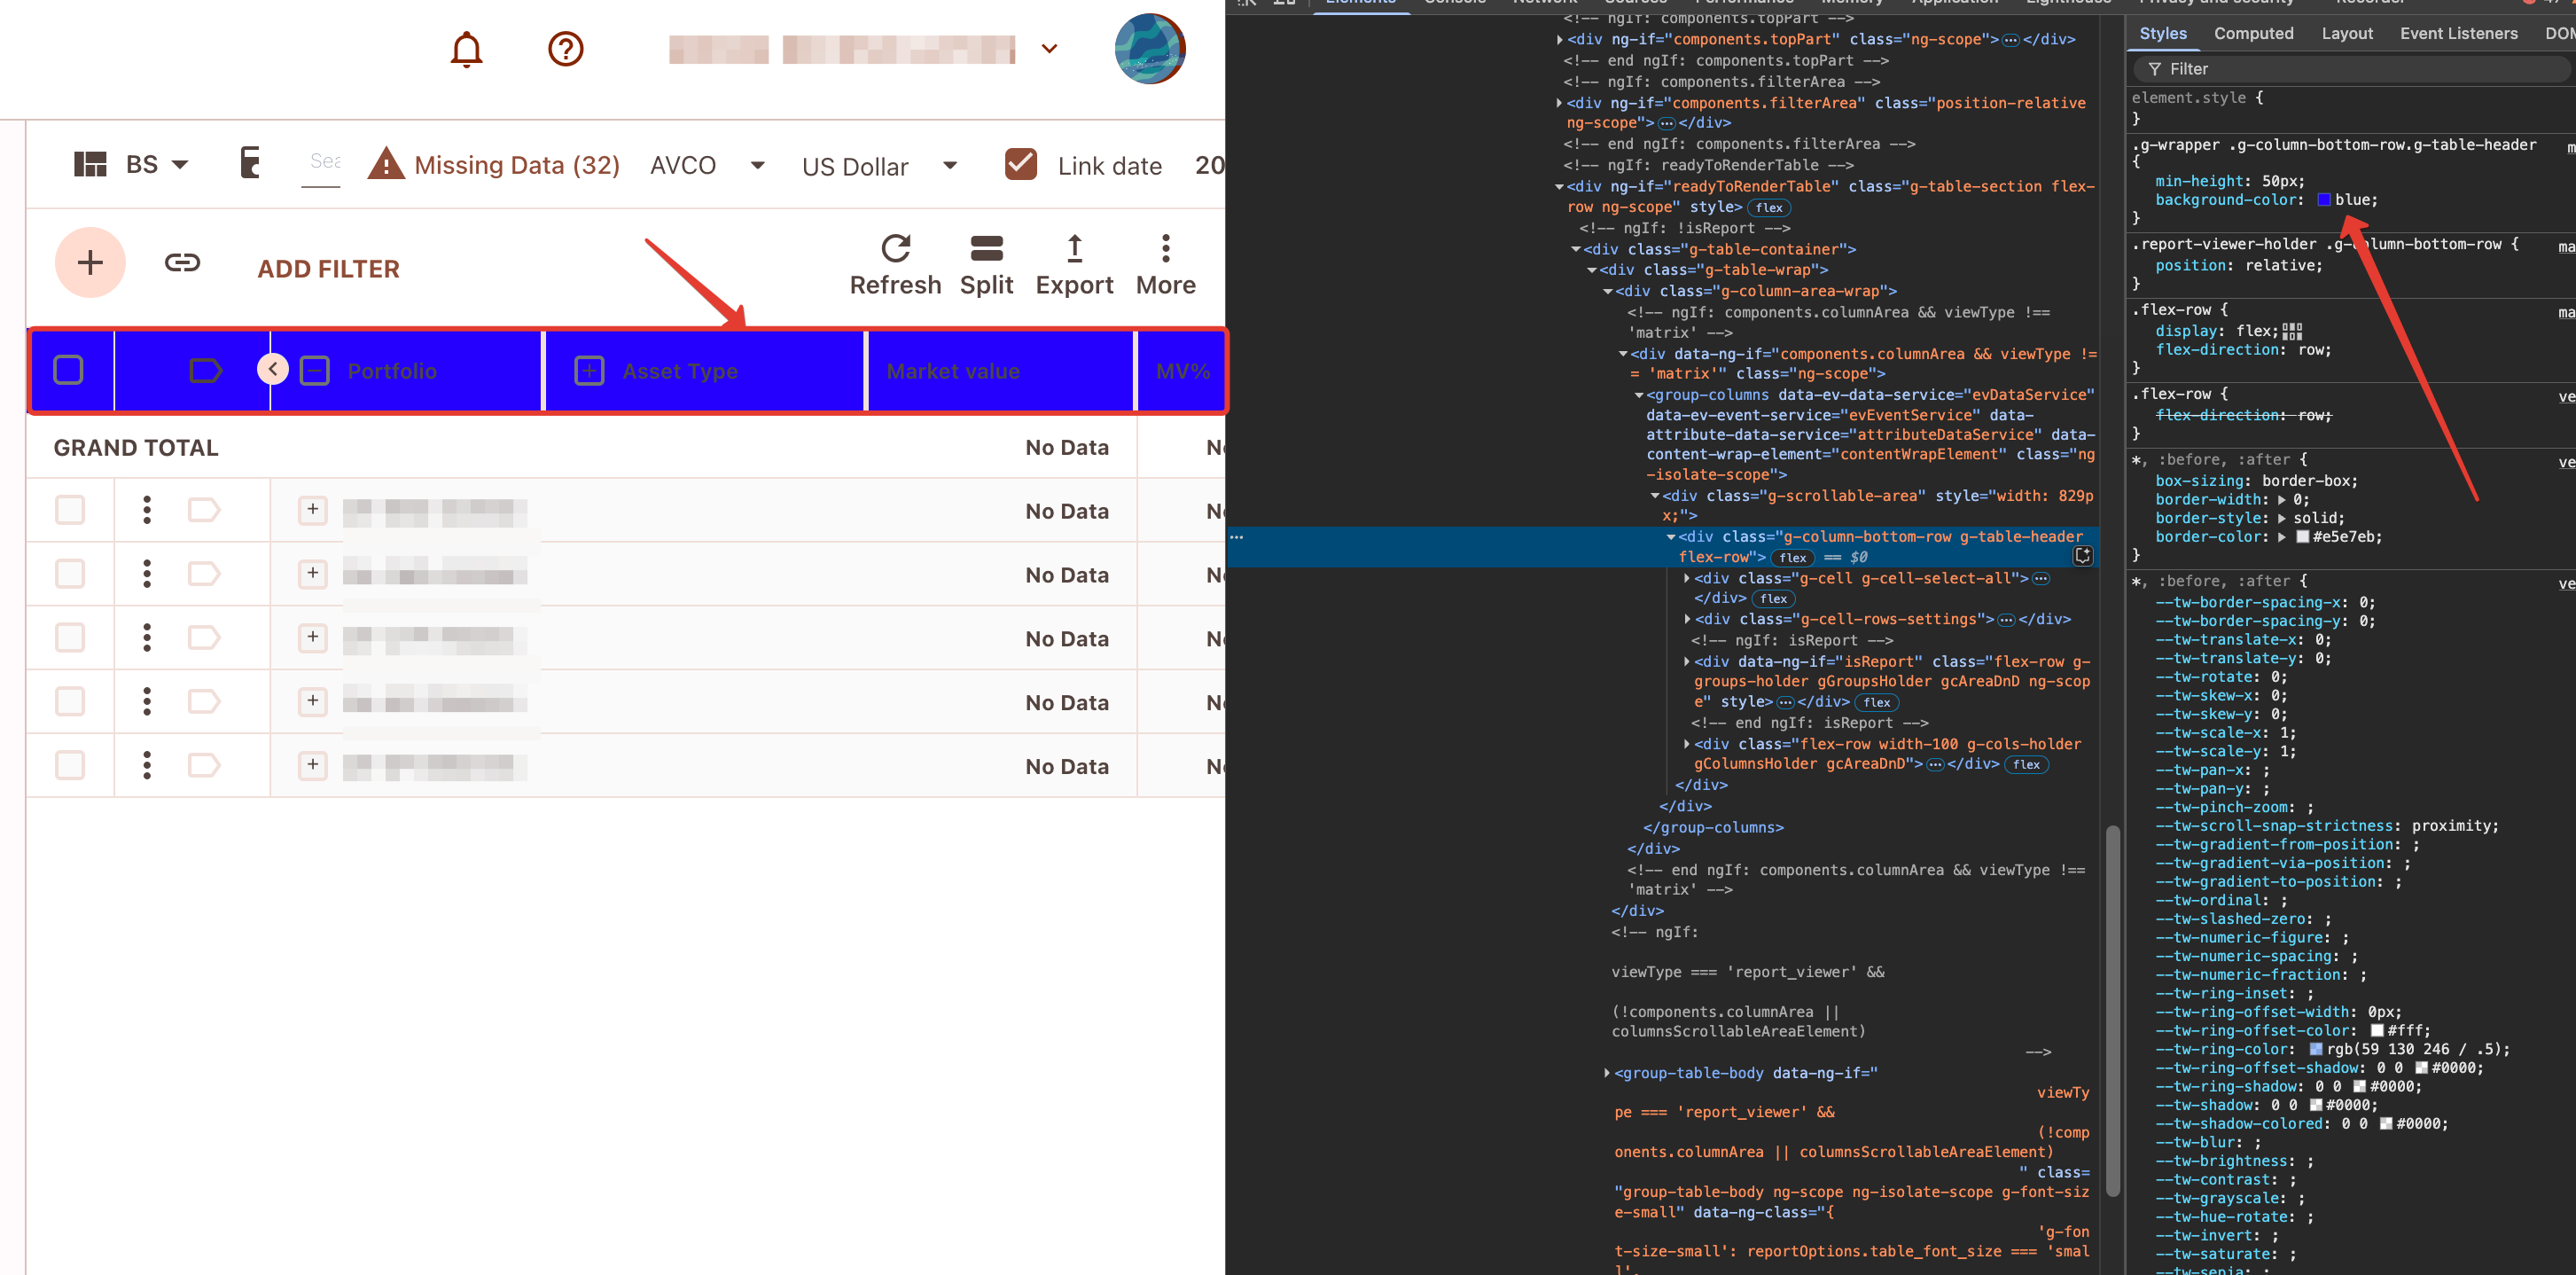
Below is an illustrated example of the CSS Customization Step-by-Step Process:
-
Objective:
In this example, we will change the color of the table header.
-
Locate the Element:
Find the target element in the element tree.
(Right-click on the target element and select "Inspect Element" (or "View Code") to open DevTools.)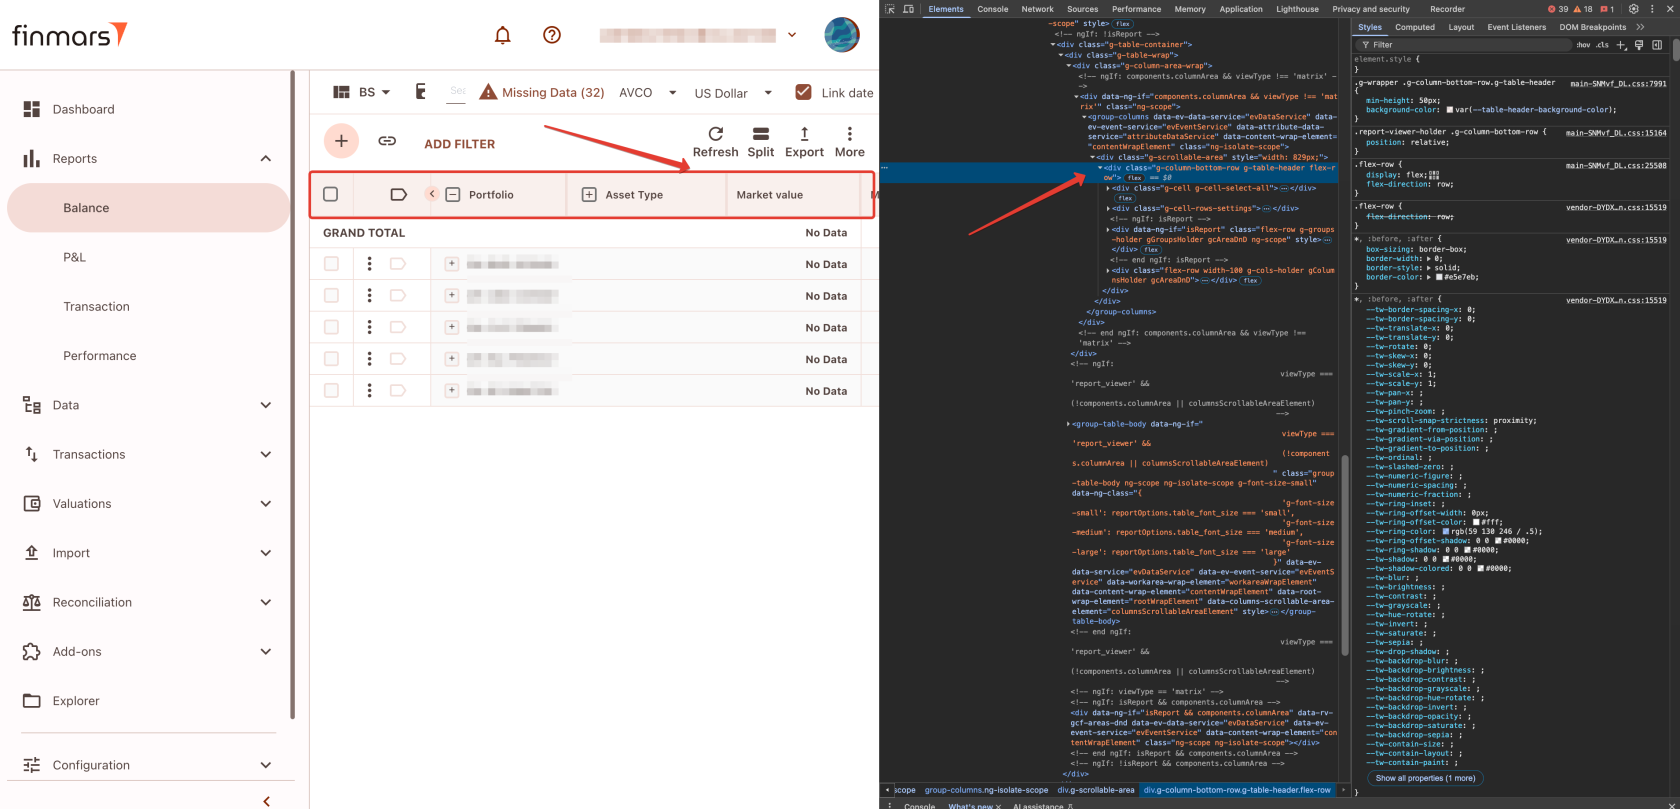
-
Identify the Style and Selector:
Look for the style that applies the current color to the element, and note the corresponding selector.
Test different colors directly in DevTools until you select the desired one.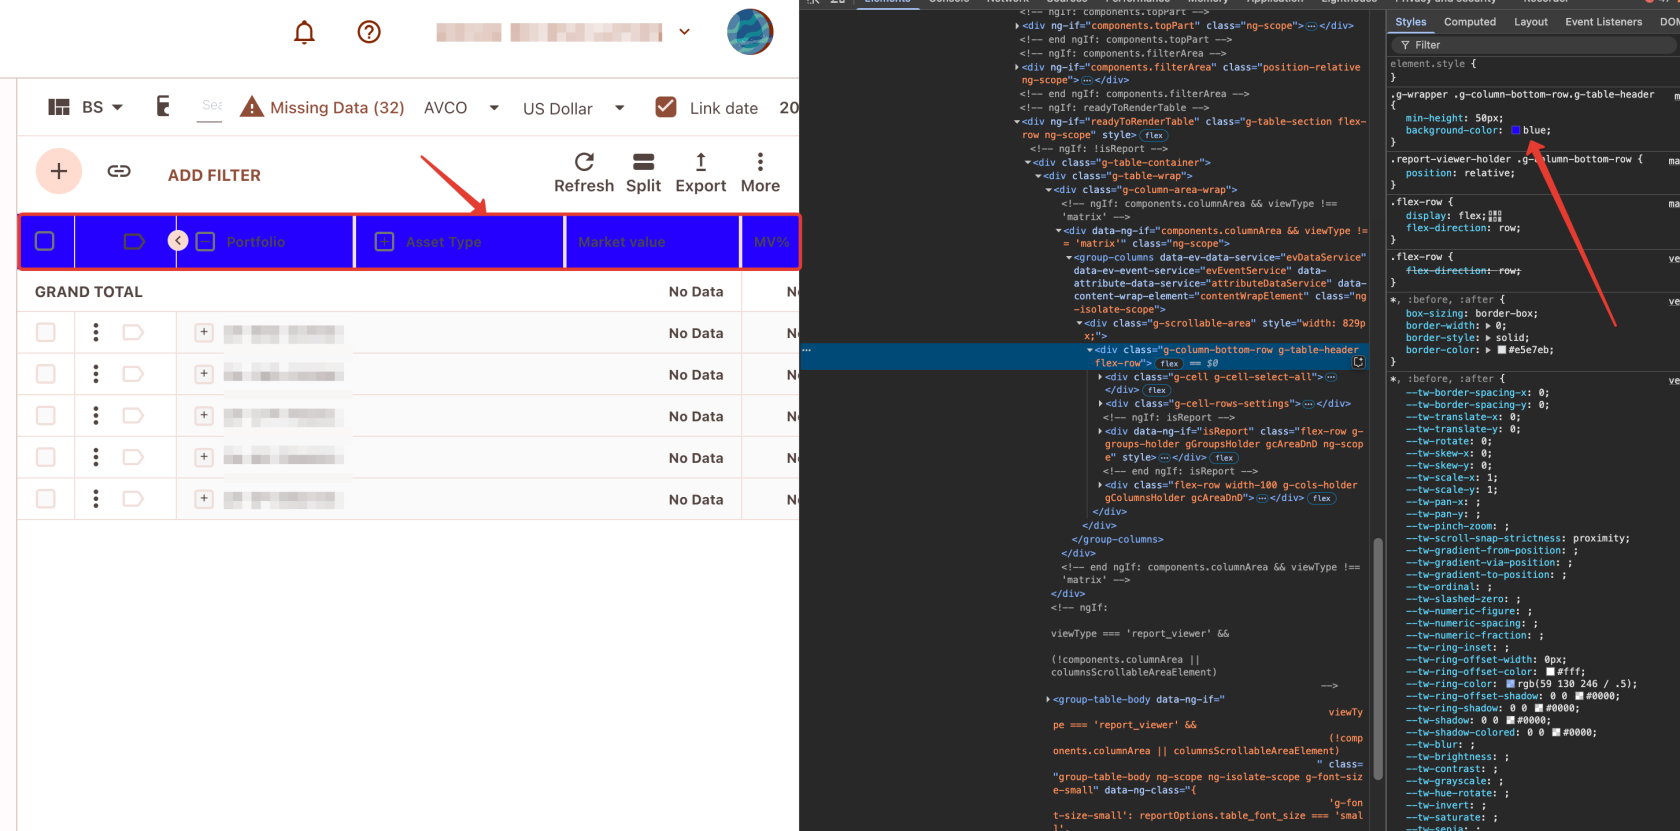
-
Apply the Changes:
Once the color is finalized, copy the selector and the new style into your CSS file or the Custom CSS field.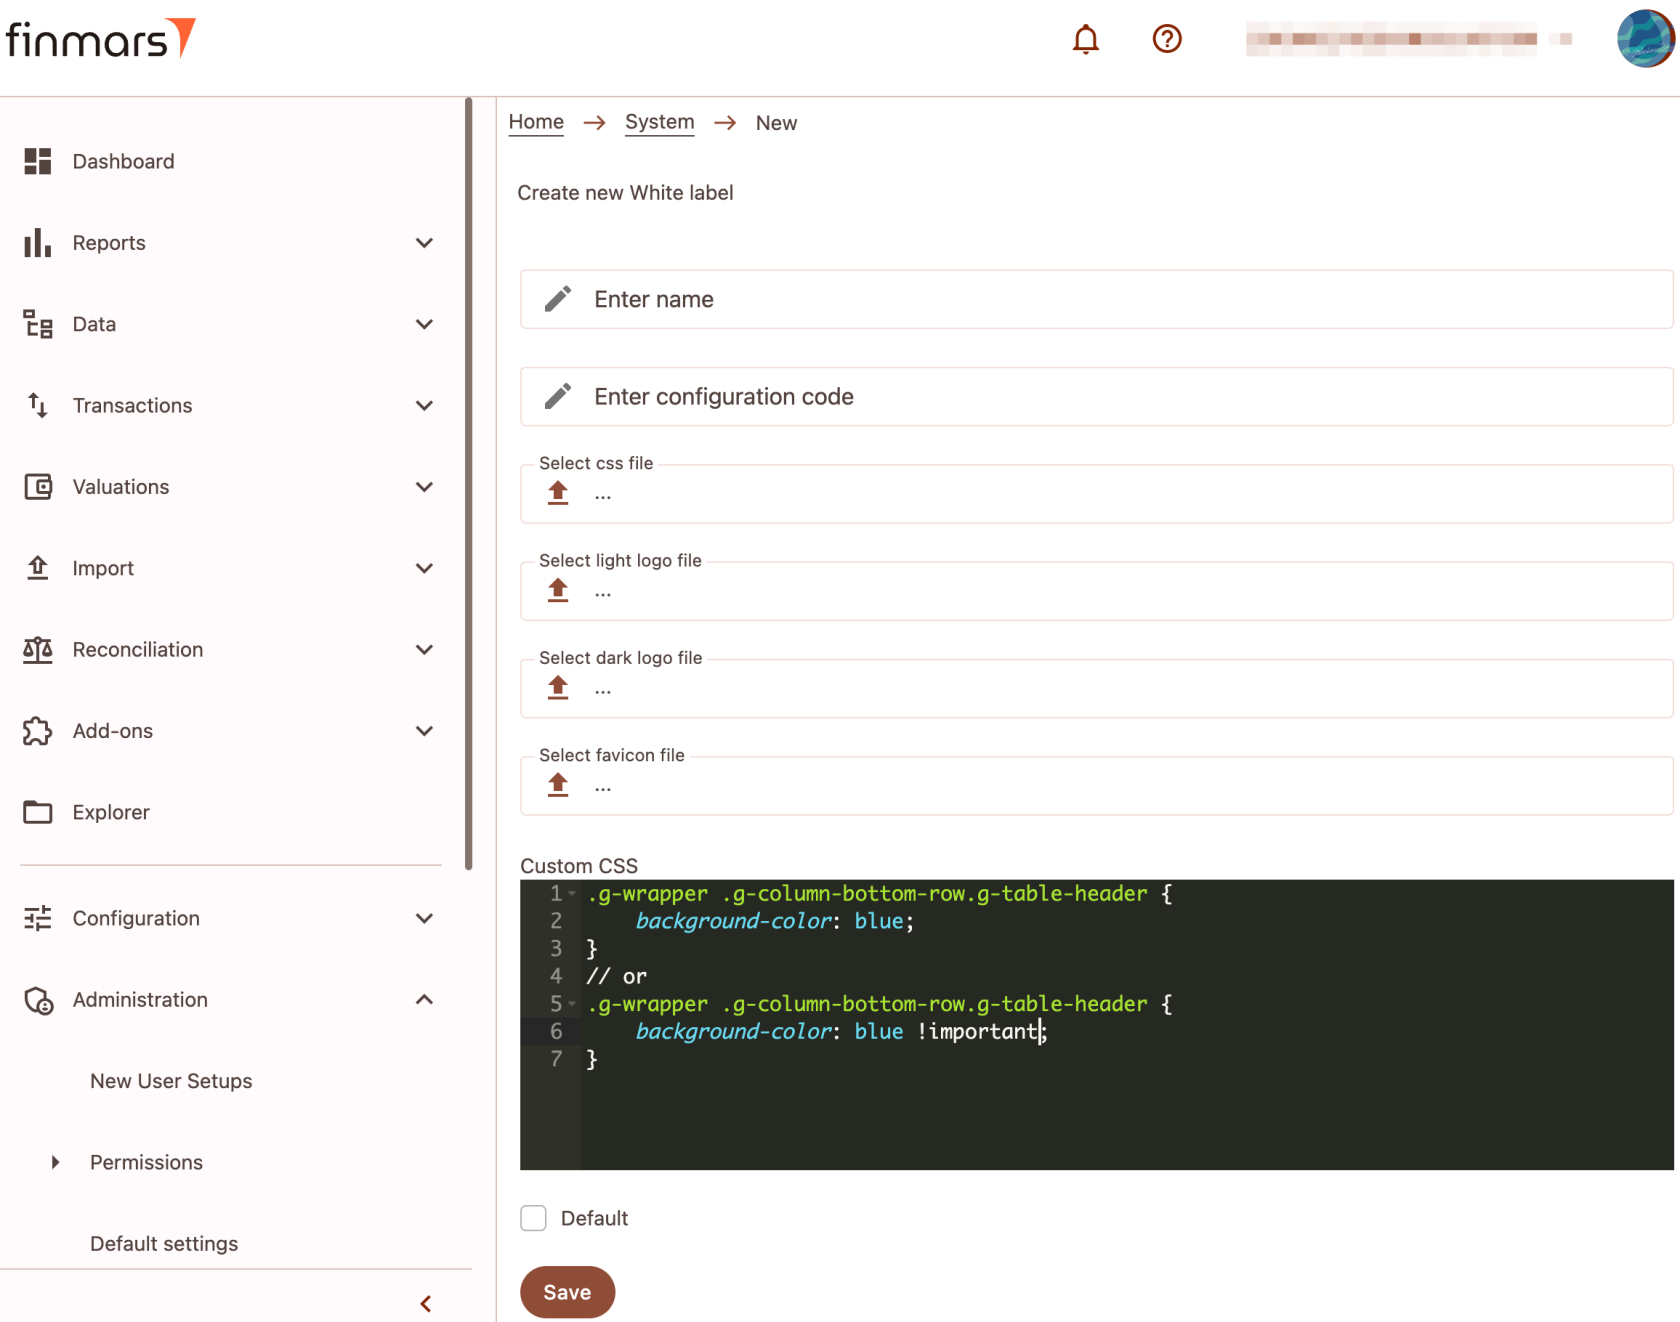
-
Enhance Specificity if Needed:
In some cases, to ensure your style takes precedence, add the!importantdeclaration to the property.