How to Push a Module/Package to the Marketplace and updating version
Prerequisites
We assume you have all prerequisites you may need, including:
- If needed: the VPN is configured to access the Finmars resources
- If needed: access to the Virtual Machine to work with the sensitive information
- Must have: registered in Finmars in the needed region environment (self-registered or registered by Finmars)
-
Must have:
passwordhavingfrompermissions set to allow continue with theadministratorActionforincreatingthenewGuide - Must have: registered in Finmars Marketplace to use credentials to push a module/package
- Must have: the module/package is already created
Pushing a Module/Package to the Marketplace and updating version
Step 1. Before pushing a new module package, ensure that the date and version are correct. If a new version needs to be deployed, first update the version number in the configuration manager and the manifest file. Additionally, update the date in the manifest file.
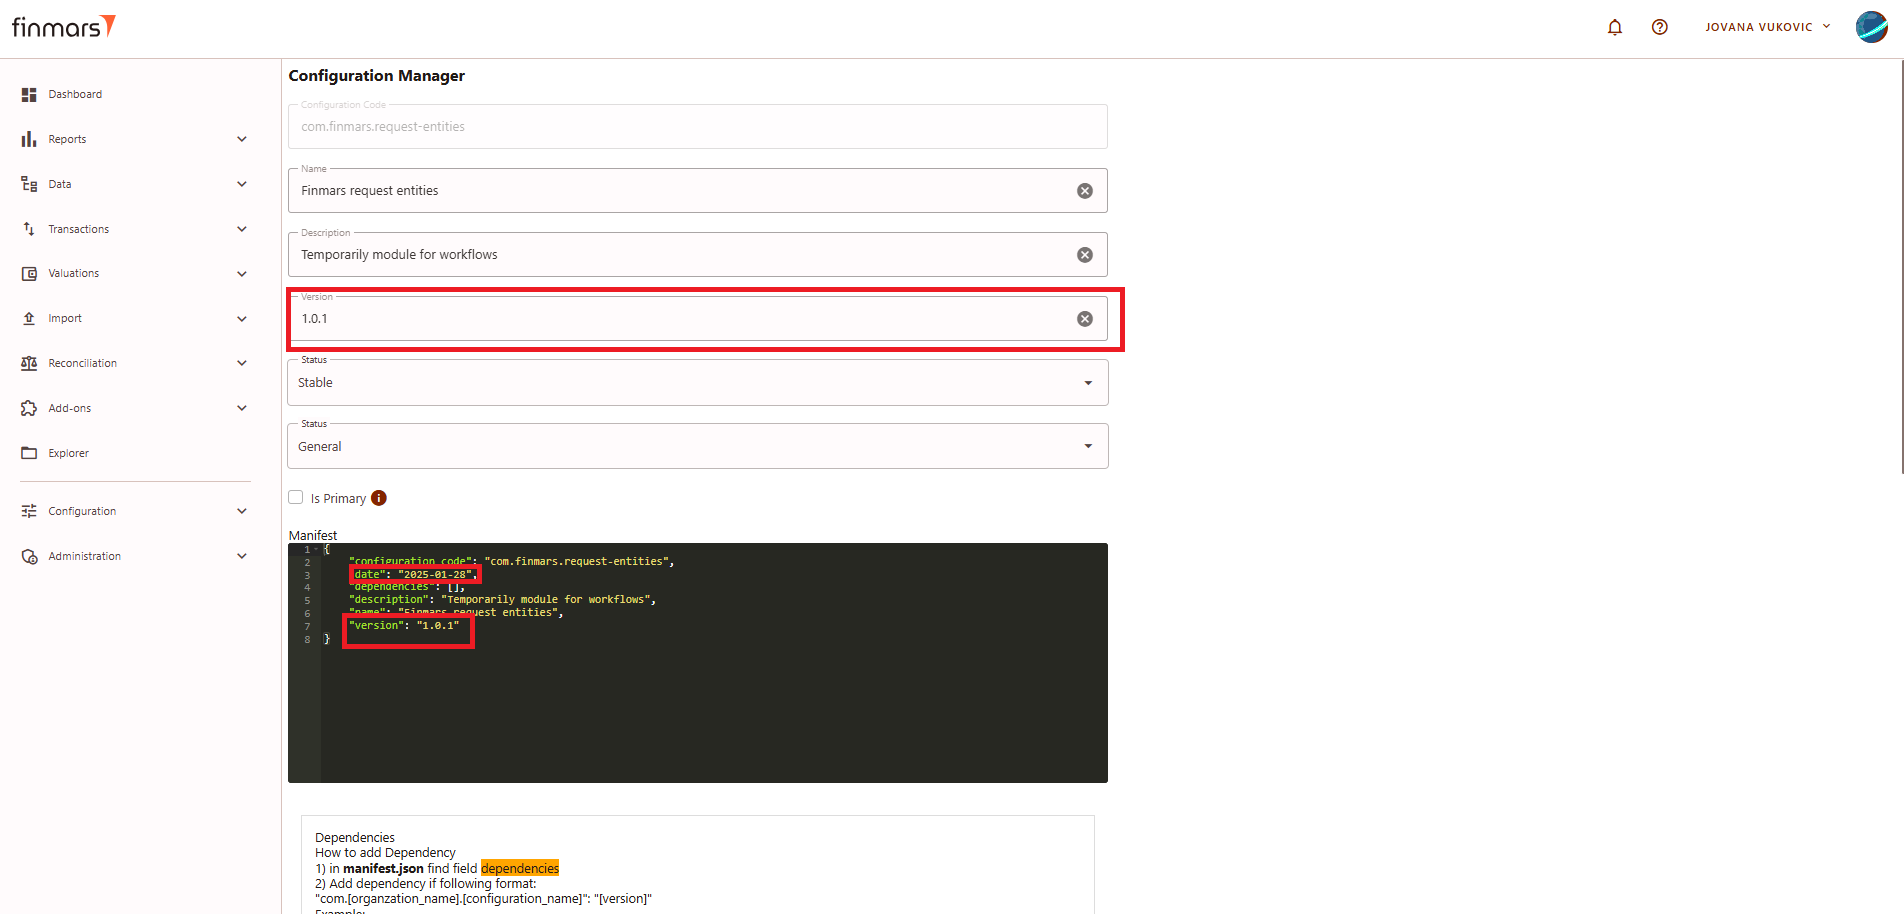
Picture 1. Date and version of the released package/module
Step 2. If only an update is required, simply click the 'UPDATE' button.
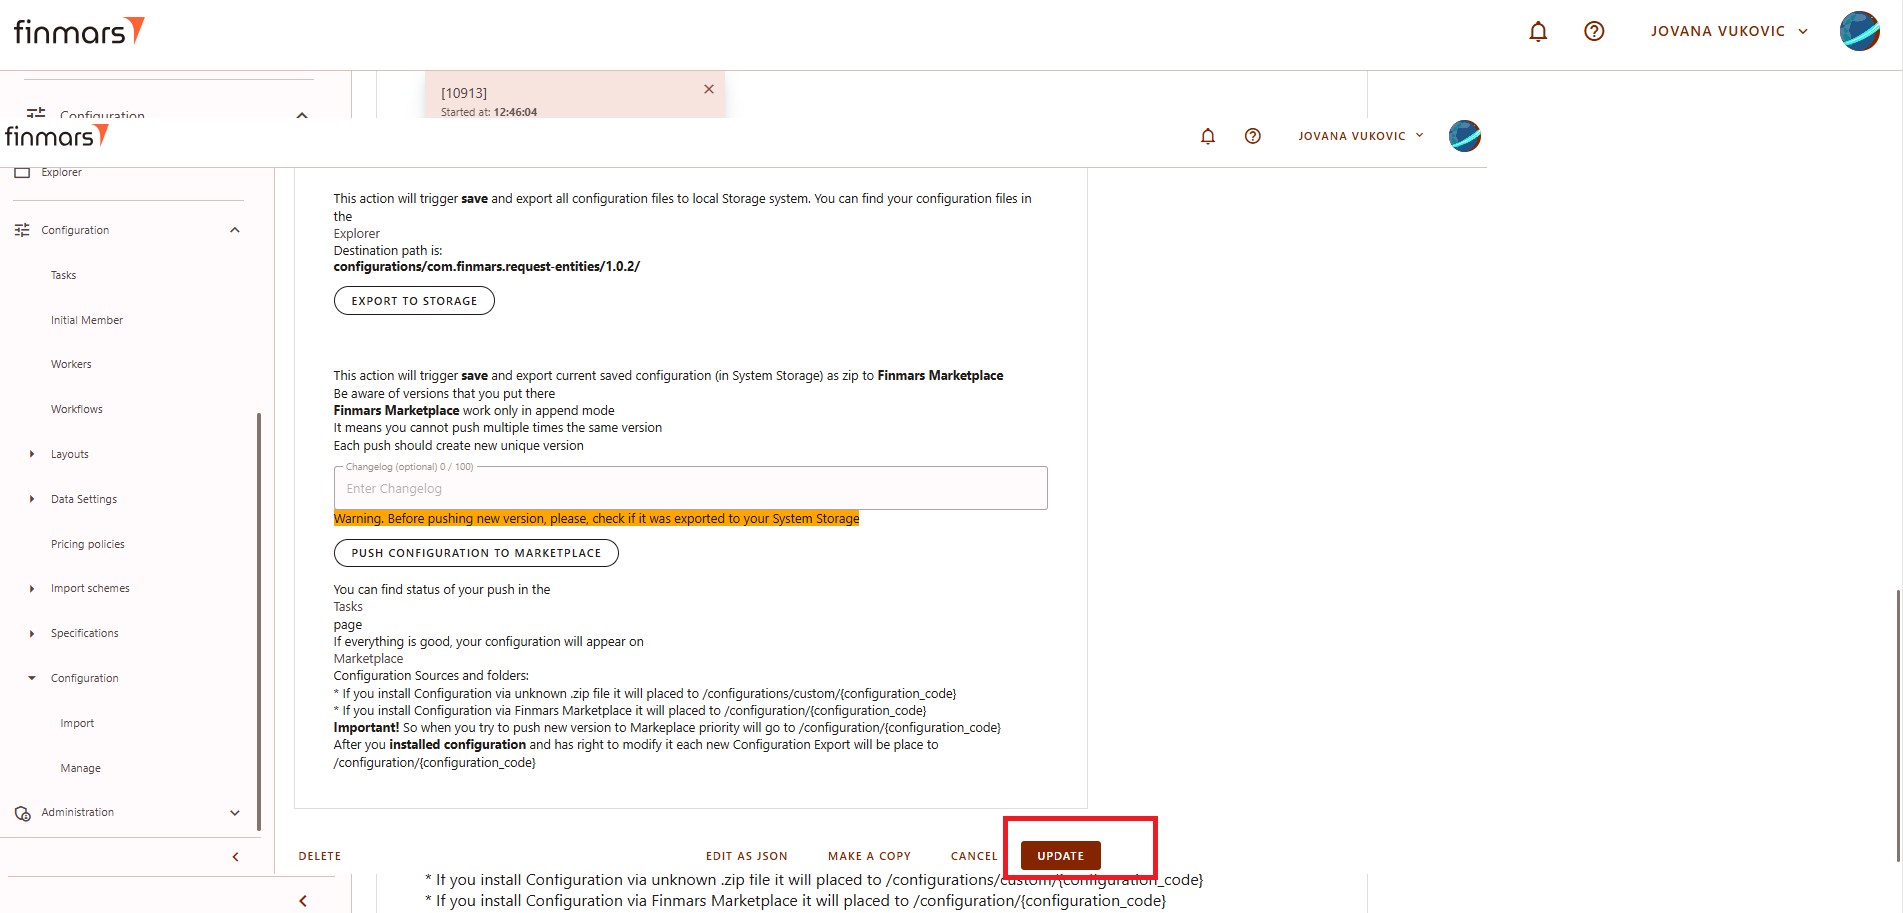
Picture 2. Updating the version of the released package/module
Step 3:1: After creatingcreating/modified the module/packagepackage, ingo to the Configuration Manage,Manage page, click on the card for the module/package. It has been createdcreated/modified locally, but now it needs to be pushed to the marketplace.
* The example in the pictures shows a module, but the process is the same for a package.
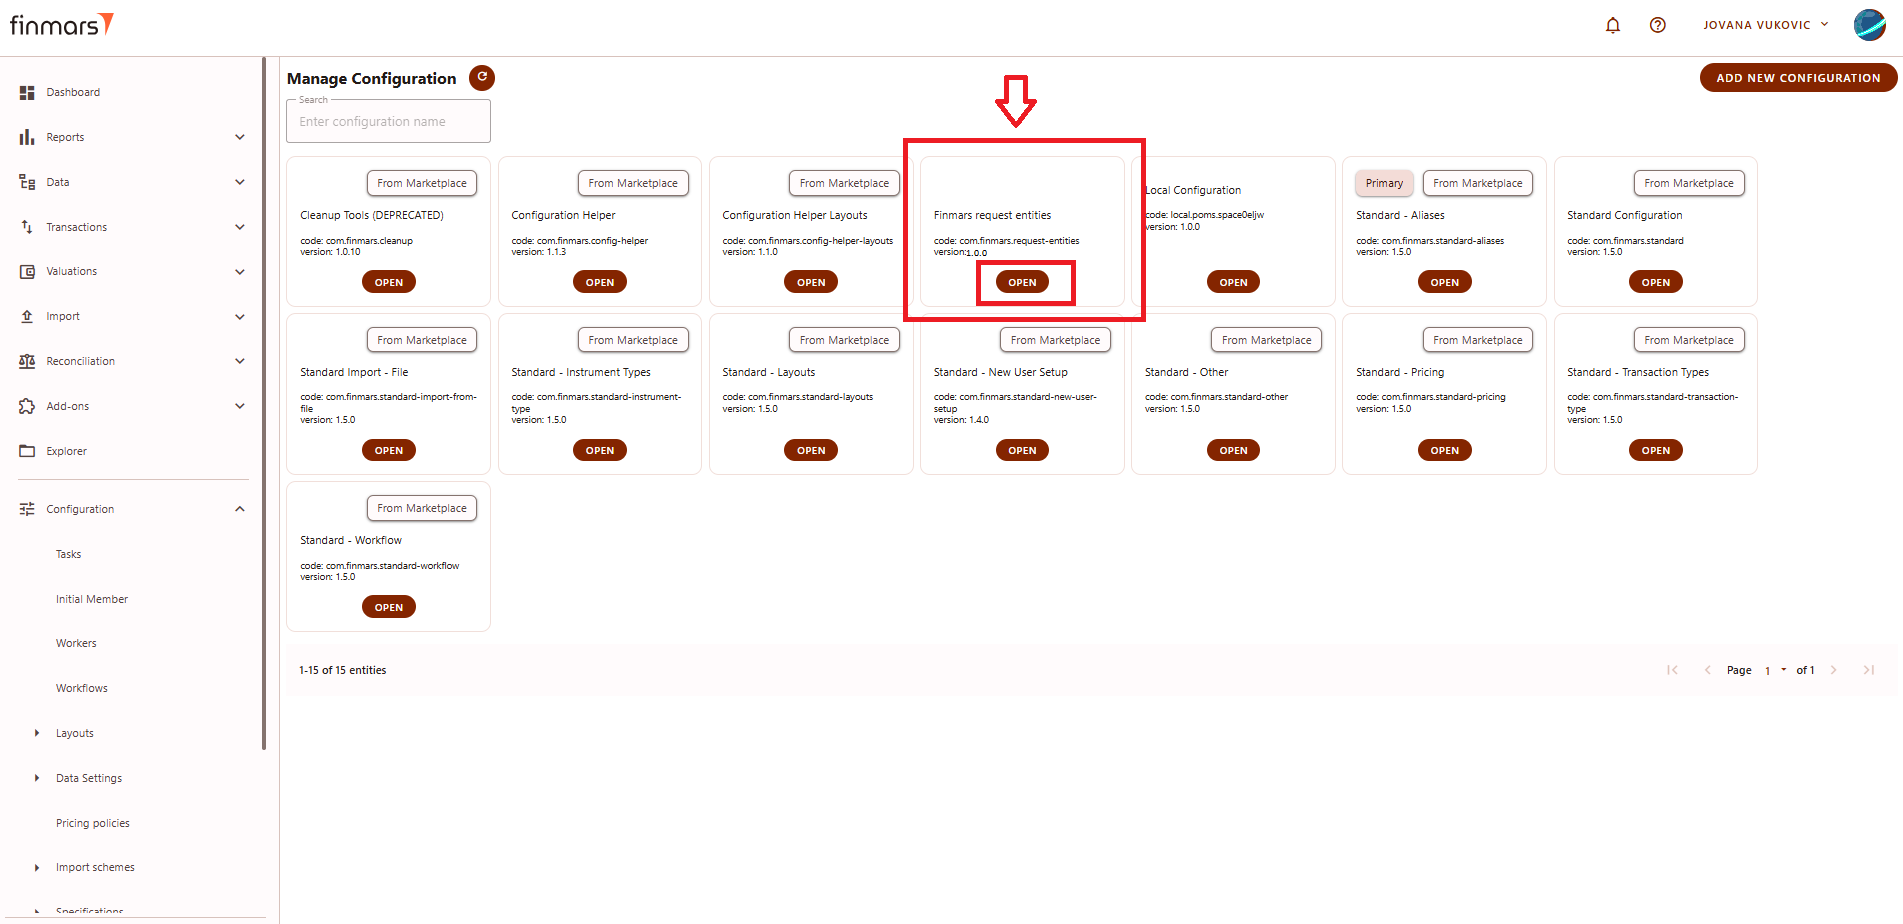
Picture 3.1. Marketplace with new module
Step 4:2. Before pushing Creatinga new module/package, ensure that the moduledate alsoand generatesversion are correct. Usually a new version is needed, so increment the version number in the configuration manager and the manifest JSON file. The file mustso they will be copied and sent to an administrator with Admin rights to the marketplace to add the configuration. This step is important; without it, the module/package will not be added to the marketplace. You will receive from the administrator password that you need to save it on your local machine.same.
Picture 4.2. ManifestDate JSONand file,version of the released package/module
Step 5.3. Select appropriate Status for the configuration's version:
- Stable - the latest version of stable releases are installed by default from the Marketplace
- Release Candidate - this version can be installed manually from the Marketplace
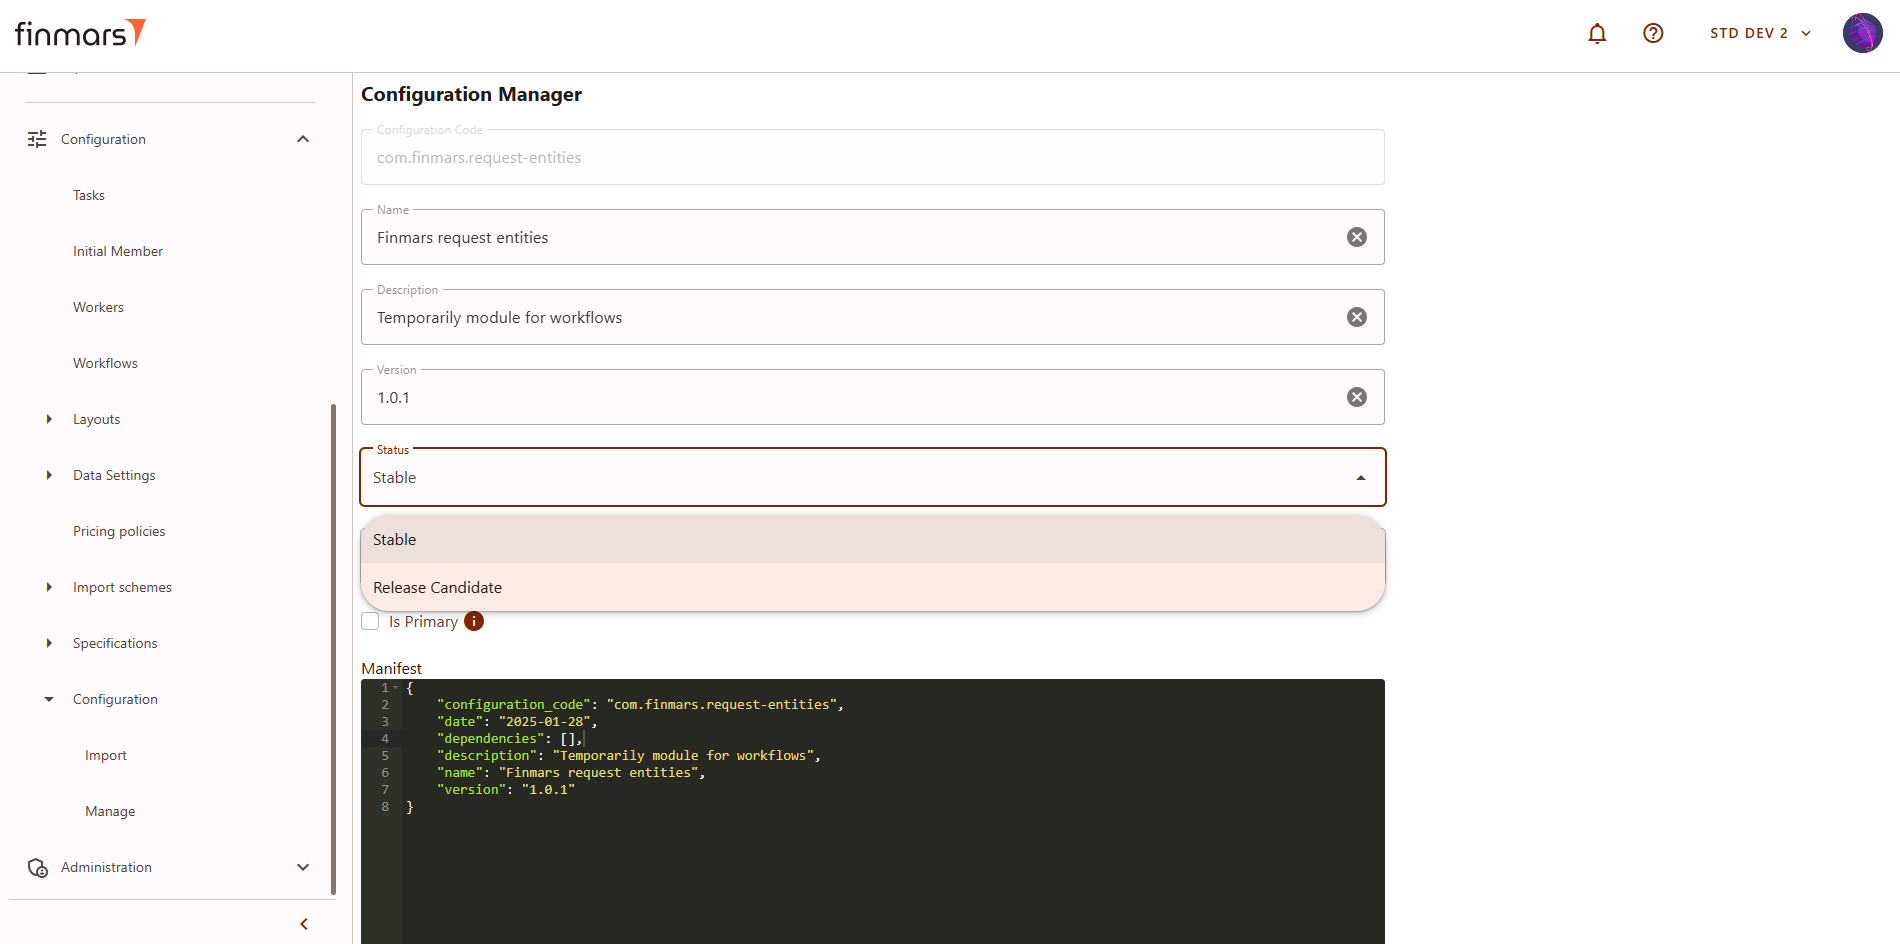
Picture 3. Selecting Status
Step 4. When creating a package, ensure that all required dependencies are included.included in the Manifest JSON. Refer to the example below.
{
    "actions": [
        {
            "workflow": "com.finmars.standard-workflow:init"
        }
    ],
    "configuration_code": "com.finmars.standard",
    "date": "2025-02-08",
    "dependencies": [
        {
            "channel": "stable",
            "configuration_code": "com.finmars.standard-transaction-type",
            "version": "1.6.1"
        },
        ...
        {
            "channel": "stable",
            "configuration_code": "com.finmars.standard-iam",
            "version": "1.0.2"
        }
    ],
    "description": "Package for Standard configuration",
    "name": "Standard - Configuration",
    "primary_module": "com.finmars.standard-aliases",
    "version": "1.6.4"
}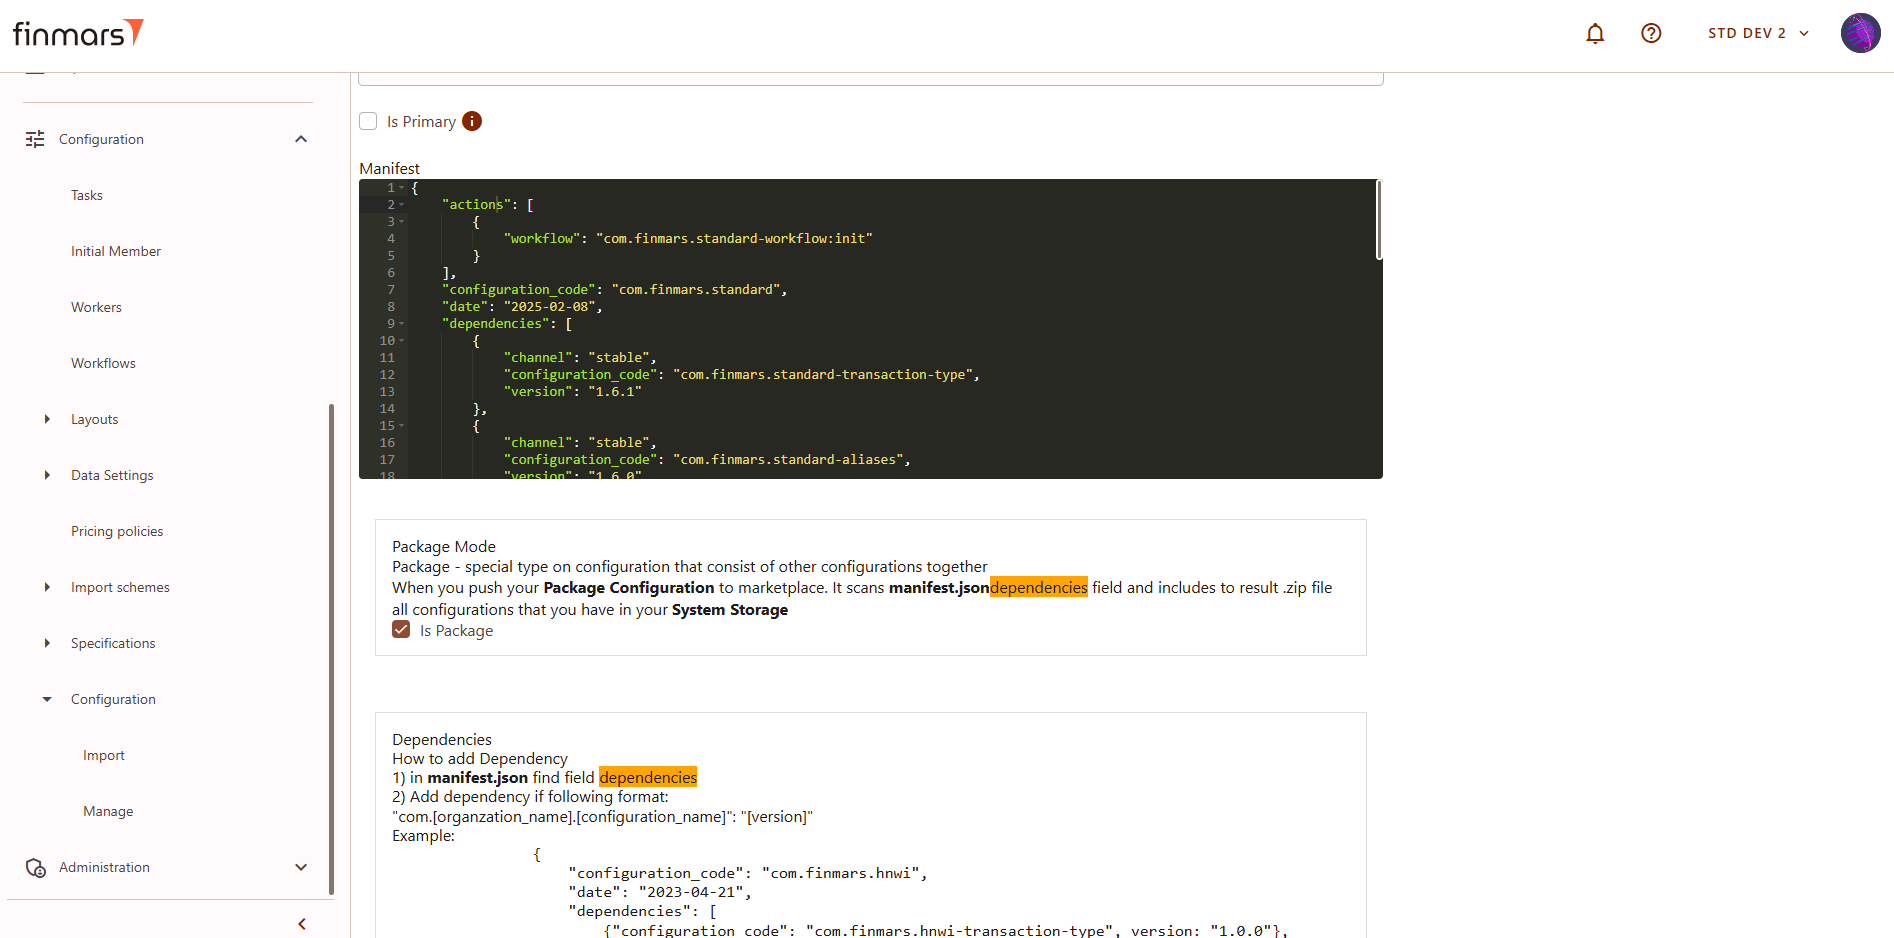
Picture 5.4. Adding dependencies in case of the package creating
Step 5: Click the 'UPDATE' button to apply changes to the Manifest for further Export to Storage and Push.
Picture 5. Updating the version of the released package/module
Step 6: After receivingupdating, open the passwordconfiguration fromagain the administrator,and export the configuration to storage. Click on the button "Export to storage" This action will save and export all configuration files to the local system storage.
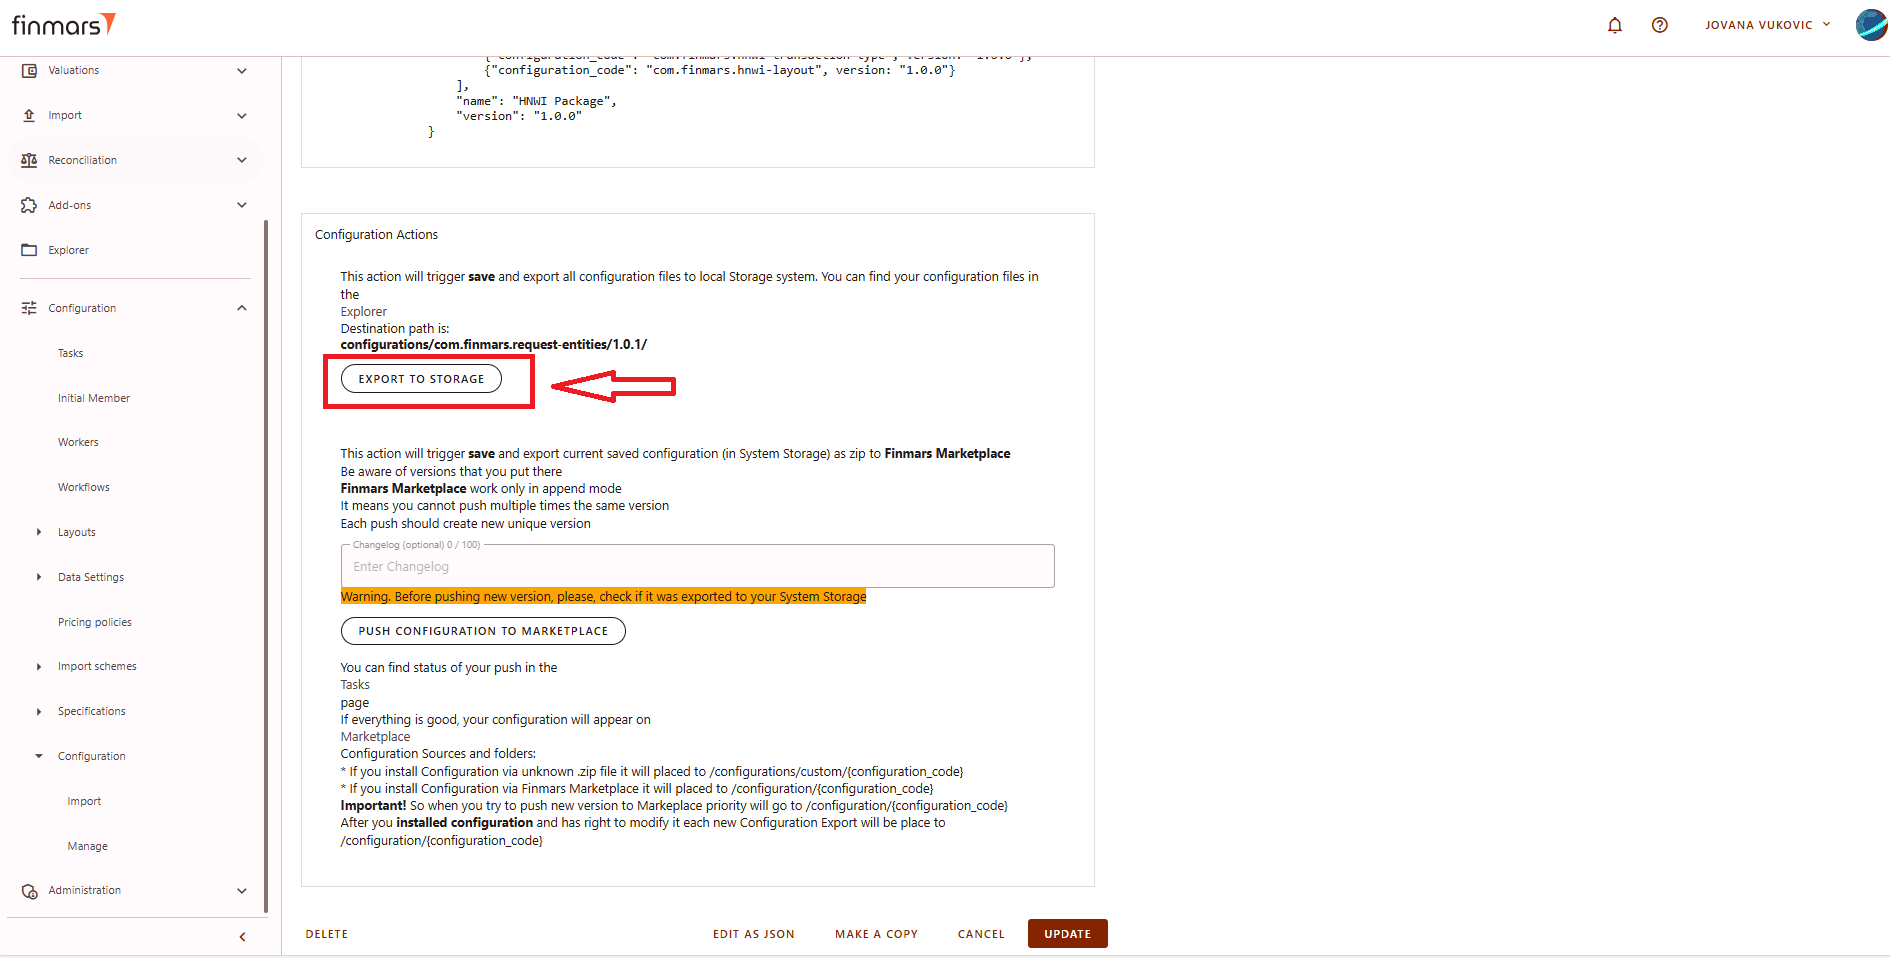
Picture 6. Export to storage
Step 7. Clicking the button will initiate export to storage.
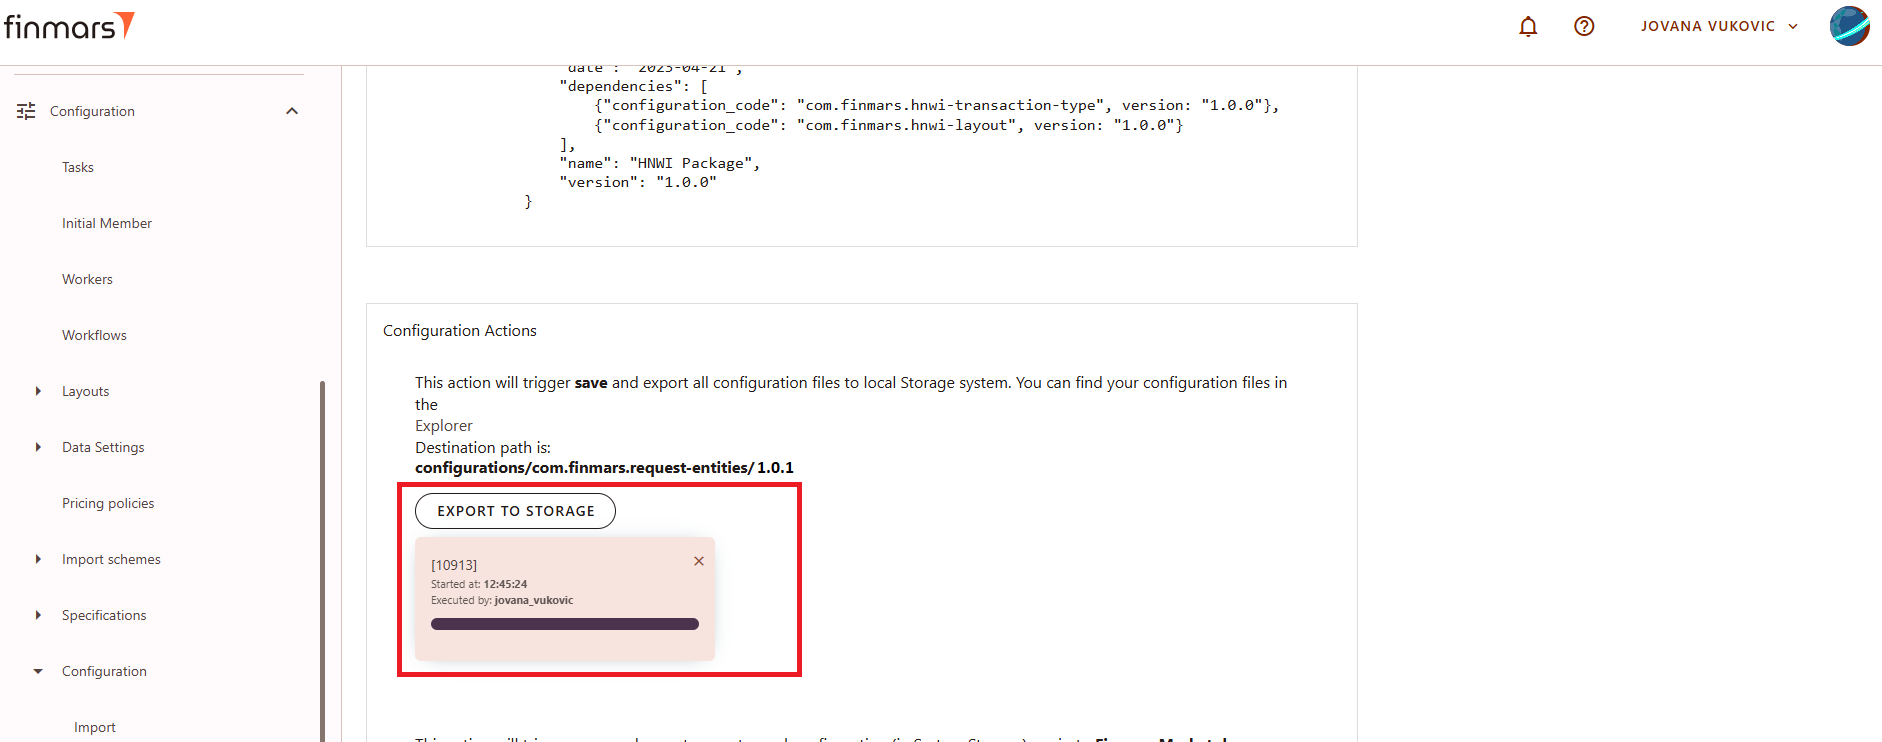
Picture 7. Exporting to storage
Step 8. Wait until the task status shows "Task Finished" and manually verify that the export was completed successfully to ensure everything is in order.
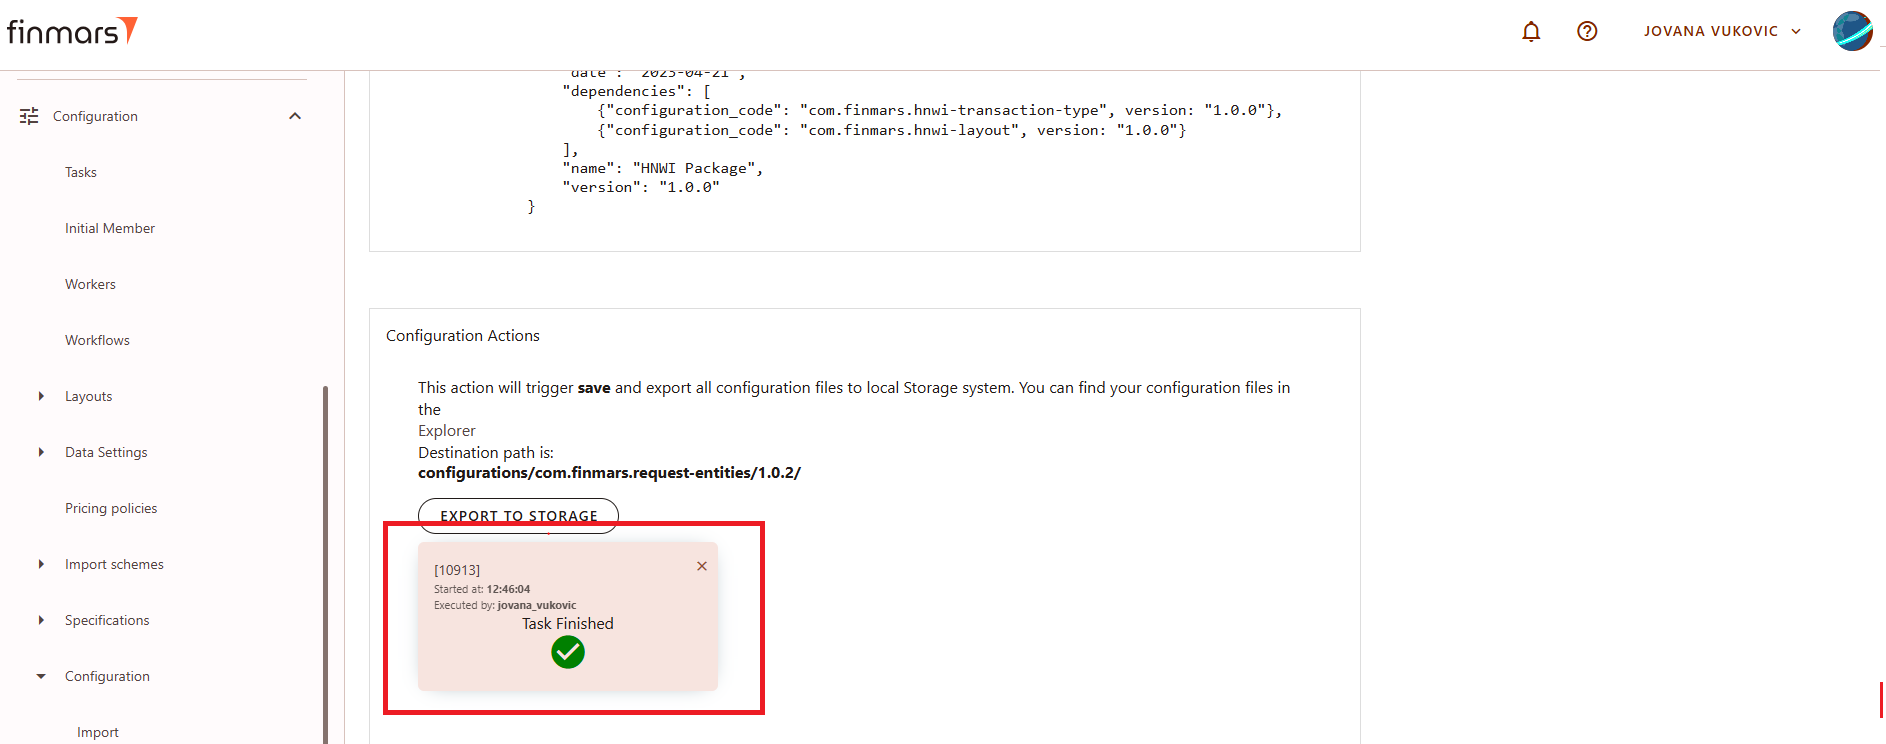
Picture 8. Successful export to storage
Step 9.9: Enter Changelog
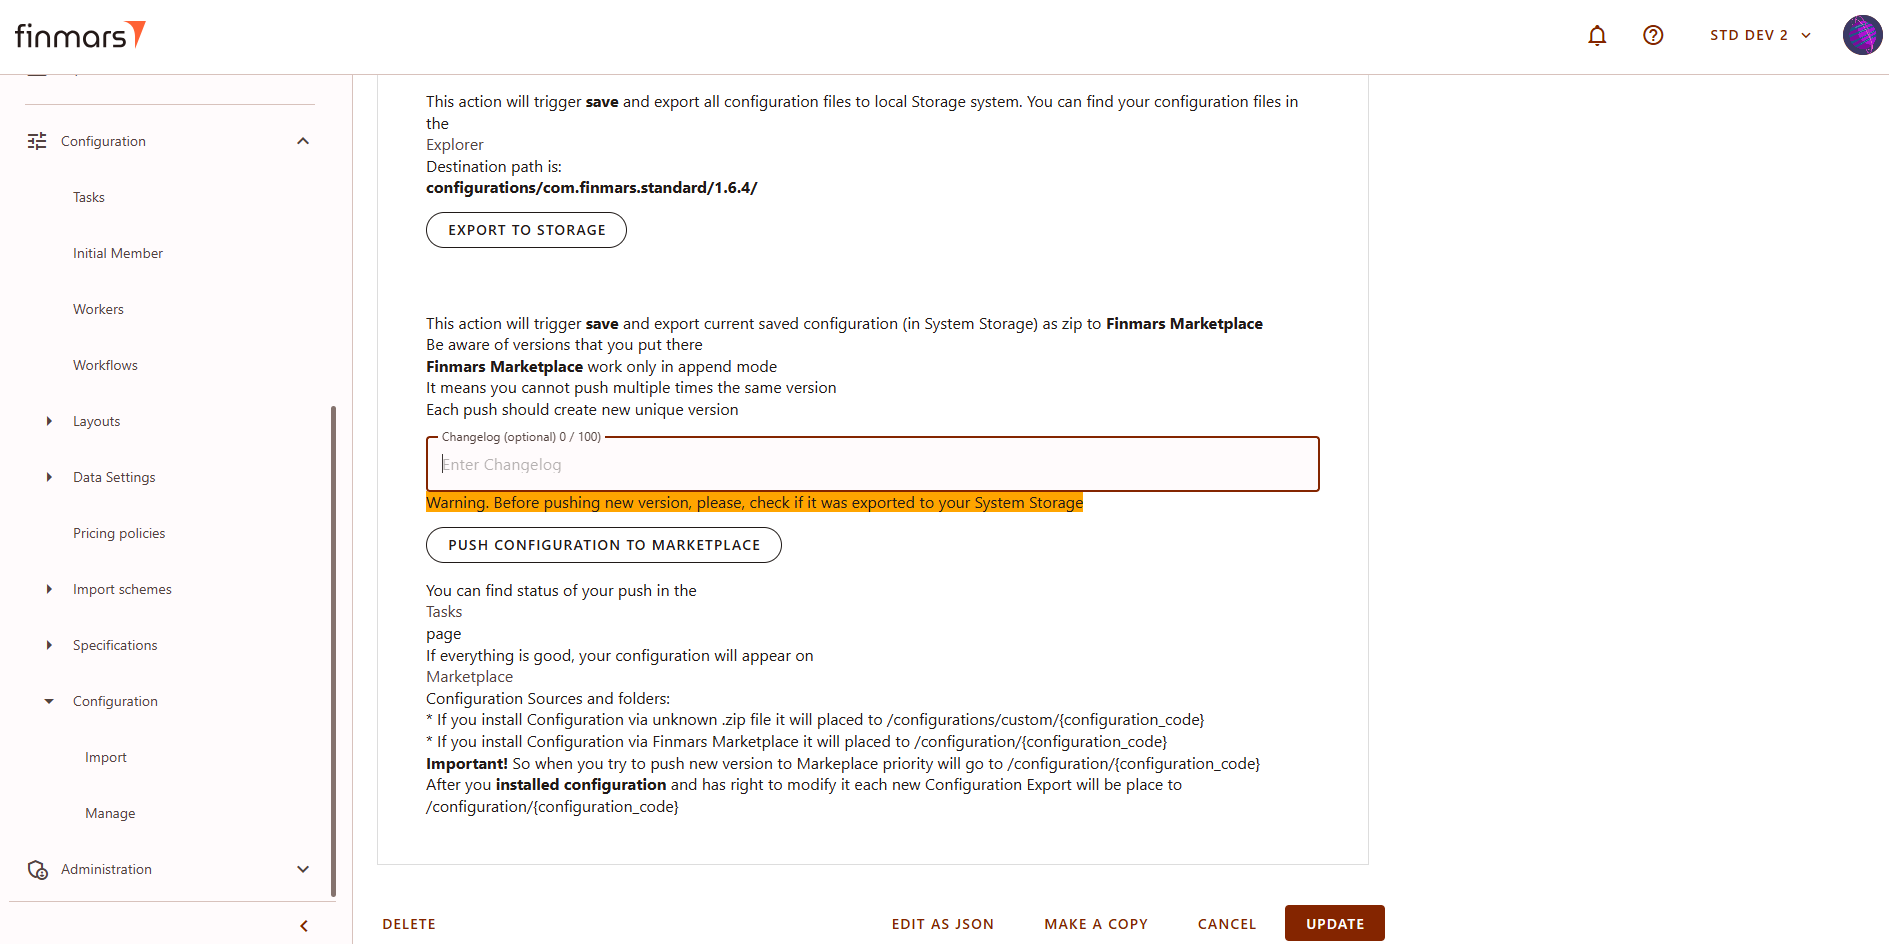
Step 10: Once the files have been successfully exported, enter the username and password provided by the administrator, then click "OK."
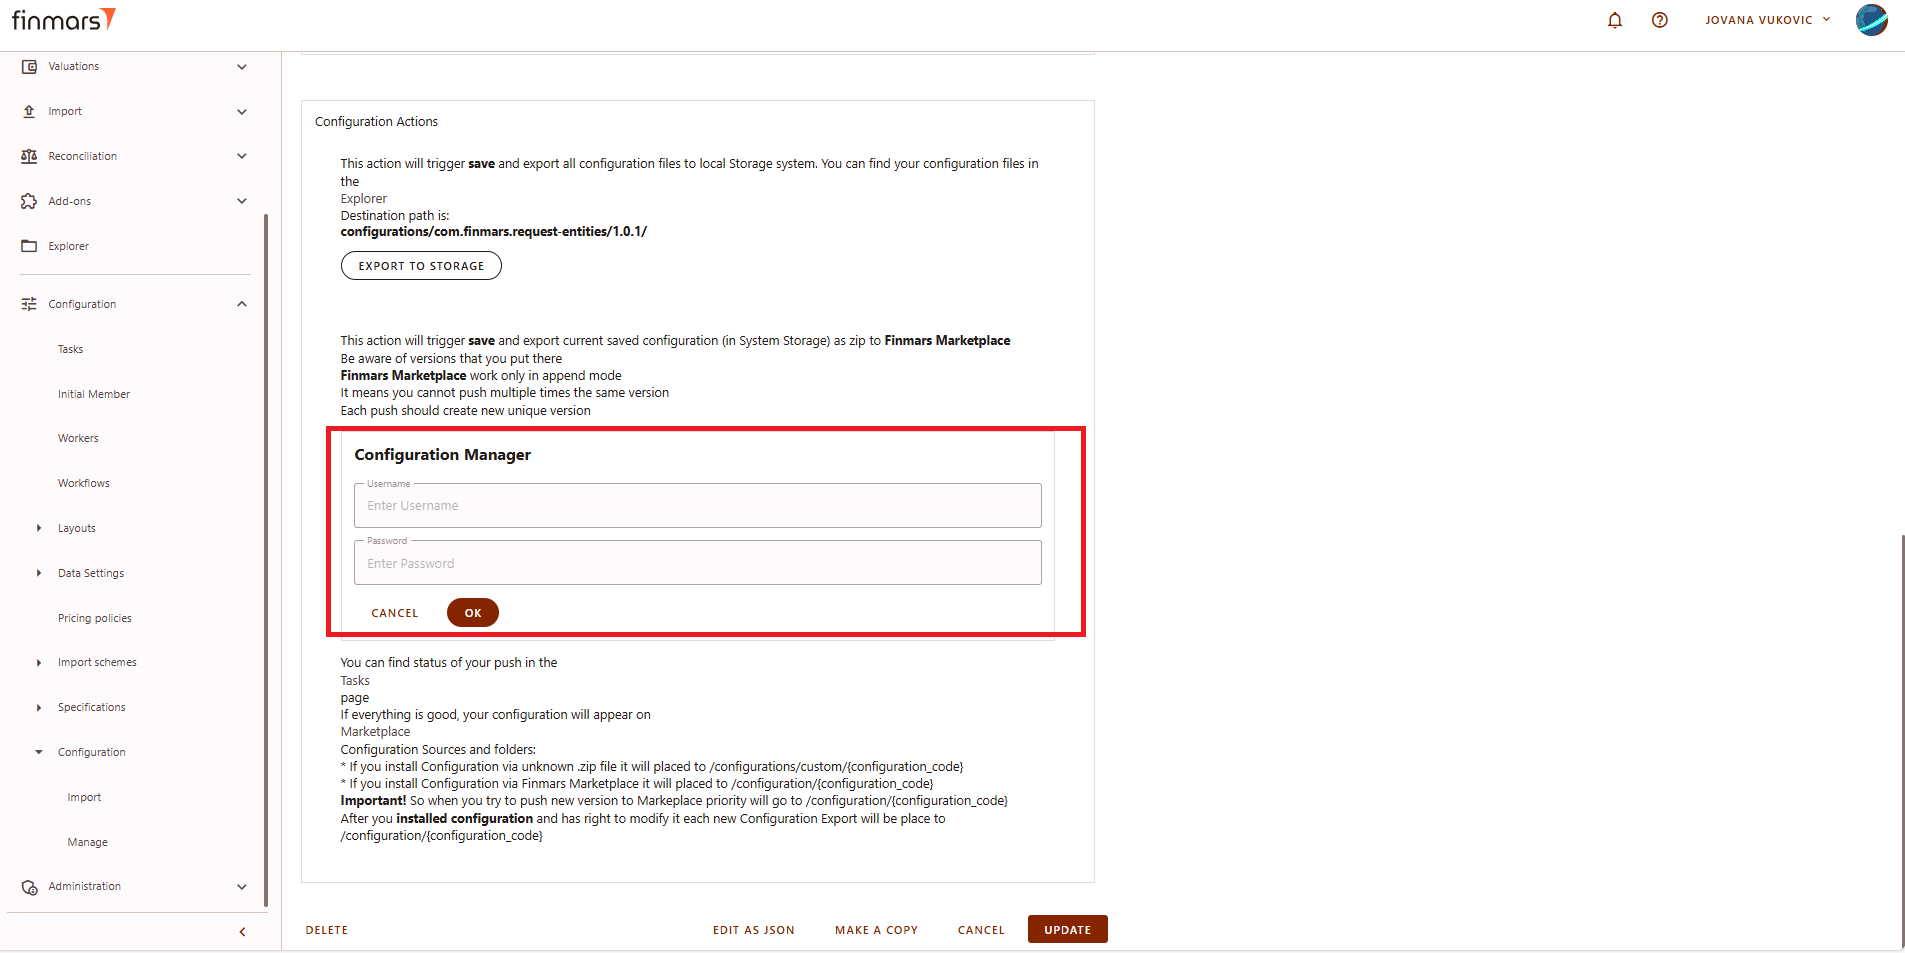
Picture 9. Pushing configuration to the marketplace
Step 1011. Wait and verify until the task status shows "Task finished."
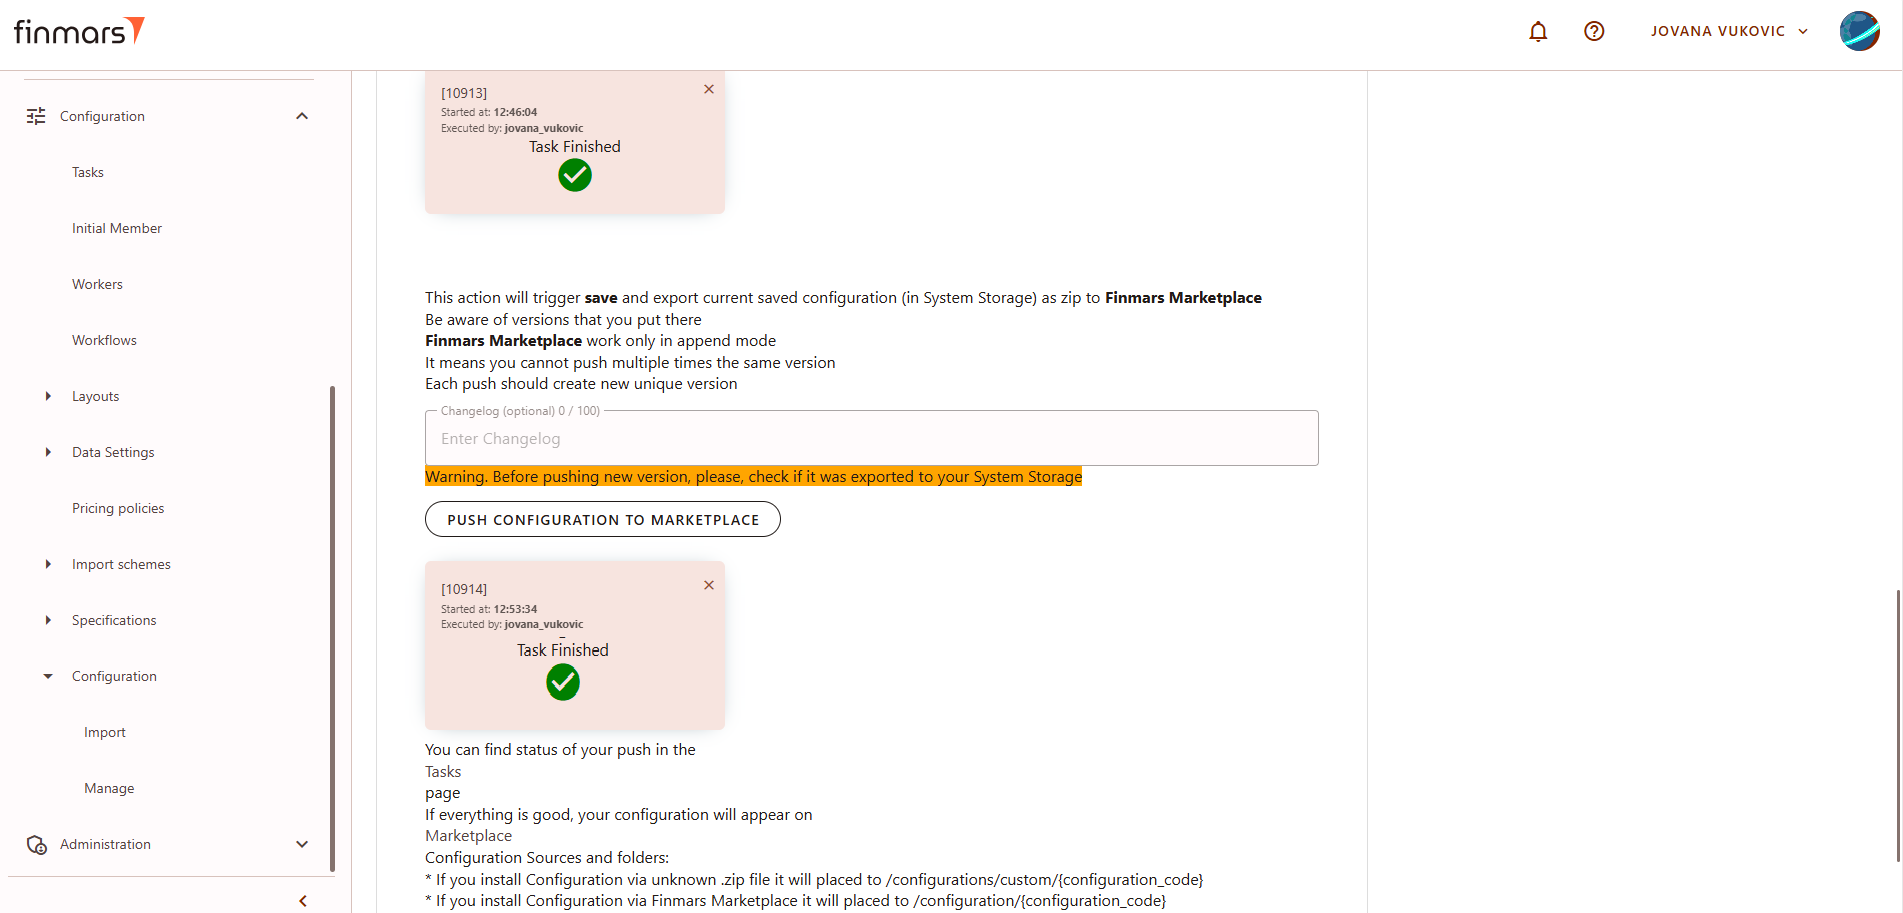
Picture 10. Successful pushing configuration to the marketplace