How to Import File in PMS Core and PMS Plus
Prerequisites
We assume you have all prerequisites you may need, including:
Import File in PMS Core and PMS Plus
In this guide we will demonstrate how to import excel files in PMS Plus add-on, while commenting what is available to PMS Plus only and absent in PMS Core (which is the subset of PMS Plus).
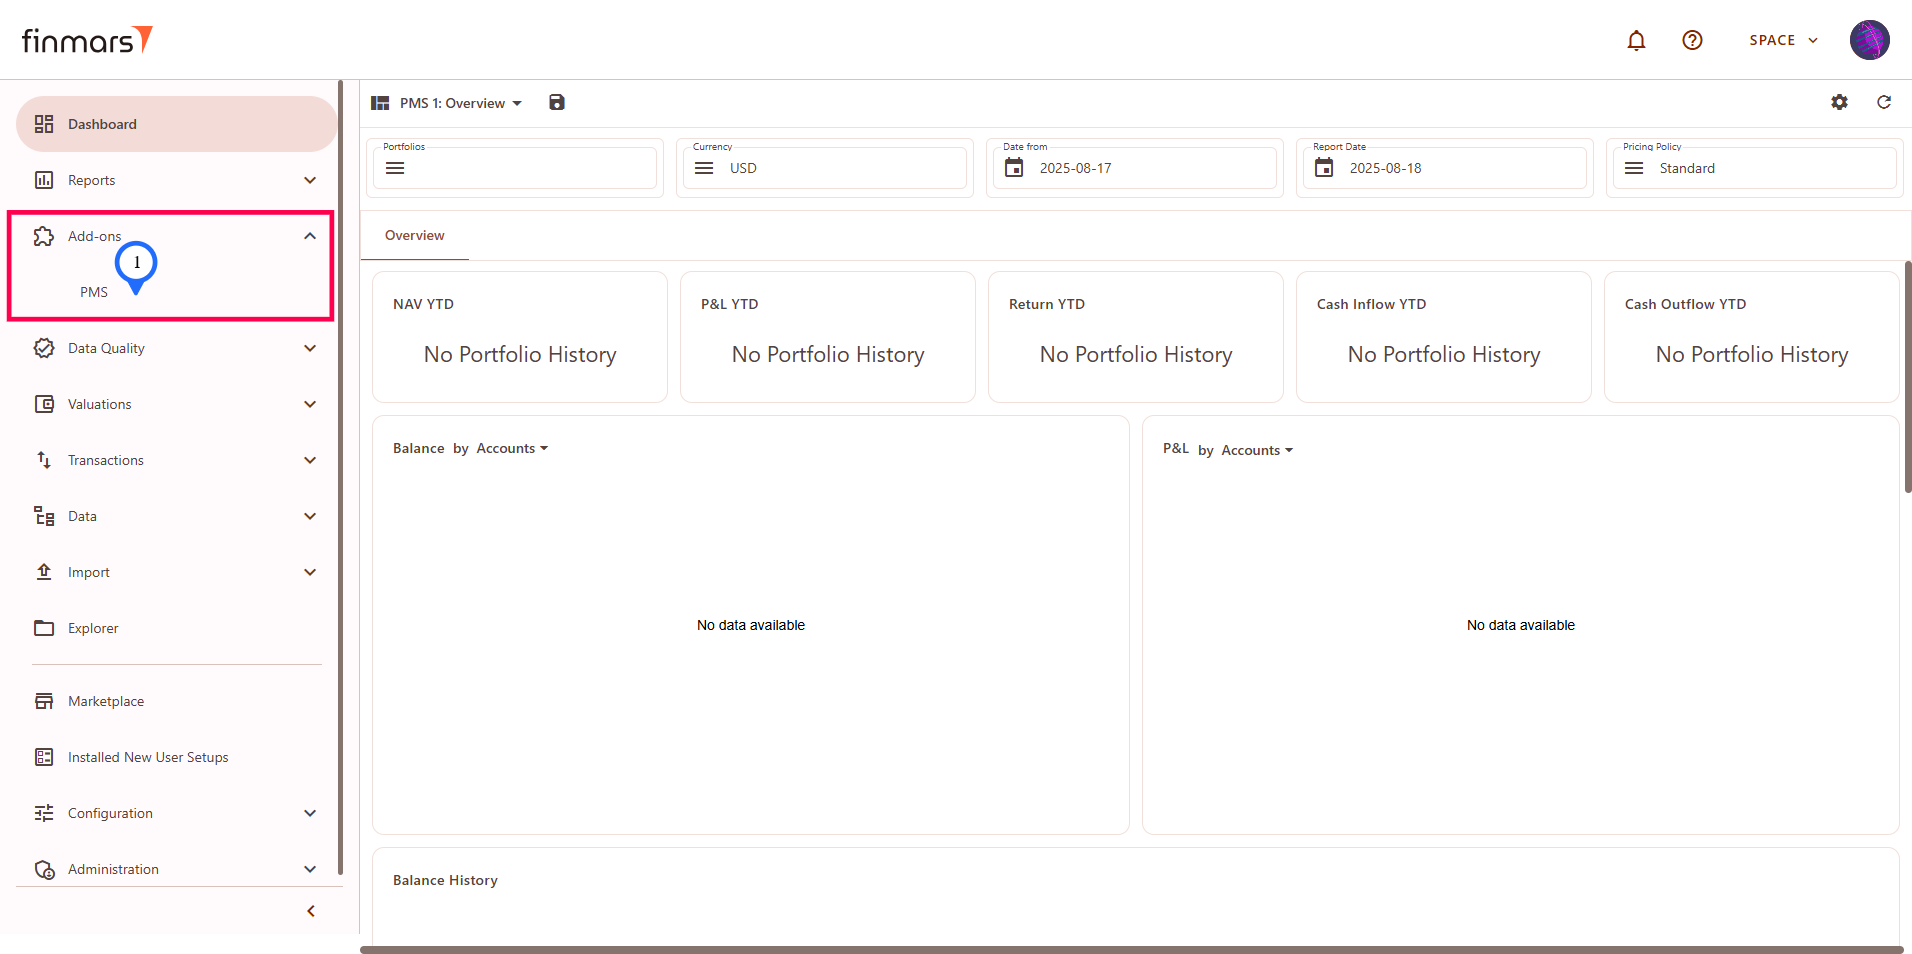
- 1: Go to the
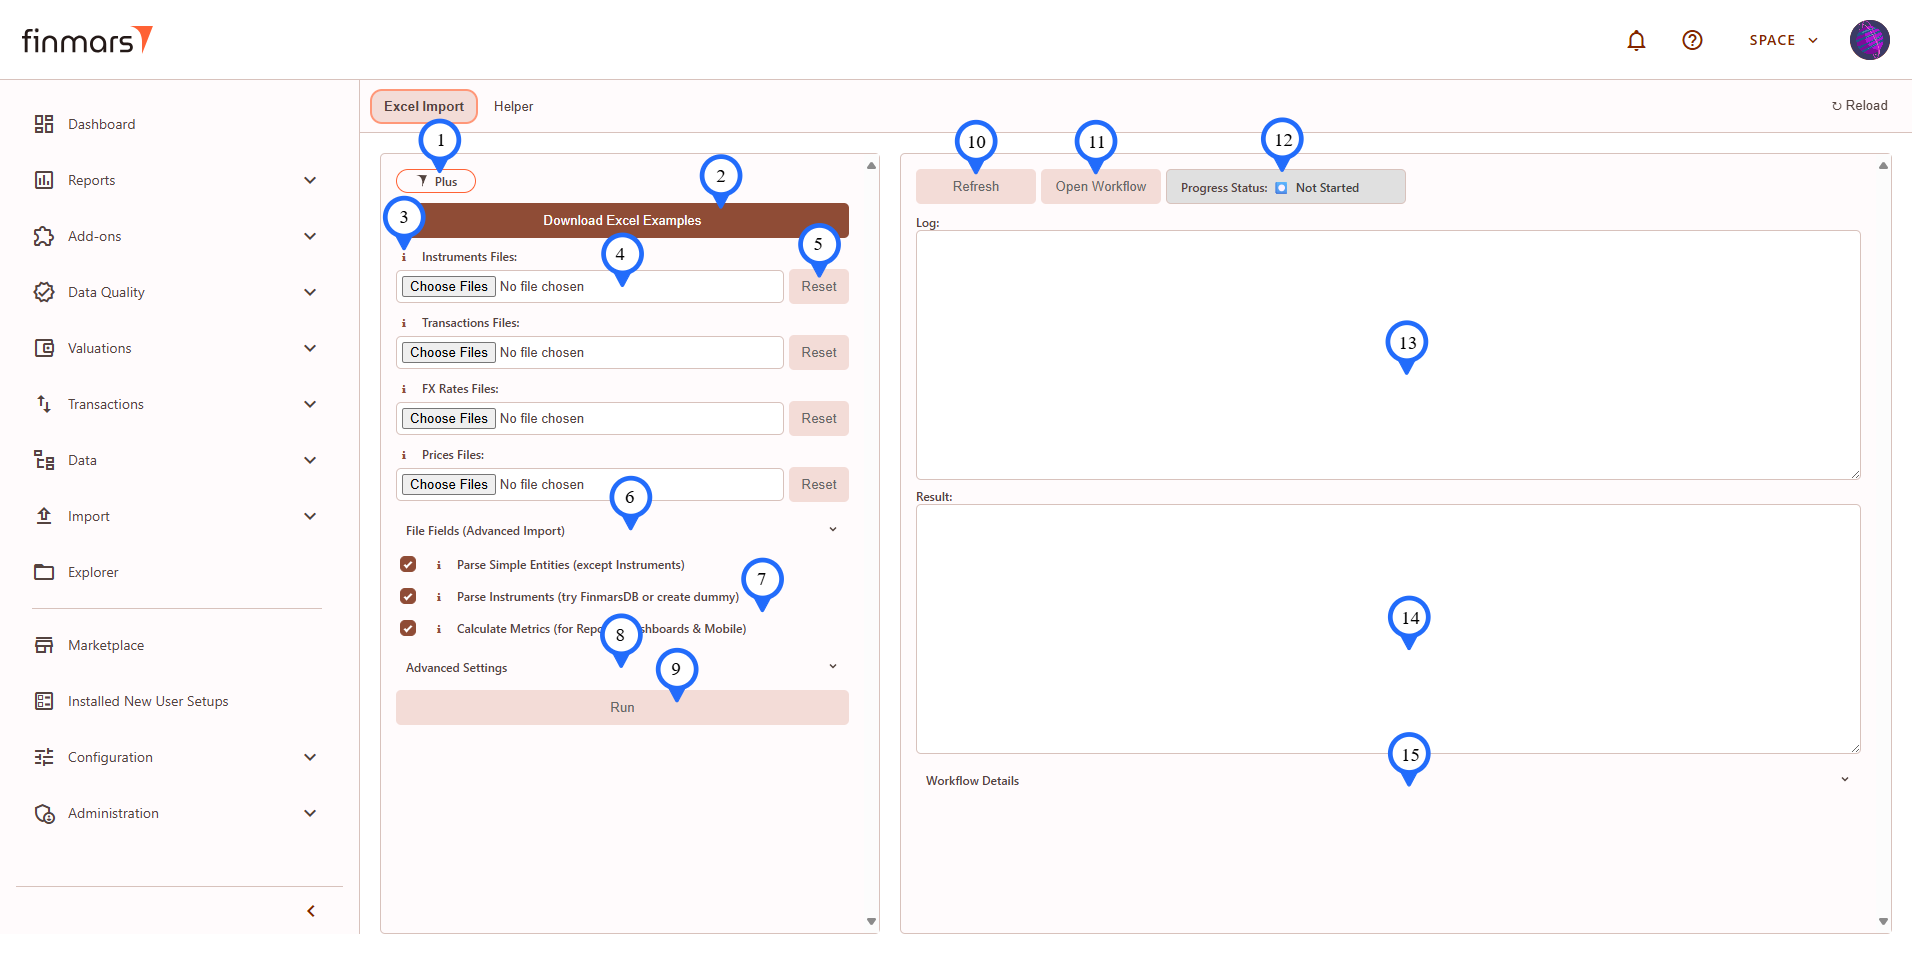
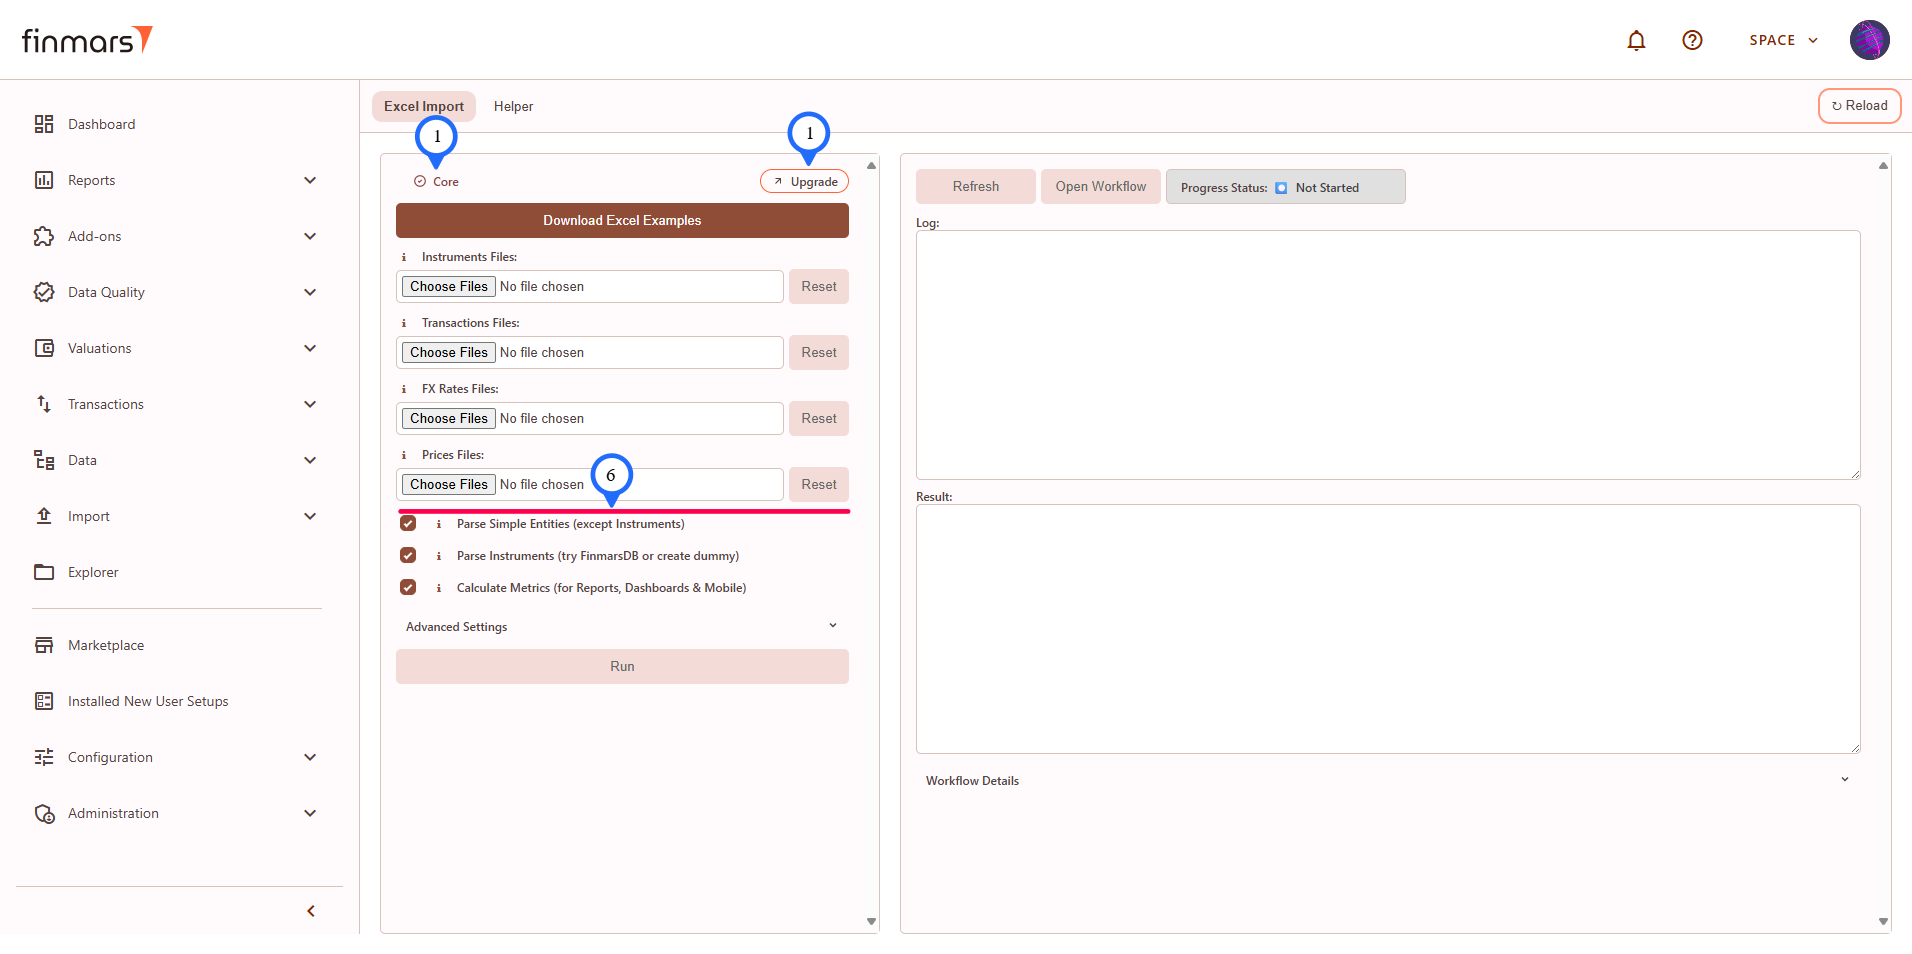
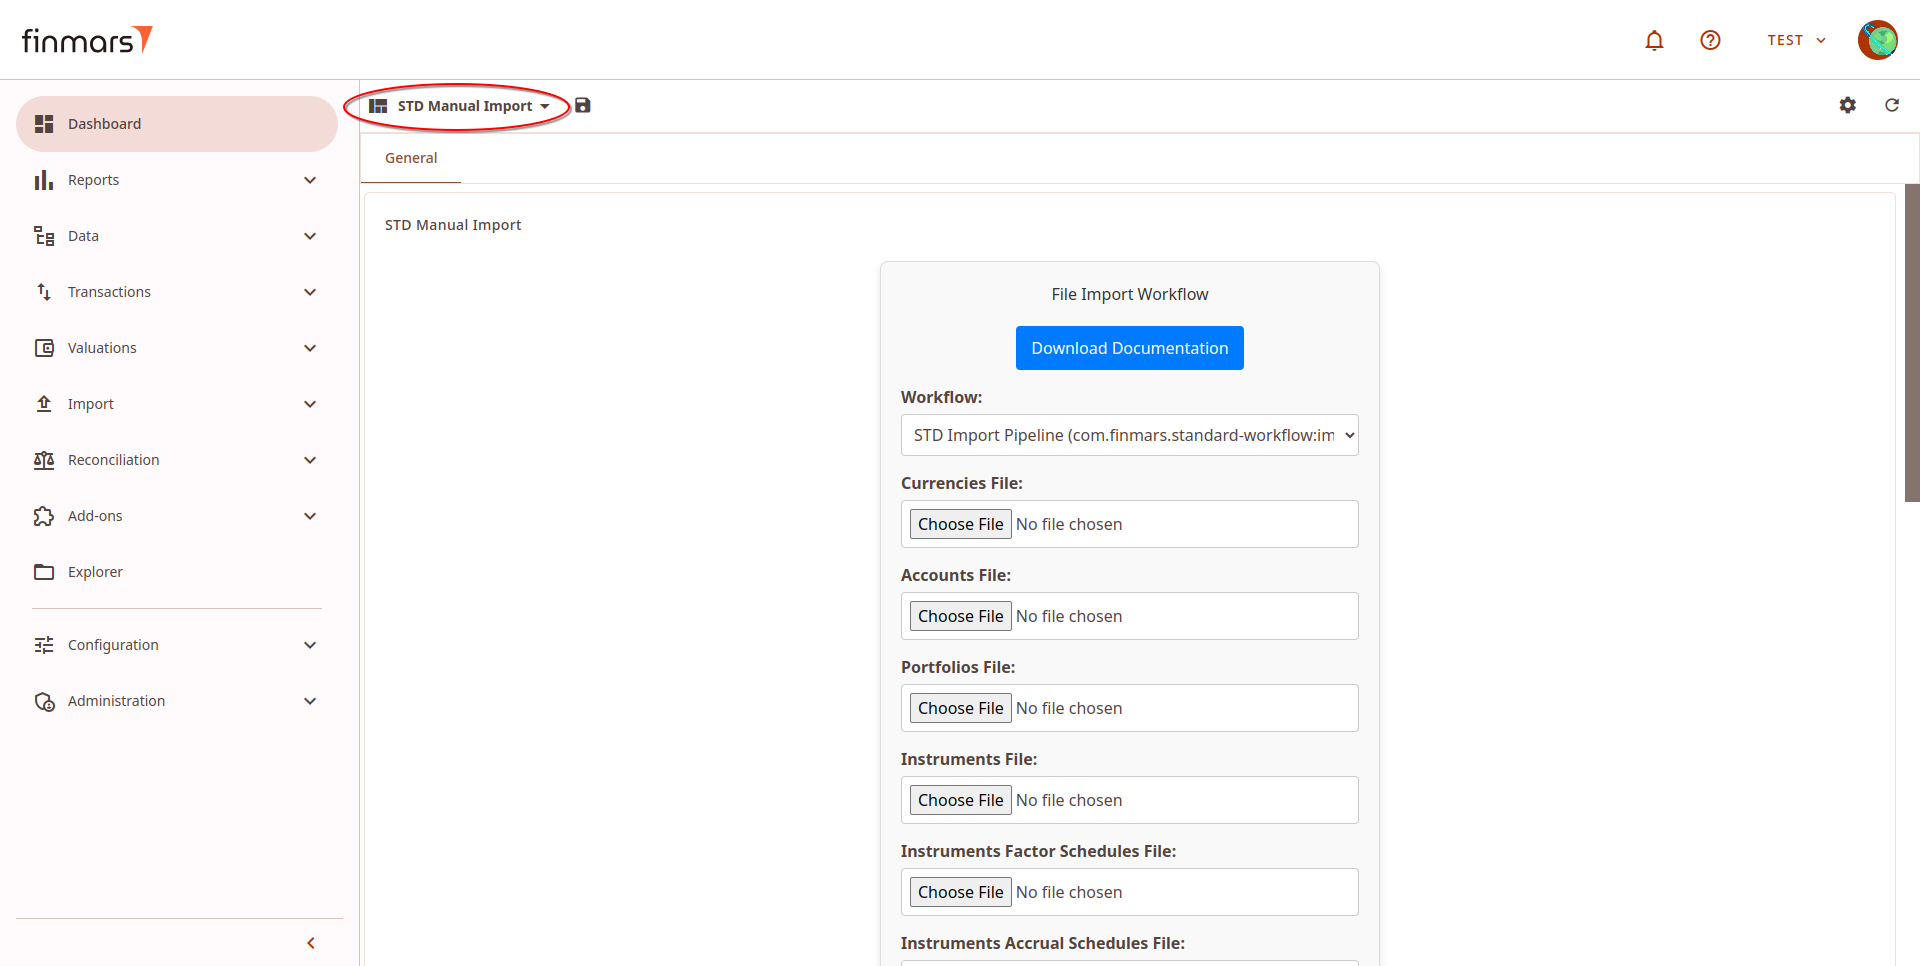
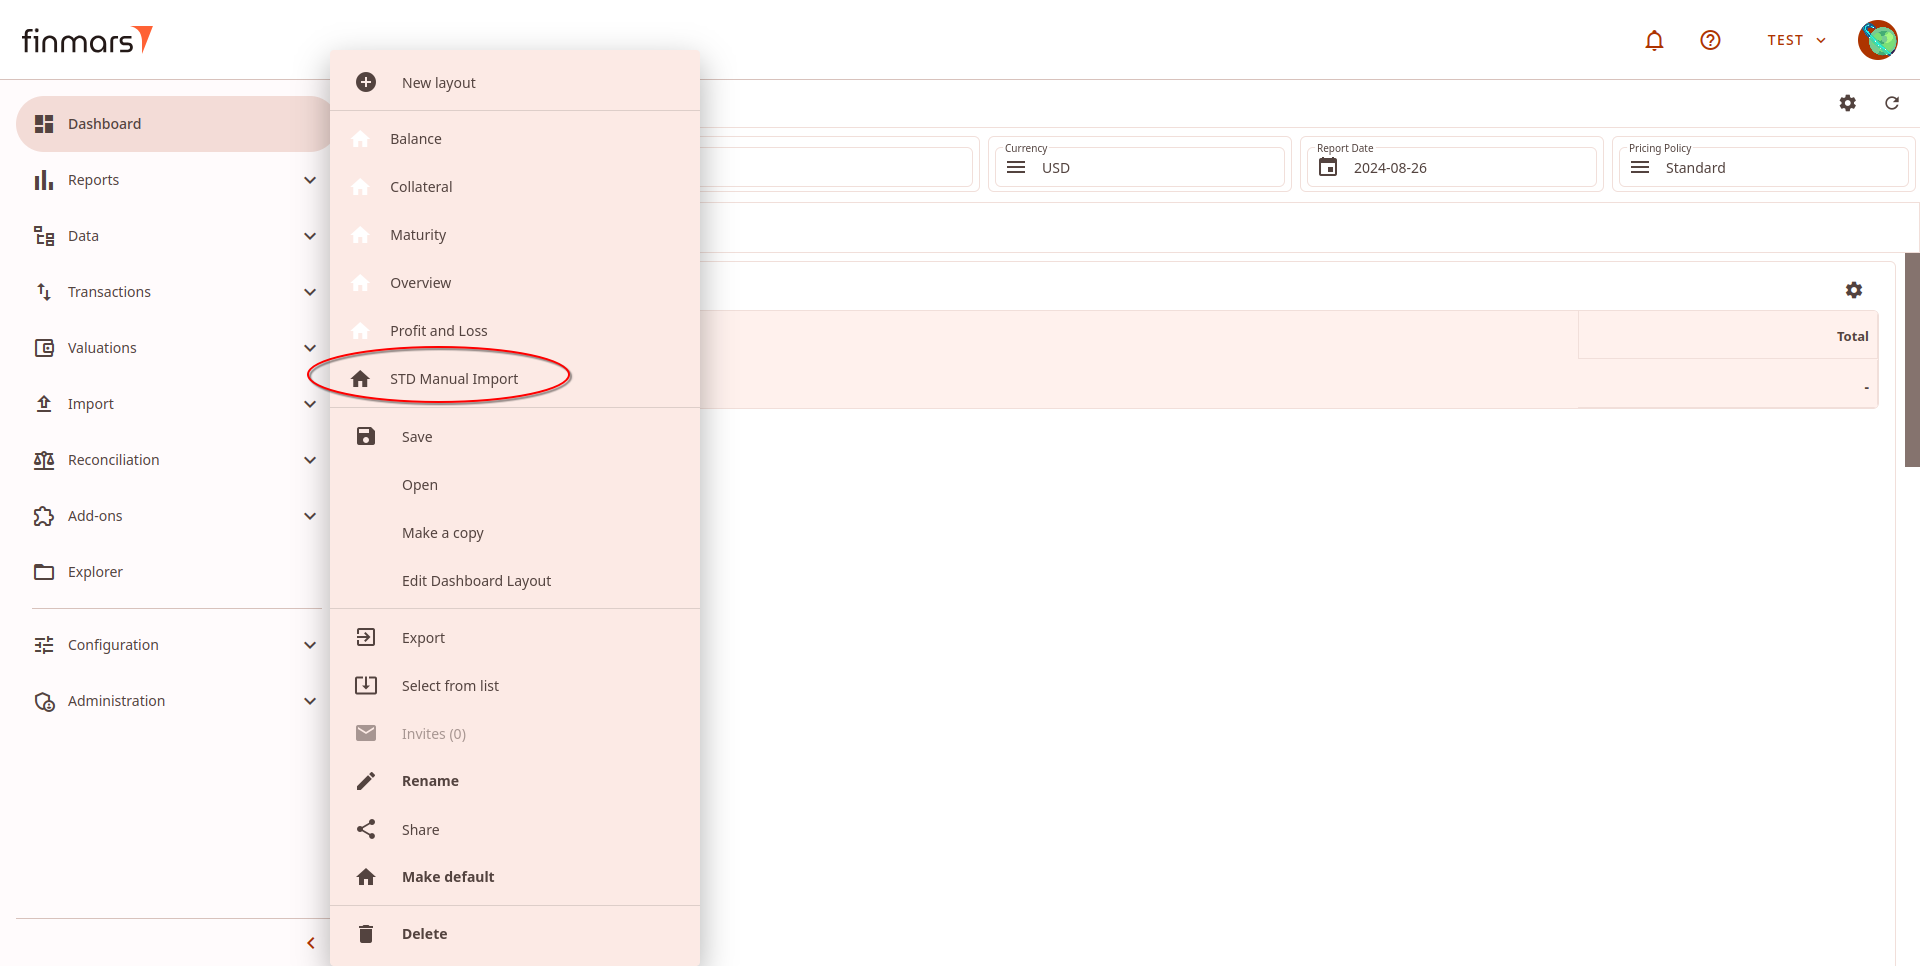
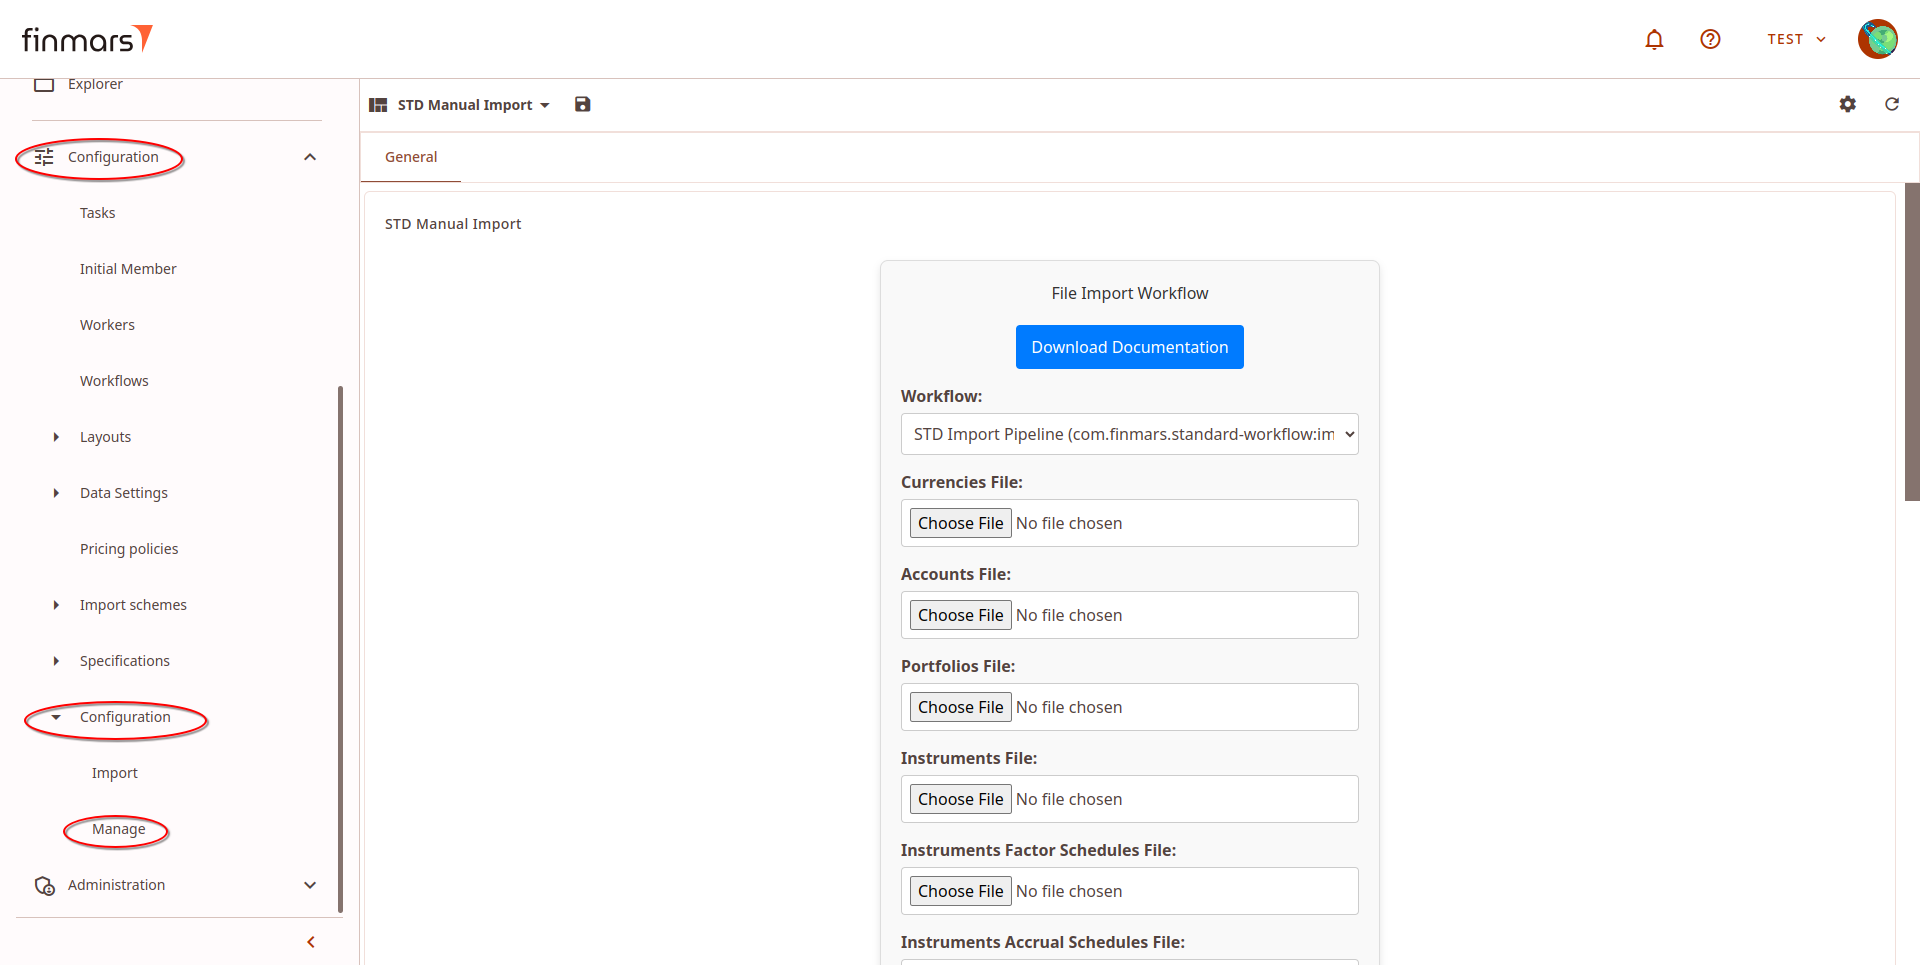
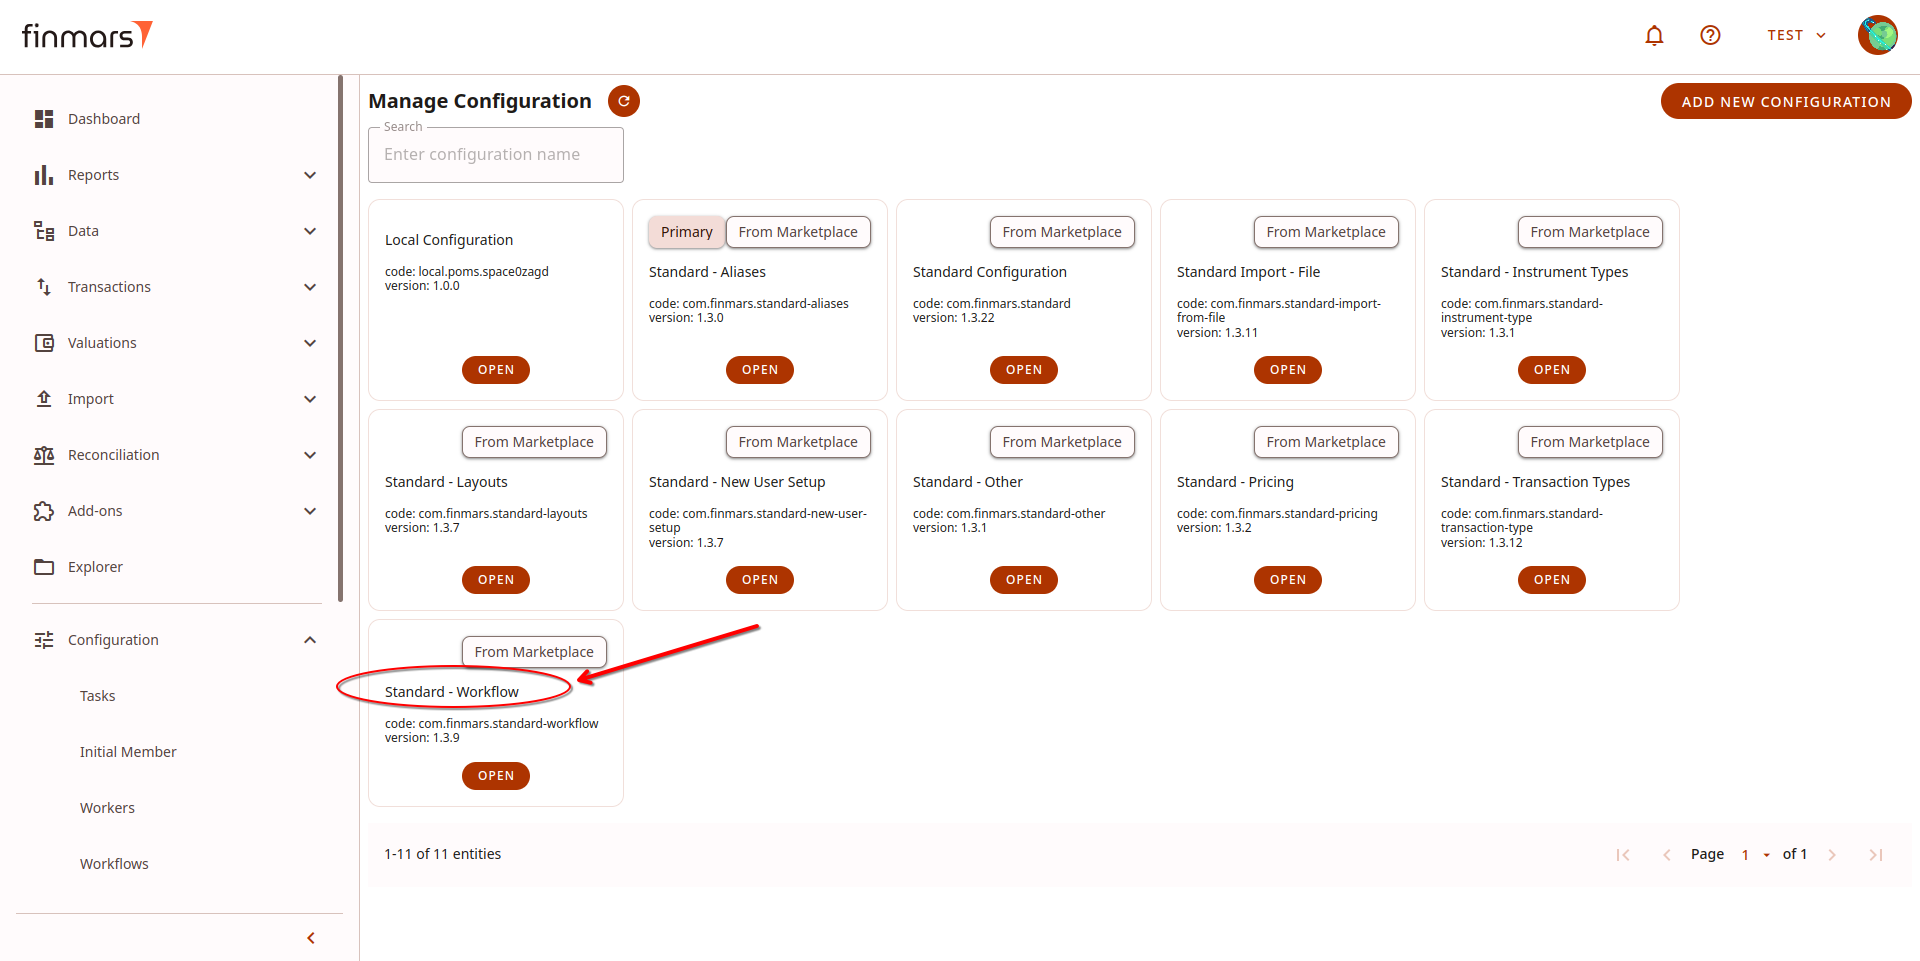
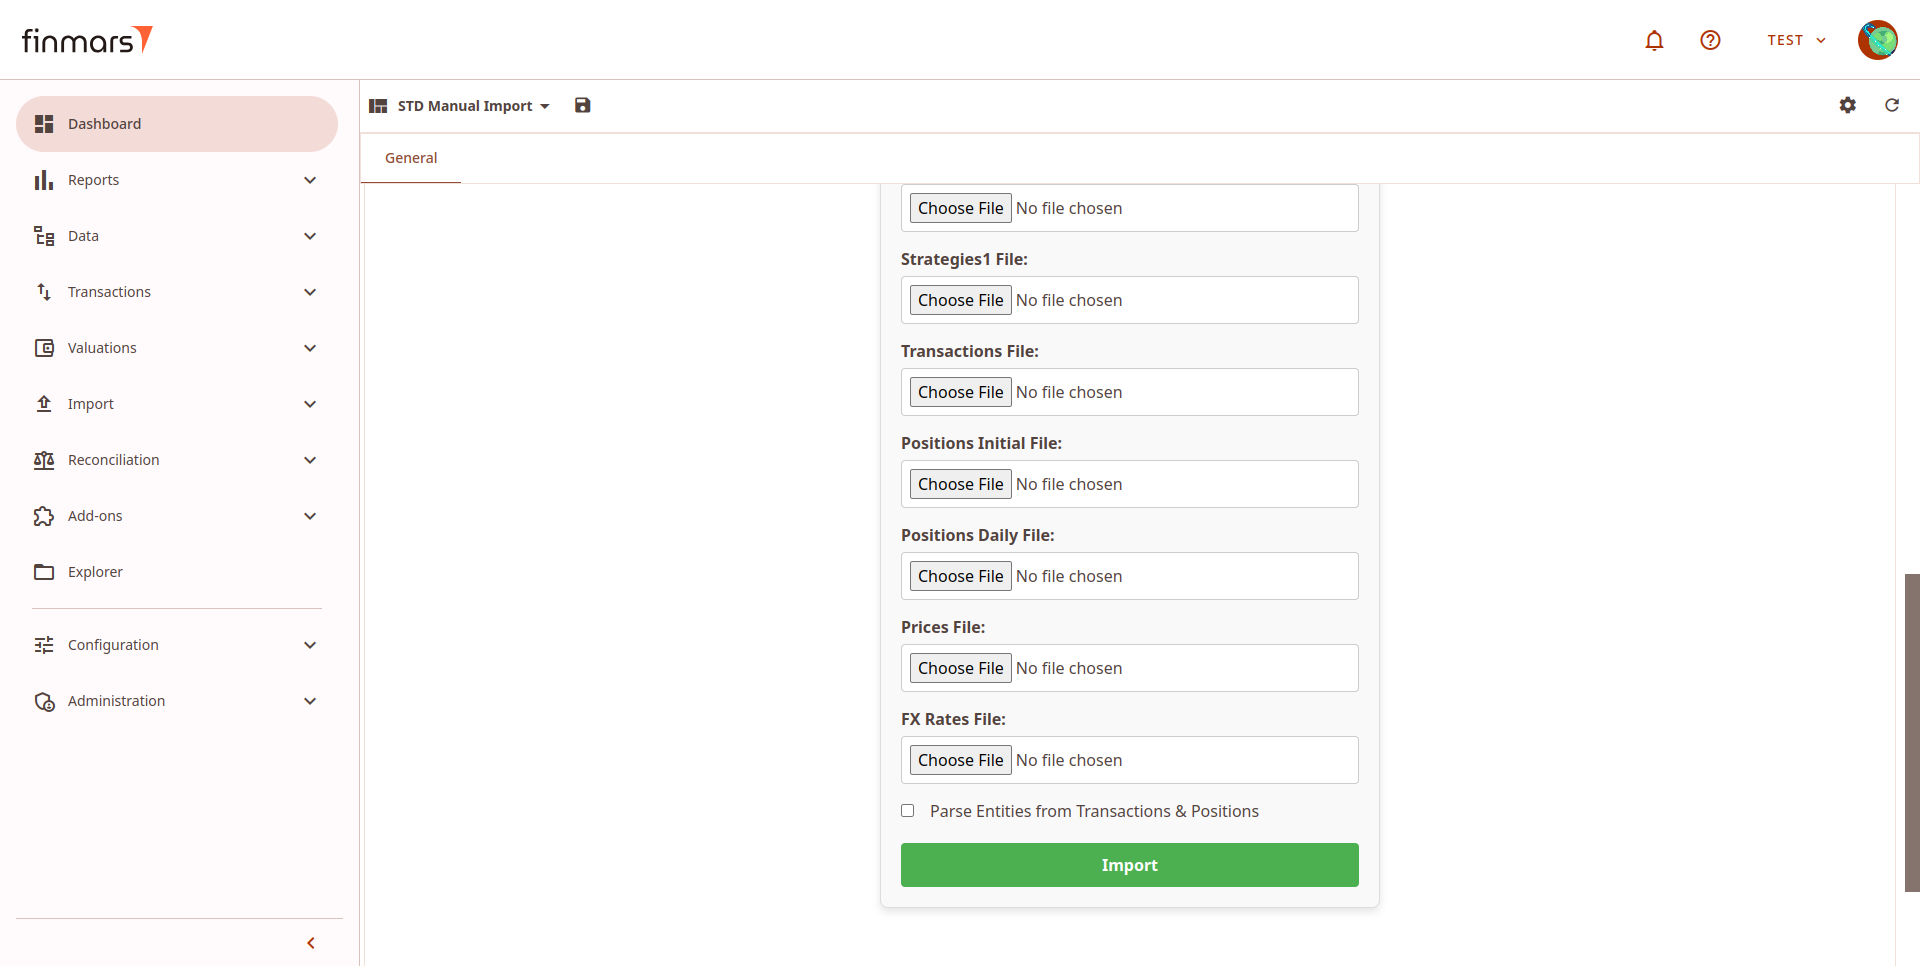
After"Plus" badge - indicator that you are using PMS Plus version. If you havefinishedPMStheCore,installationthere(rightwillupperbecorner"Core"hadbadgesuccessandpopup),"Upgrade" button that will link youshould goto theDashboardPMSmenuPlustab. Depending on your default layout settings, it may have different layout selected, you need to click on the layout name to navigate to the needed layout.Once the menu is opened, you will be presented a choice of selecting multiple menus. SelectSTD Manual Importlayout.Workflowfield denotes which workflow will handle the input. For now, use the defaultcom.finmars.standard-workflow:std-import-pipeline. If you see this import, skip steps 5-6 and go toStep 7.If you do not see this import, double check that you have installedStandard - Workflowsmodule as a part of theStandard Configurationpackage by following the steps below. This can be done by going to theConfiguration → Configuration → ManageStandard - Workflowshould be installed thereThe basic way to useSTD Import Pipelineis to add all of the needed files yourself.That includescurrencies, accounts, portfolios, instruments, instruments factor scheduled, instruments accrual scheduled, responsibles, strategies1, transactions, prices, fx-rates, for files see instruction:How to Prepare Standard Template Files for Import.You can add multiple files at once in one field.Any combination of previously mentioned files is possible. Which means that some fields can be left without any file selected, but it's your responsibility to make sure that you won't be lacking any data.add-on.Parse"DownloadEntitiesexcelfrom Transactions & PositionsExample"checkboxtheisbuttonused whenallows youdon’ttohavedownloadsimpleExcelentitiesfilesalreadyforimportedimport,orthere are 2 set of them:- excel_demo_data - ready to import data that will allows you to check Finmars platform in action;
- excel_import_file_templates - templates how to populate the
correspondingexcelfilesfile(notinincludingFinmarsInstruments,format and you still can import them as well but theyneedwon'ttogivebeyou nice values inthe corresponding file with instruments). After adding all those files, you should clickImport.
reports.
- Next
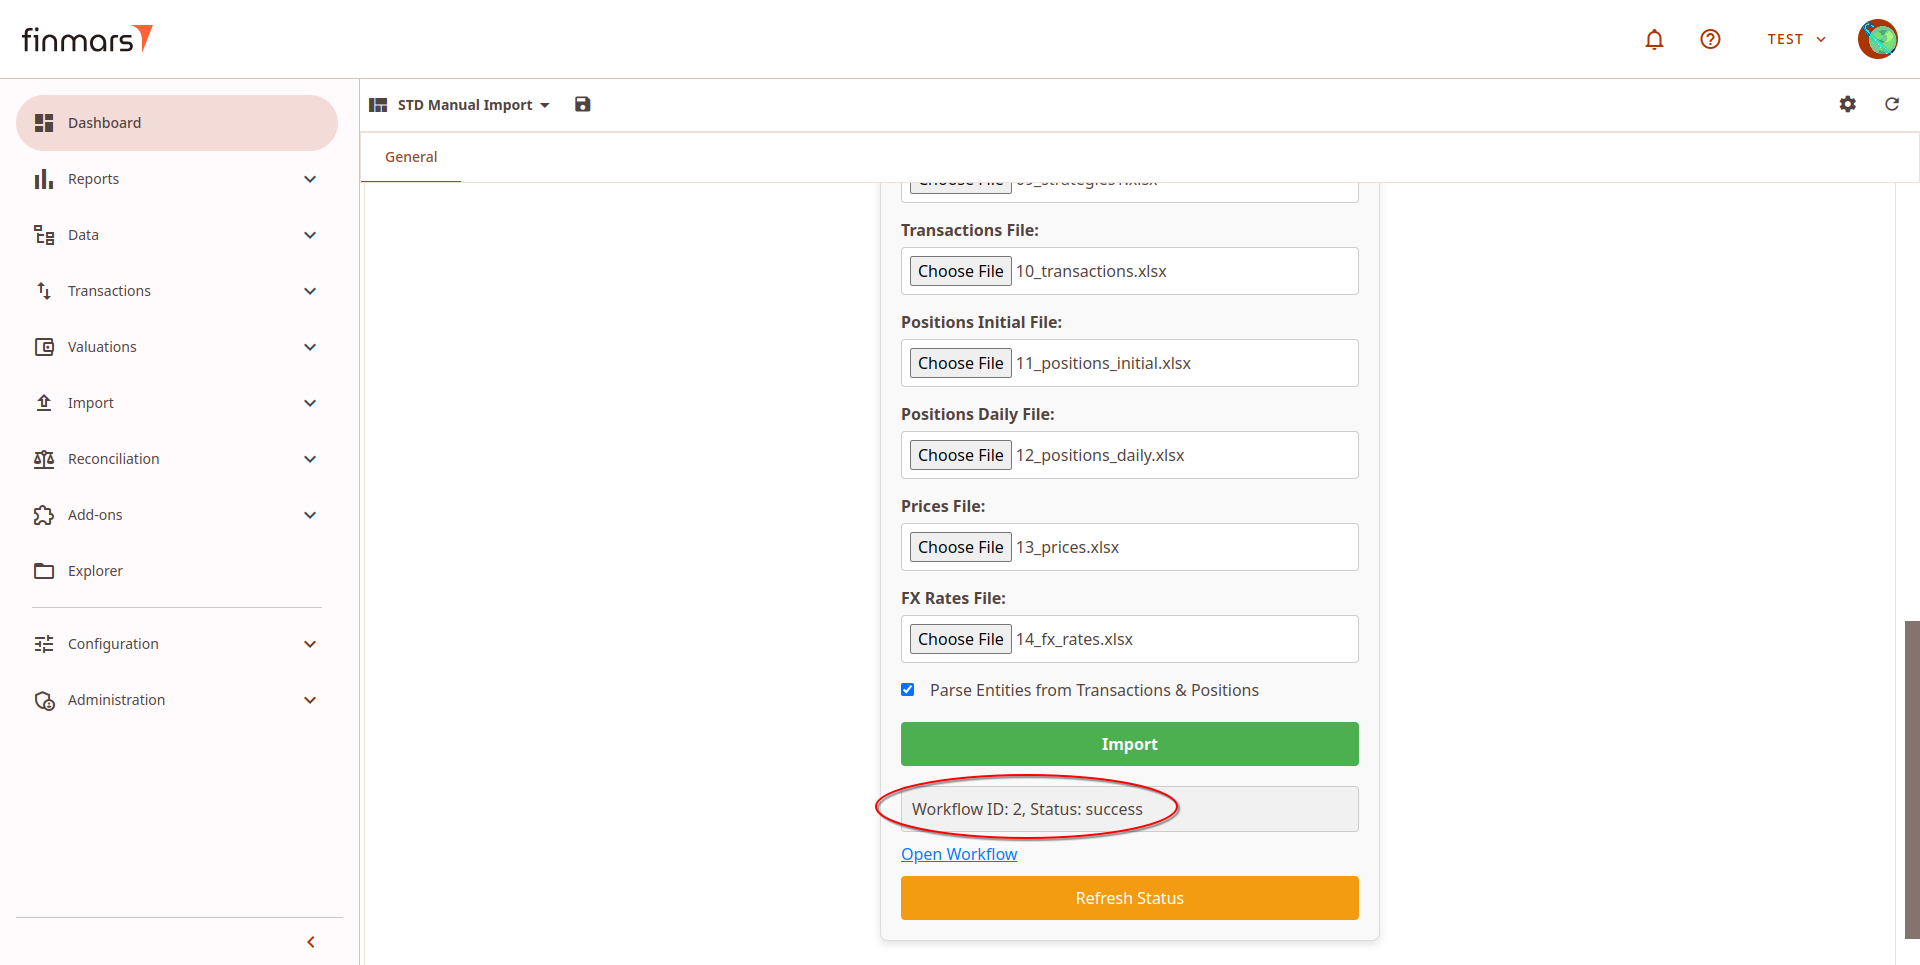
element.AftertoclickingsomeImport,labelsinformationinaboutfiletheselect,workflowinputstatusor checkboxes elements you willappear.seeRefreshInfostatusiconbutton-willclickrefreshontheitstatusto see description of theworkflow. - You will see Multiple File Select input and Text Input elements where your input required.
- "Reset" button allows to reset selected files.
- "File Fields (Advanced Import)" section is only for "PMS Plus" and contains Multiple File Select inputs for:
- Simple entities (more control over creation): currencies, accounts, portfolios, counterparties, responsibles, strategies;
- Instruments: Factor and Accrual schedules;
- Positions: Daily (one day living snapshot), Initial (starting positions in case you can't import historical transactions).
-
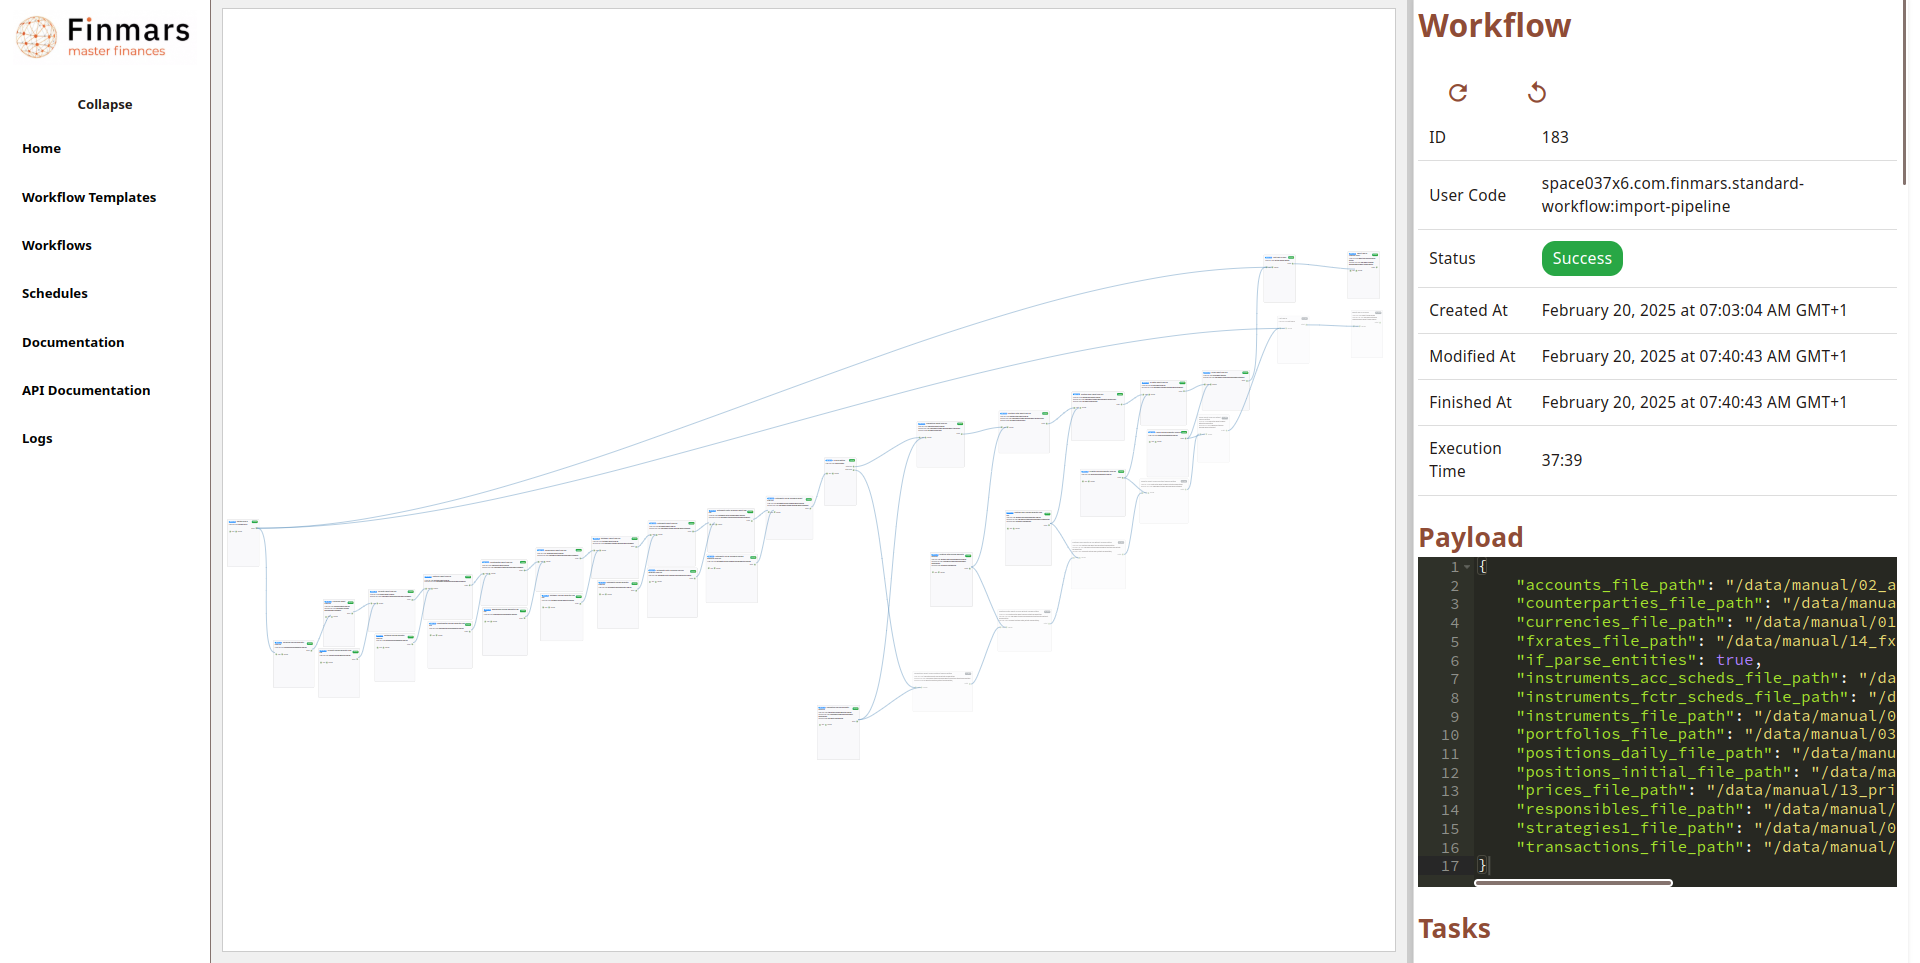
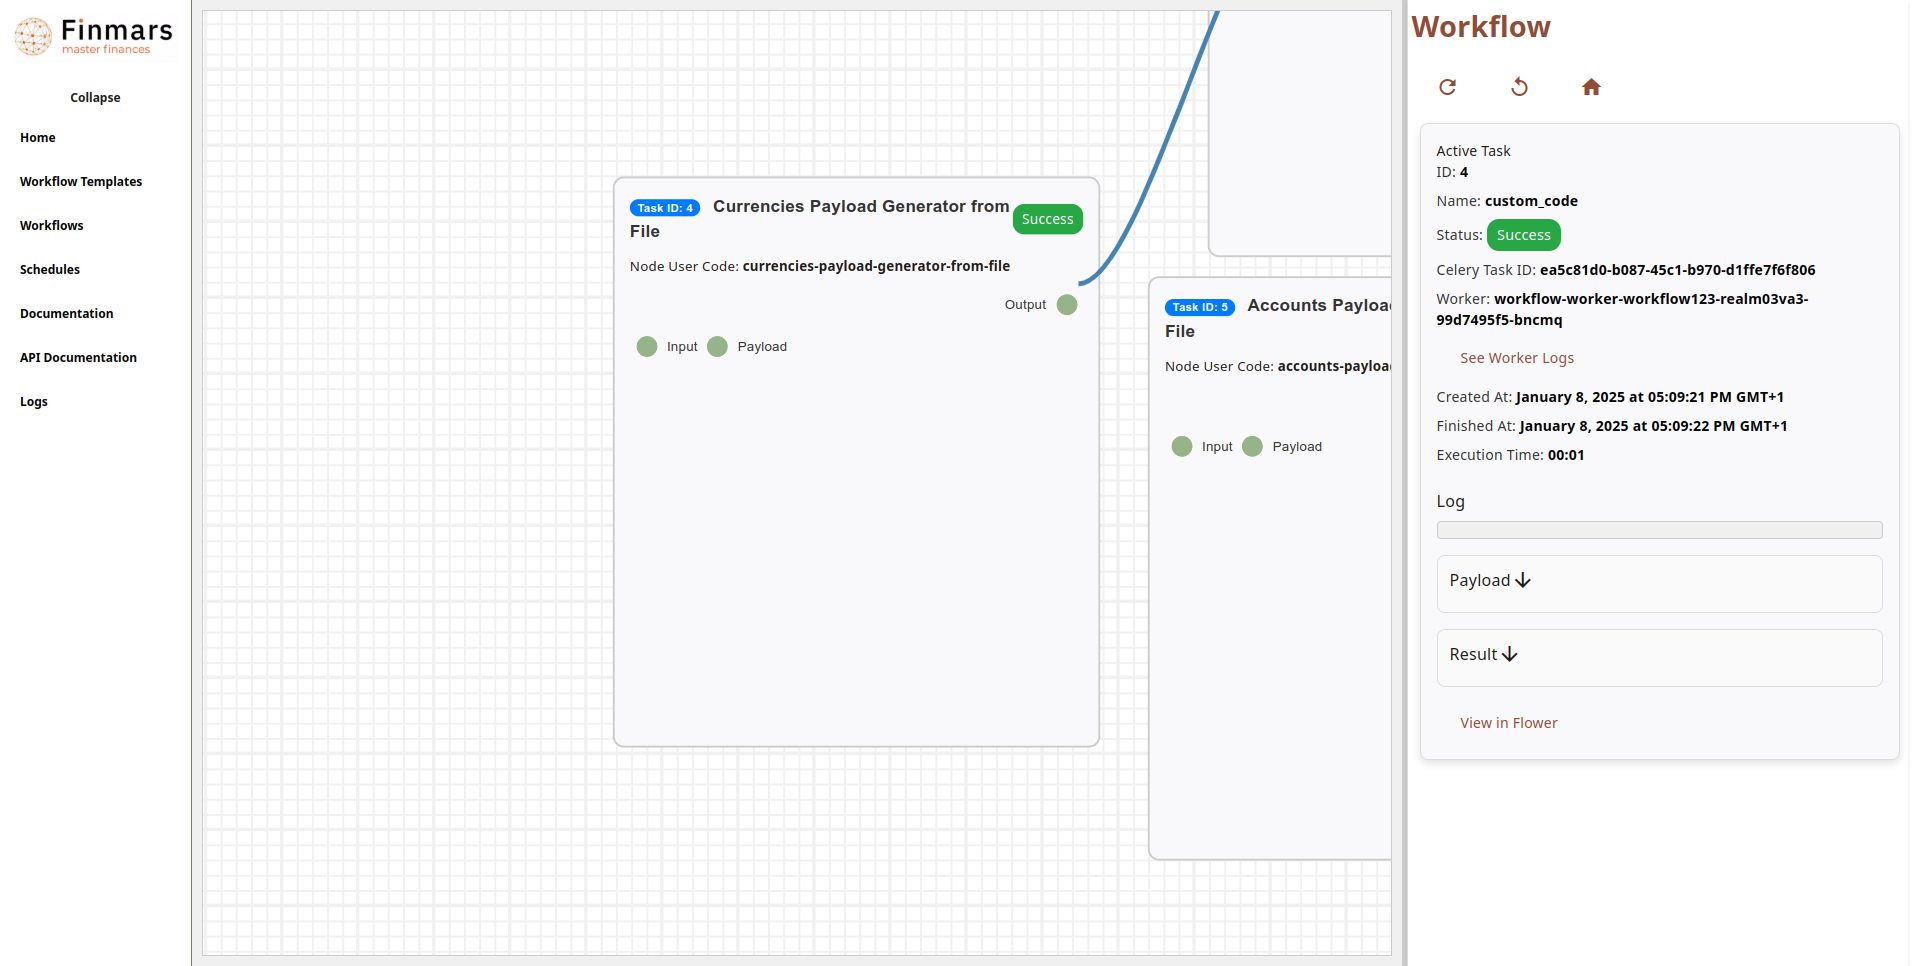
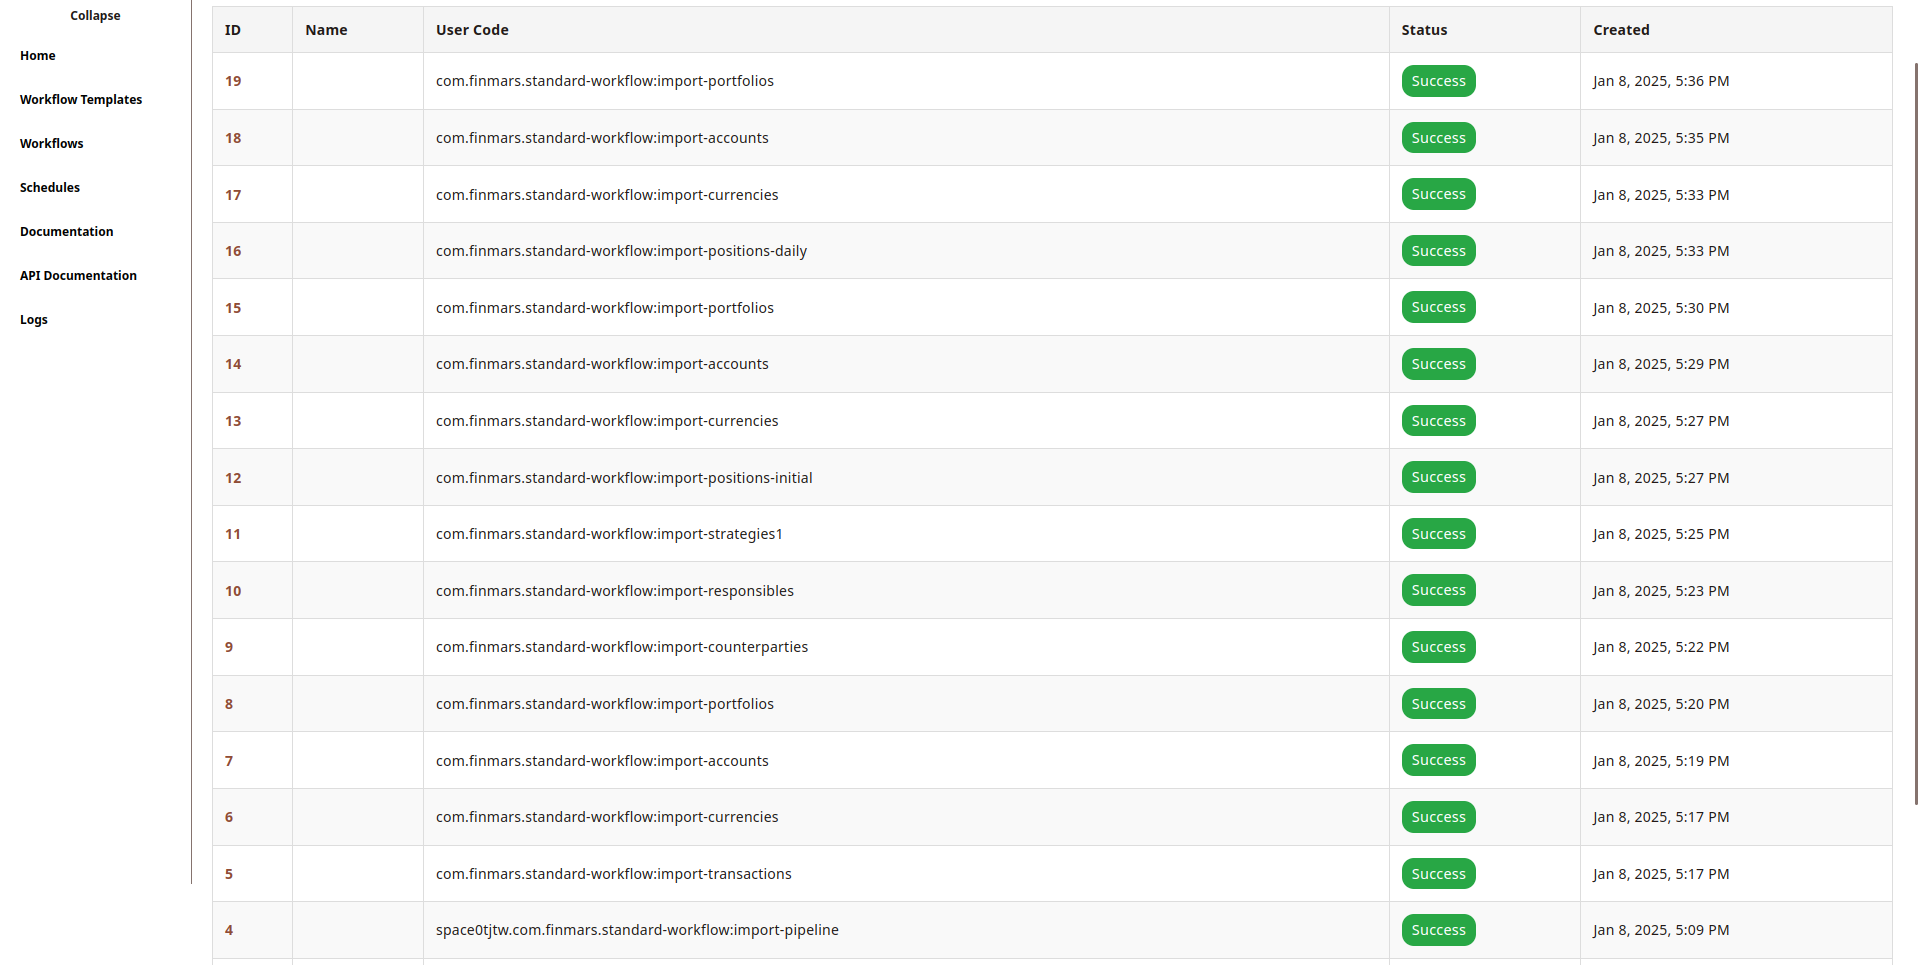
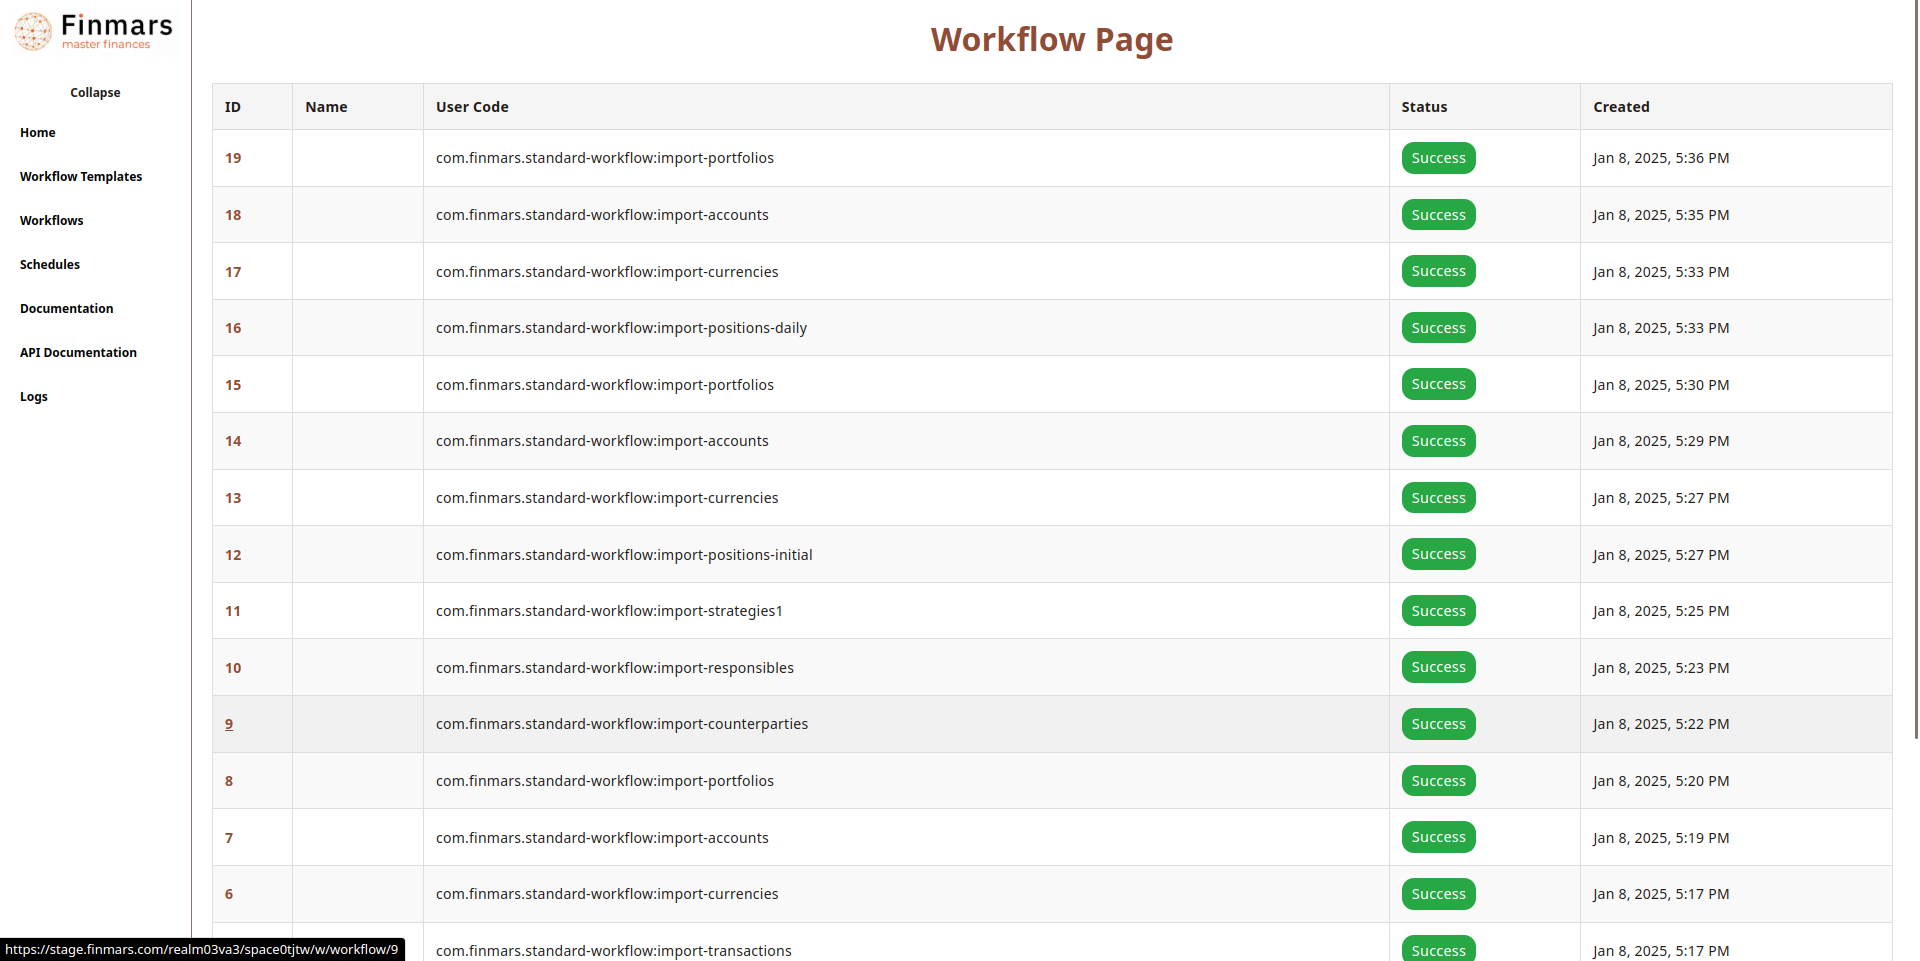
Open Workflowlink will open a more detailed view of the workflow progress. This view shows all of the workflows that will be executed bystd-import-pipeline. Zooming in, more information about each separate workflow is shown. Clicking on the workflow, detailed information is shown on the right, includingstatus,created atandfinished at, logs,as well asresults.Statusfield has following values:Progress,Success,Nested-Progress,Error.Nested-Progressdenotes that a workflow inside theNested-Progressworkflow is being executed.std-import-pipelineexecutes multiple other workflows. After all of them are completed, the workflow progress will be Success.More details about each workflow can be obtained by clicking on the id of that workflow.After all other workflows have finished Successfully “Status: success” will be shown.However, this only confirms that the data transfer was completed, not that the data is free of errors. To check that import has no errors you need to click onOpen Workflowafter the import is marked as successful.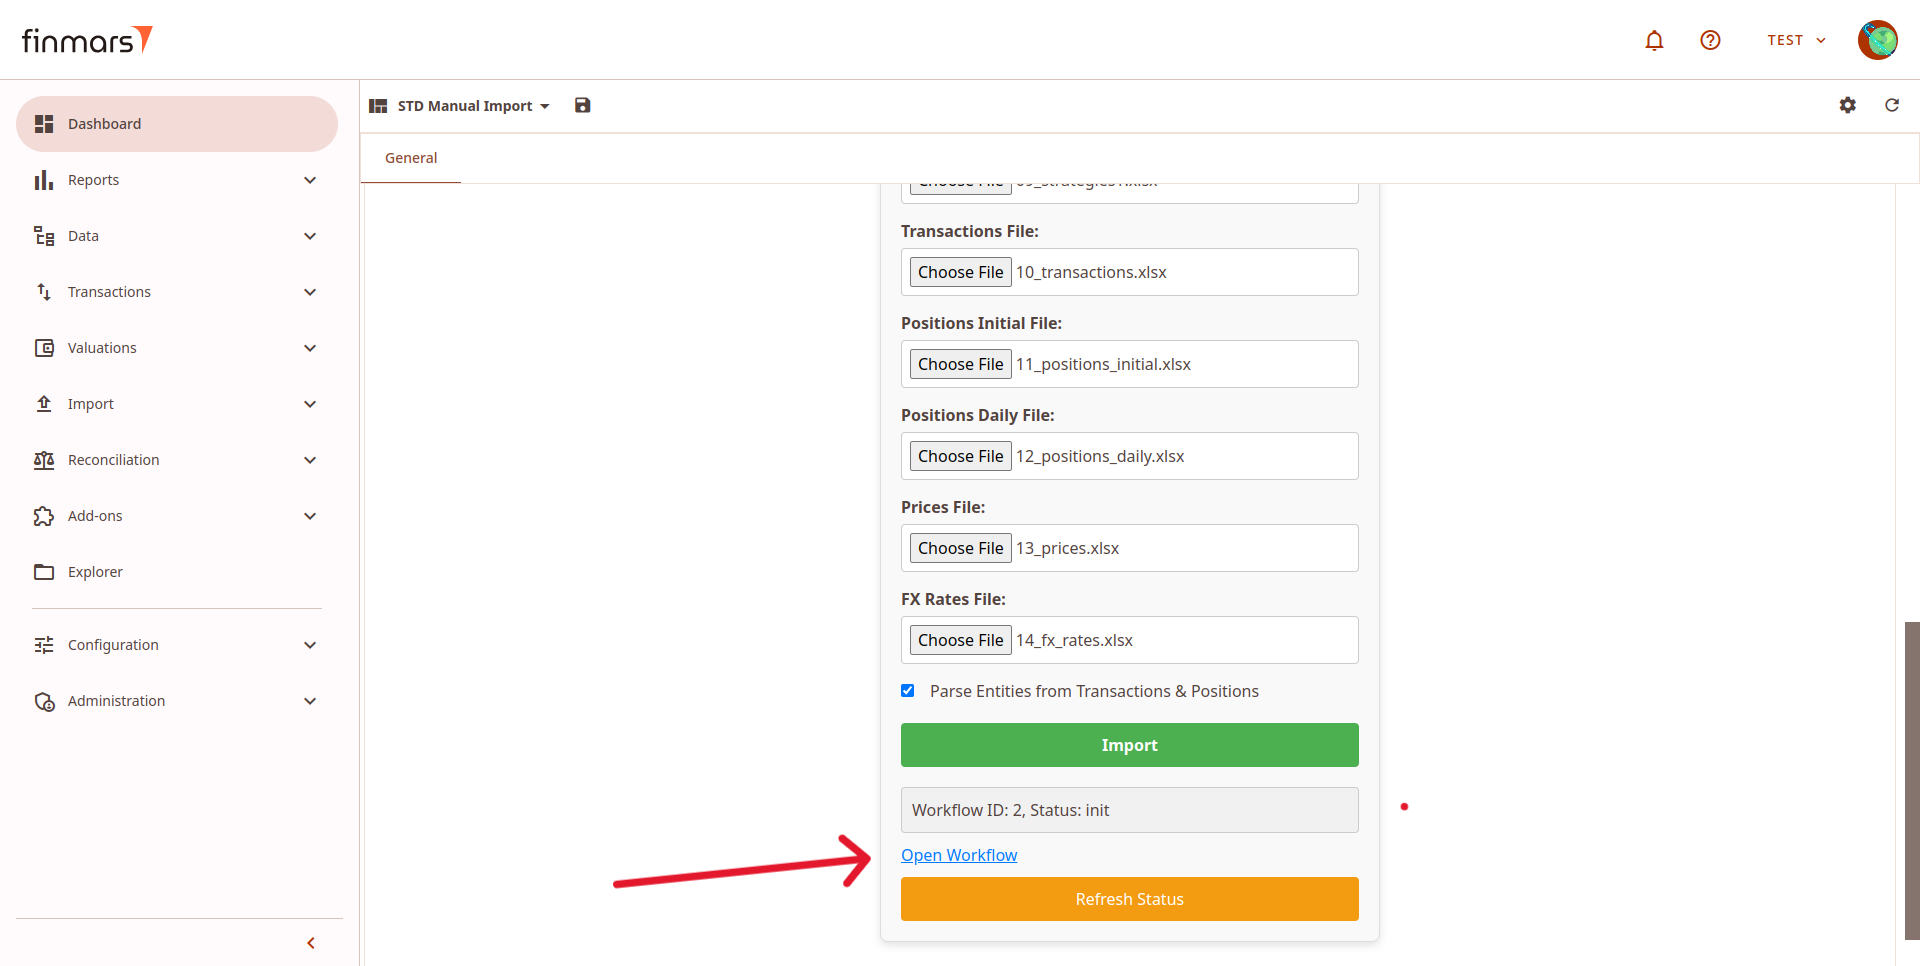
The workflow visualization will open. Locate thelast executed blockin the workflow and click on it, as shown in the screenshot.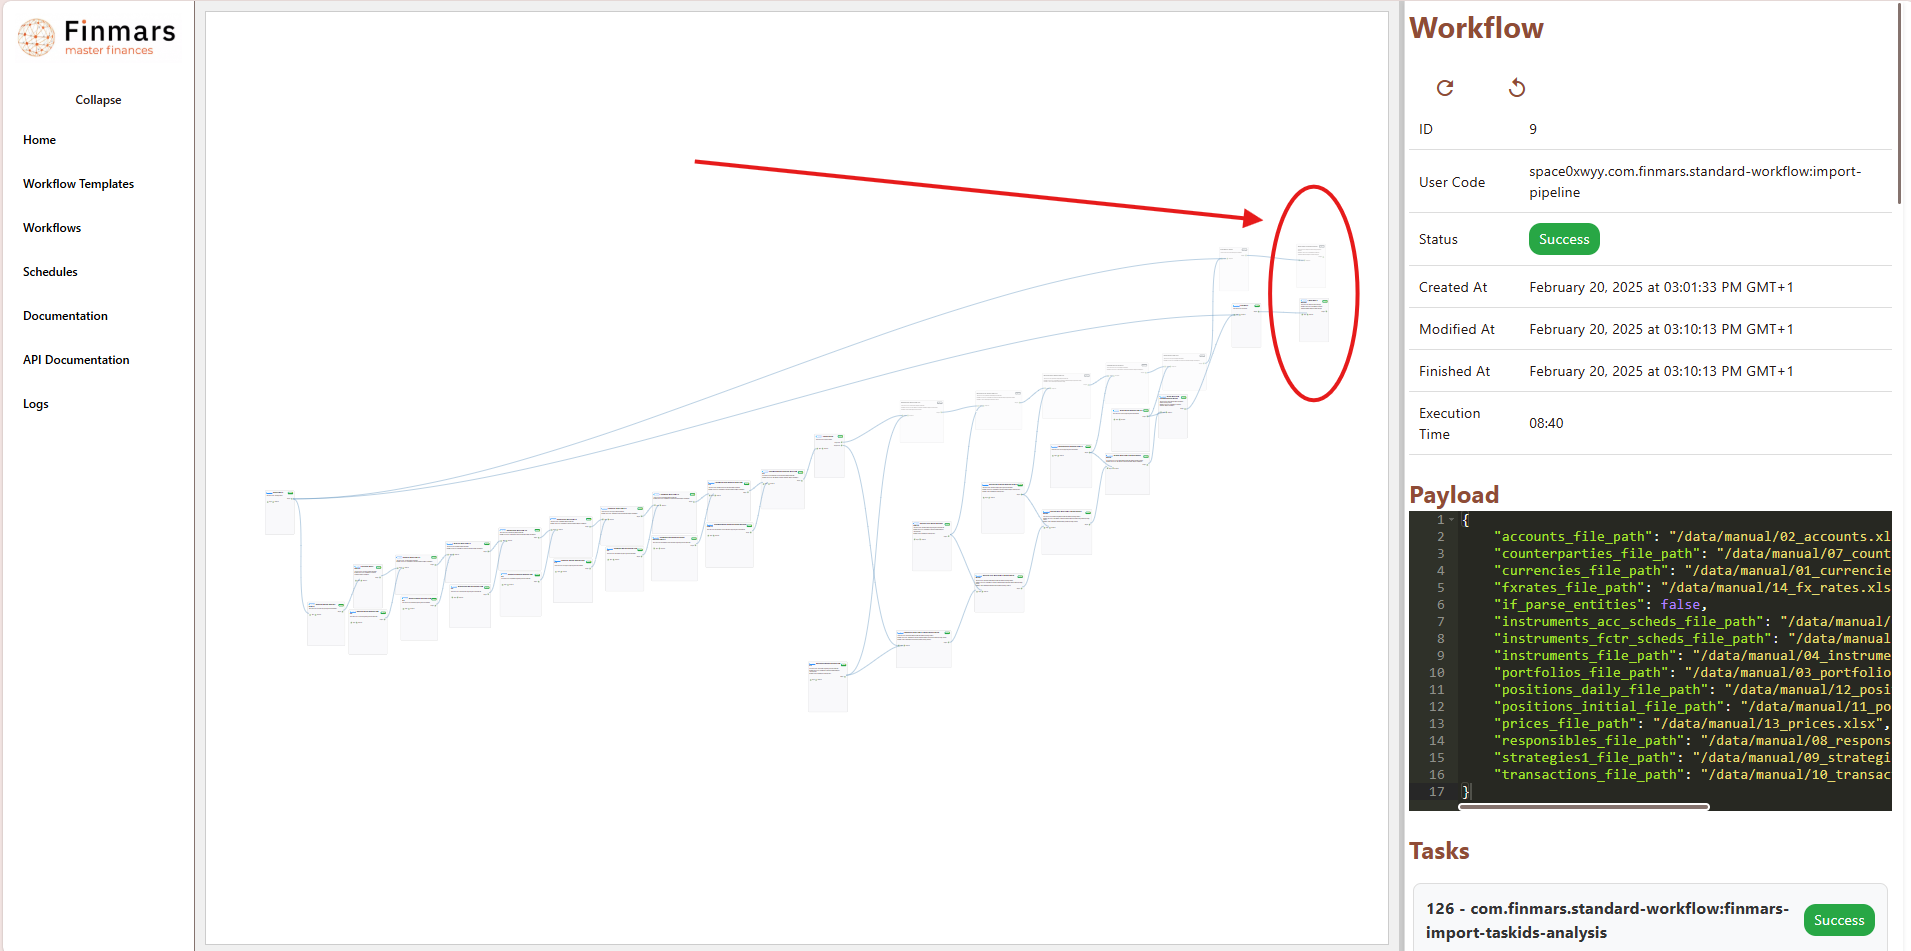
On the right panel, find theResultsection. In this section, thetop rowwill indicate whether any errors were encountered. Below, adetailed listof errors will be displayed, specifying the affected files.
If errors are present, review them carefully and take corrective actions as needed before re-running the import.
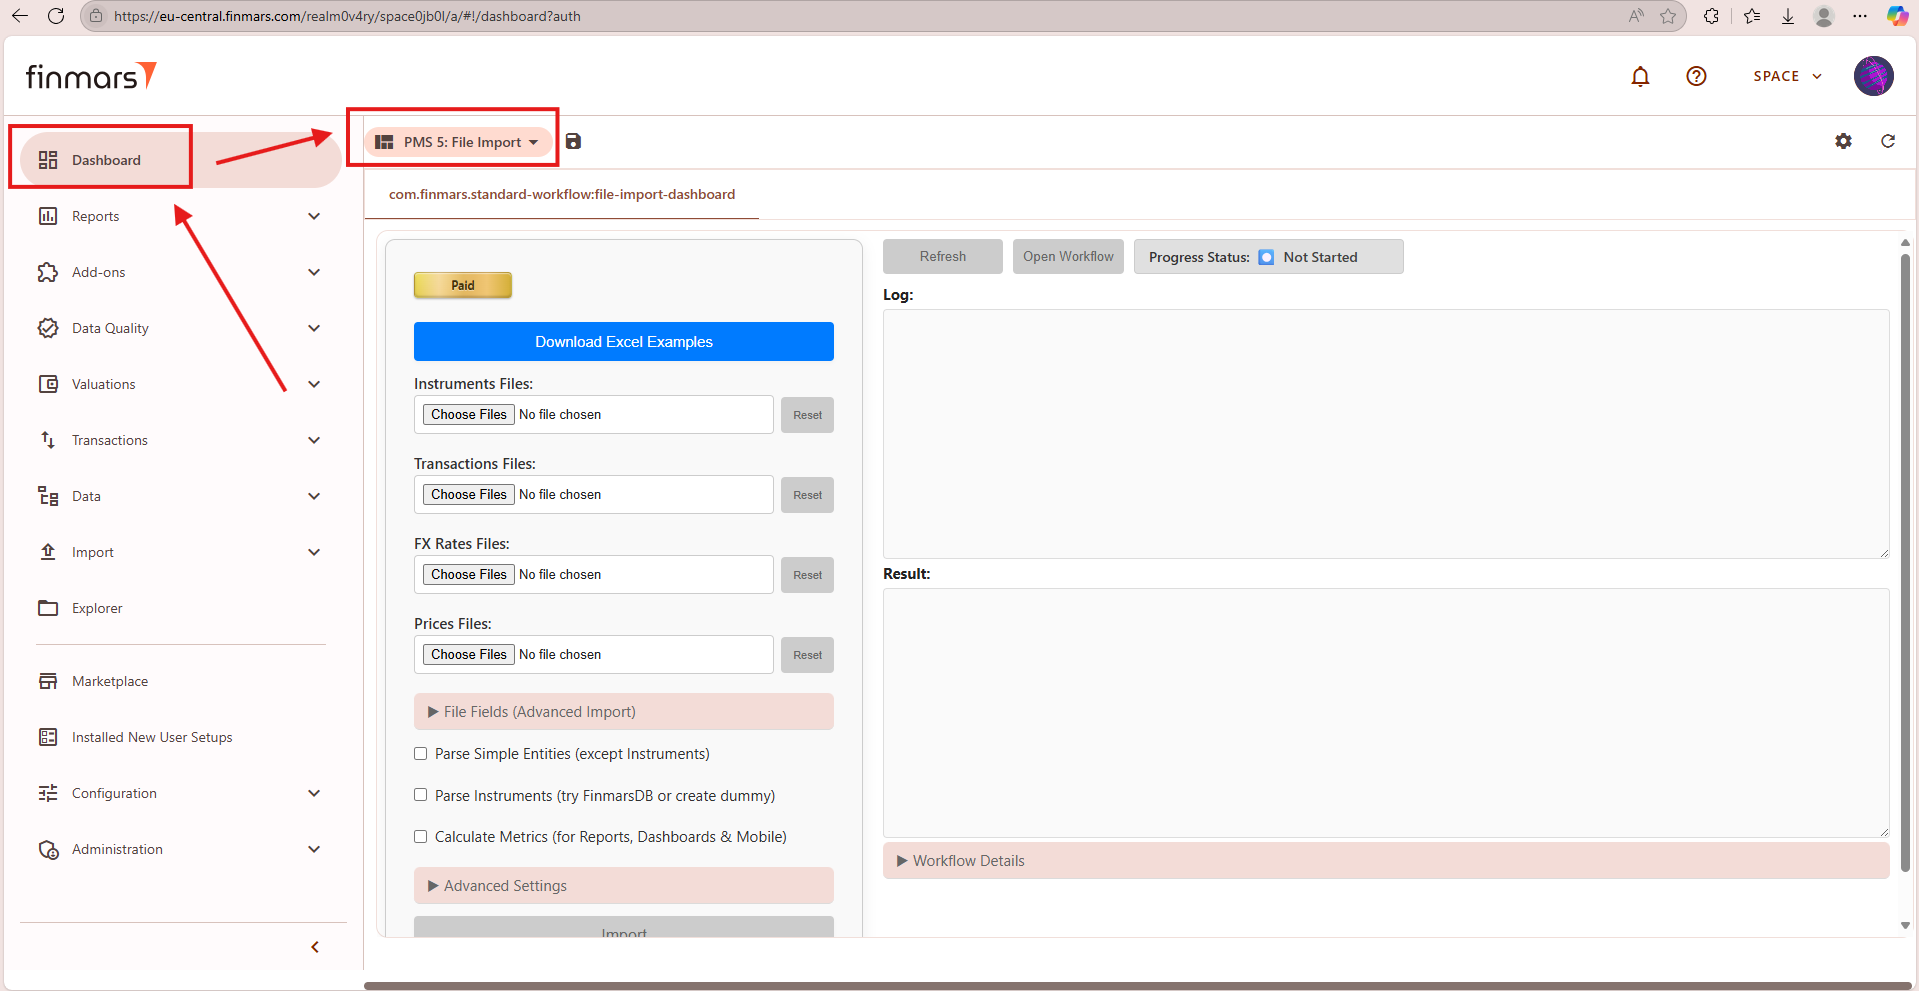
Step Dashboardsidebar menu tab.Add-ons "> PMS 5: File ImportPMS." layout should be selected. If it's selected, proceed from the step 5. If it's not selected, follow the steps below.
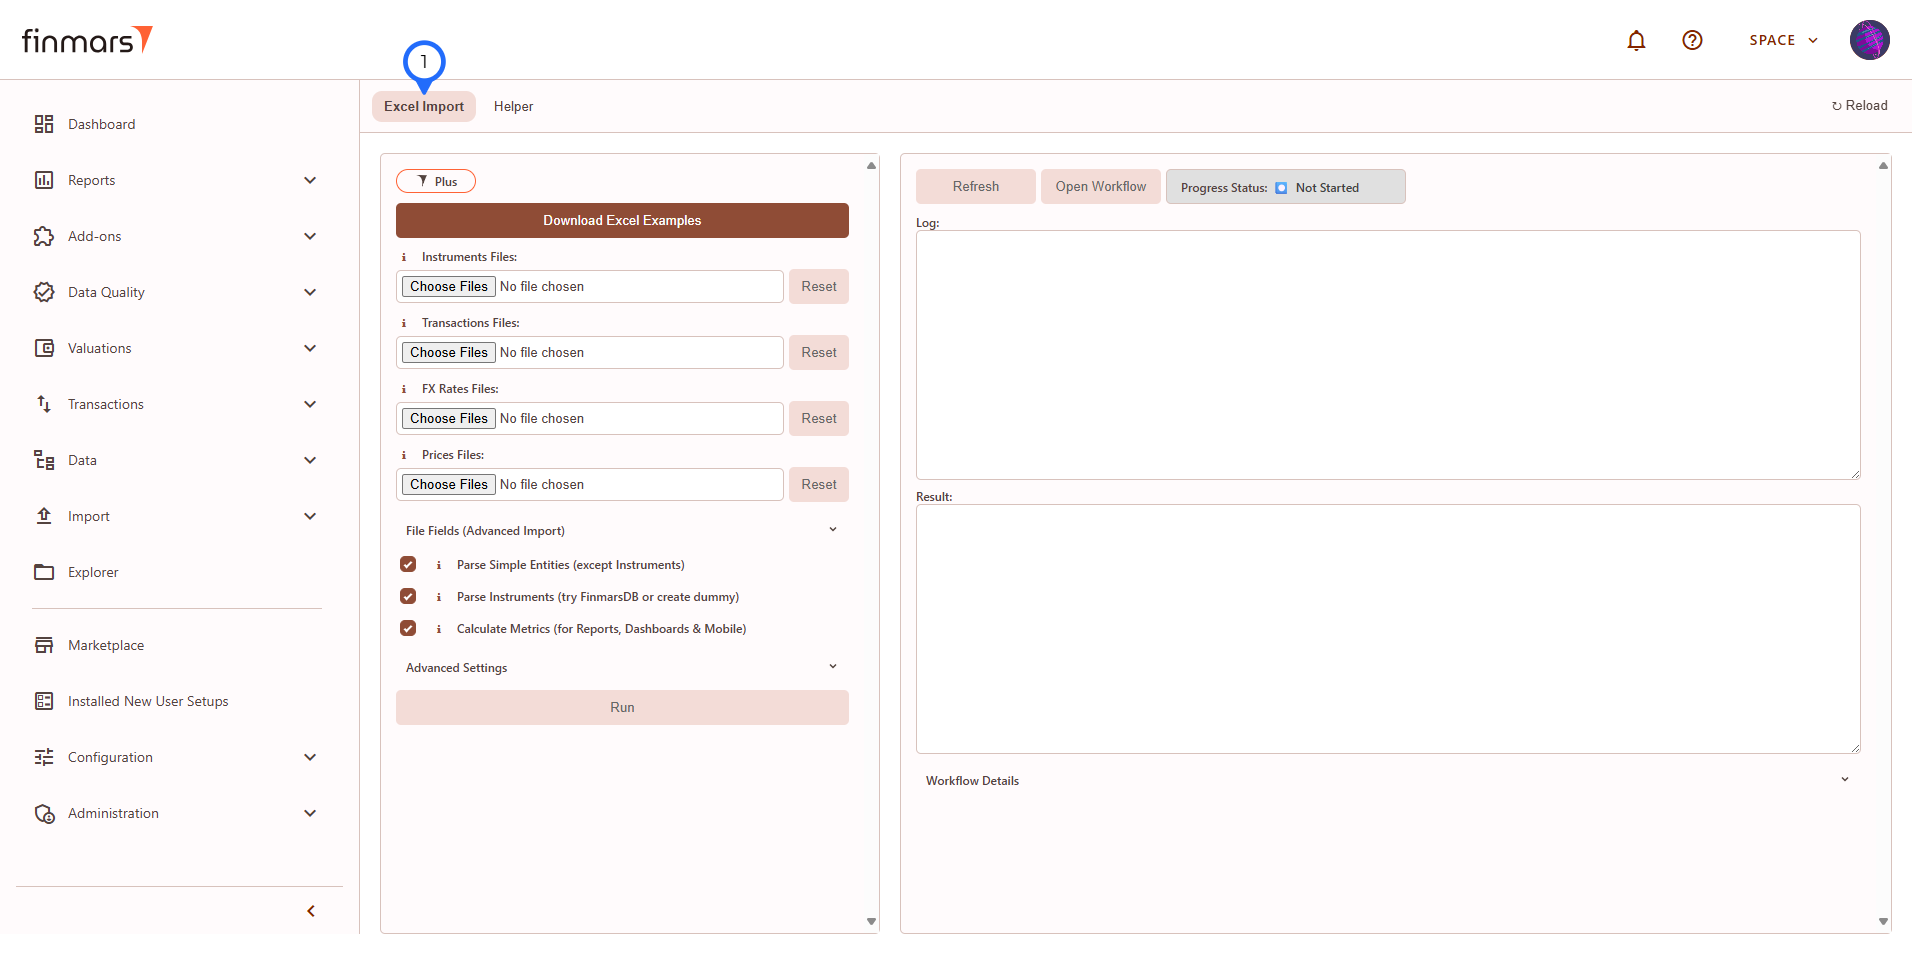
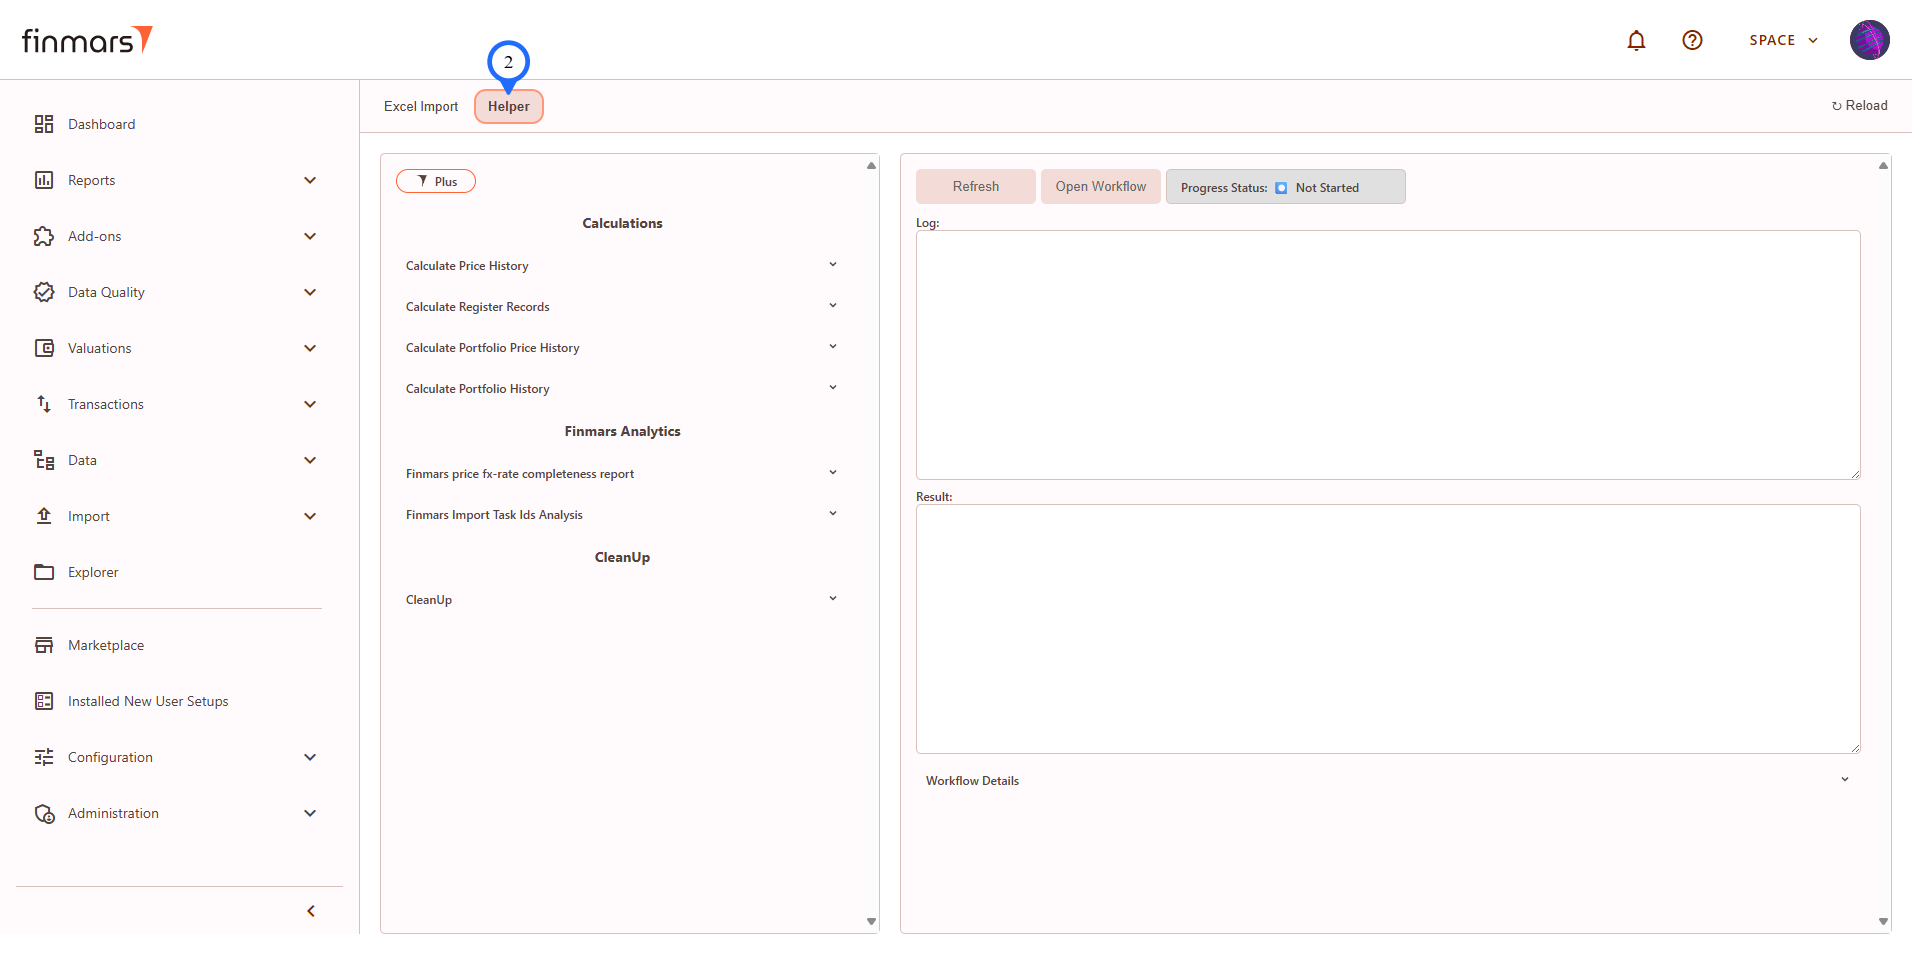
Step 2: You will see the PMS add-on page which provide the access to the Excel Import (1) interface and Helper (2) they both have similar structure of 2 panes: left pane - run page where you configure what to do, and right pane - execution info page where you can see logs and result.
In this guide we will go through how to use Excel Import tab of PMS add-on.
Step 3: Let me guide you through Excel Import tab of PMS add-on.
PMS Plus version
PMS Core version (marked differences)
Overview of the elements on the Excel Import tab:
