Check Profit and Loss Report
Prerequisites
We assume you have all prerequisites you may need, including:
- Get Access to Finmars
- Link with Finmars ID
- Install PMS Core or PMS Plus add-on
- Import Files in PMS Core and PMS Plus
- How to Do Calculations for YTM and Modified Duration (if you need YTM & Modified Duration)
Check the Profit and Loss Report
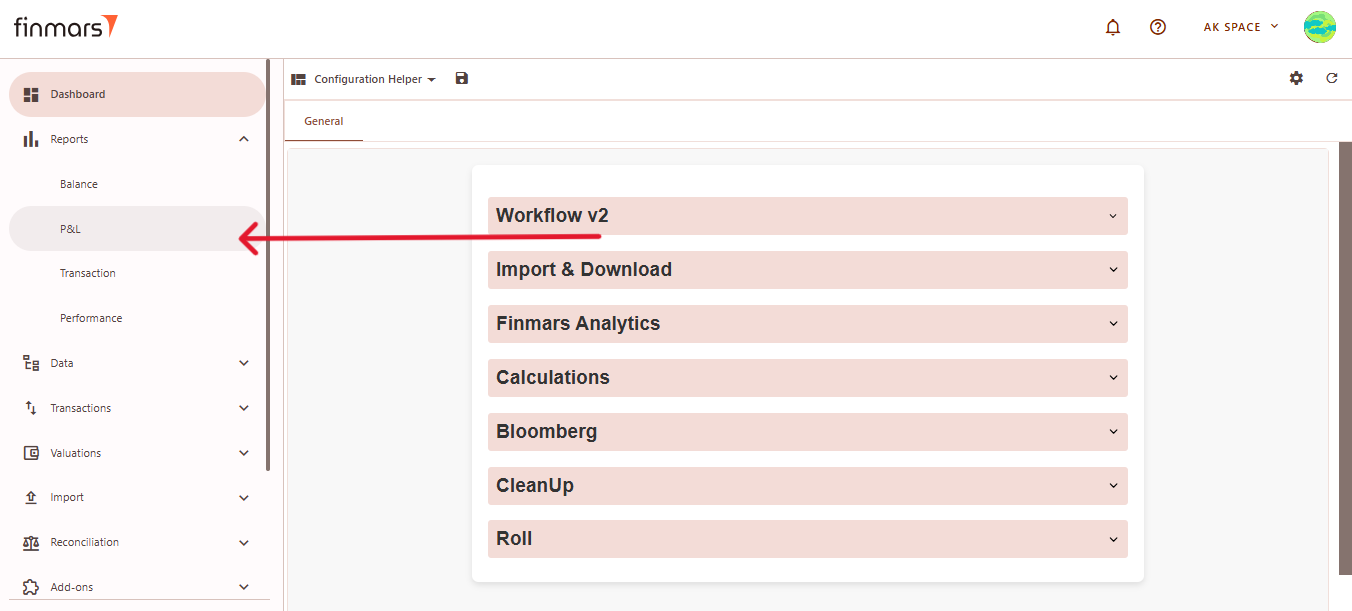
- Go to the left sidebar. Locate and select
thethe Reportthethe correct layout is selected from the dropdown in the upper-left corner. If the wrong layout is selected, change it before proceeding.
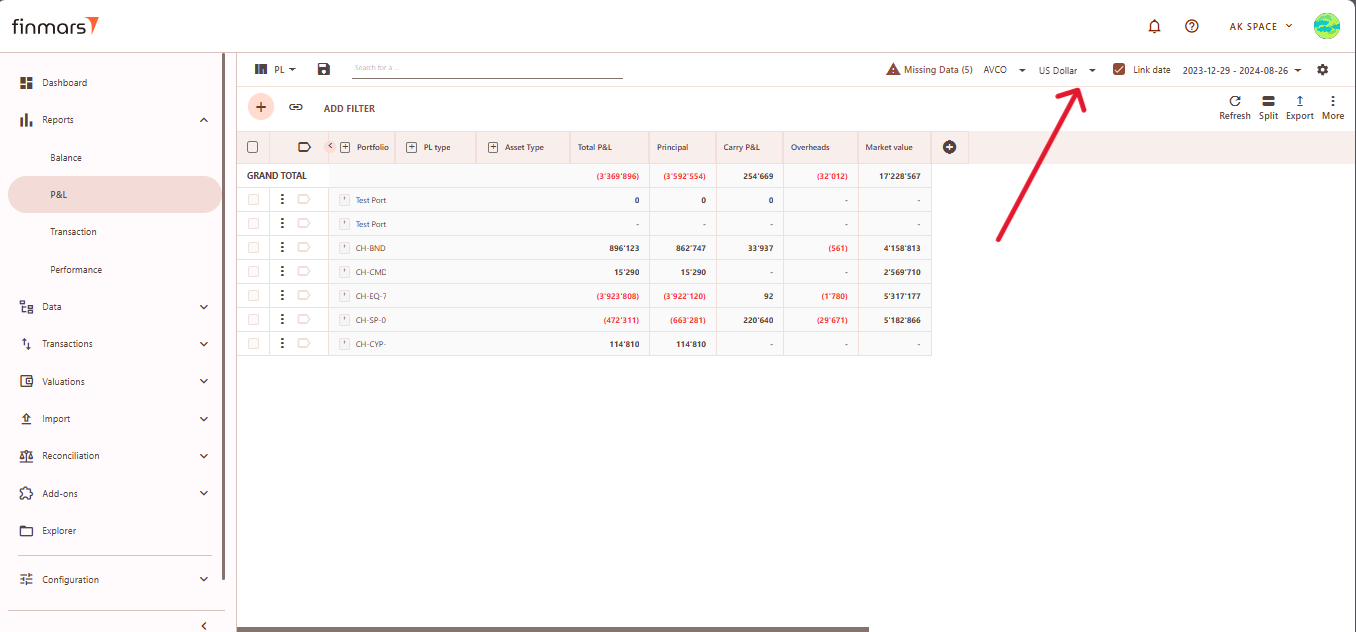
- Once on the P&L
thethe Calculation method, Pricing policy, and Currencythethe Report Date
Thesystemsystem displays the balance as of the end of the selected day. This setting should always be used to reflect accurate financial data.
For example if you want to get P&L report for Week To Date you need to select Report Date: Previous Week End -> This Week End. It means that you need to select date range FROM the END of the PREVIOUS period to the END of the CURRENT period.
- If you want to configure
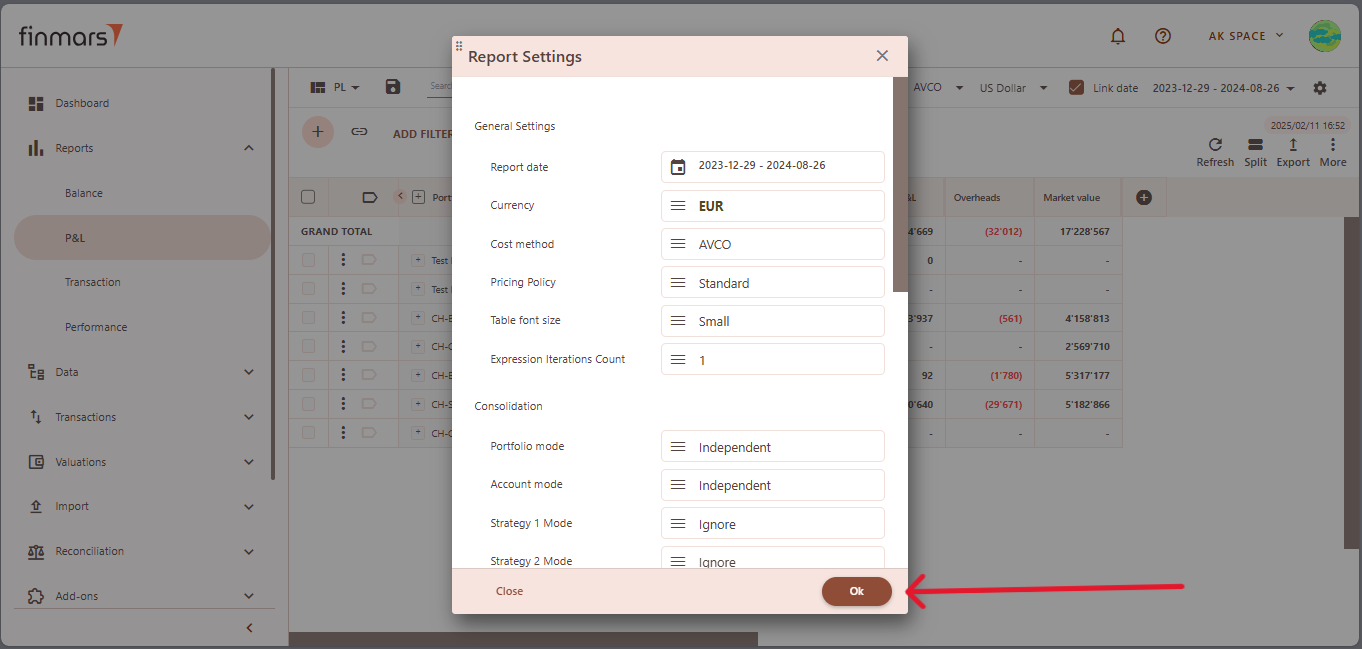
moremore detailed report settings, click onthethe gear icon in the top-right corner to open the settings panel.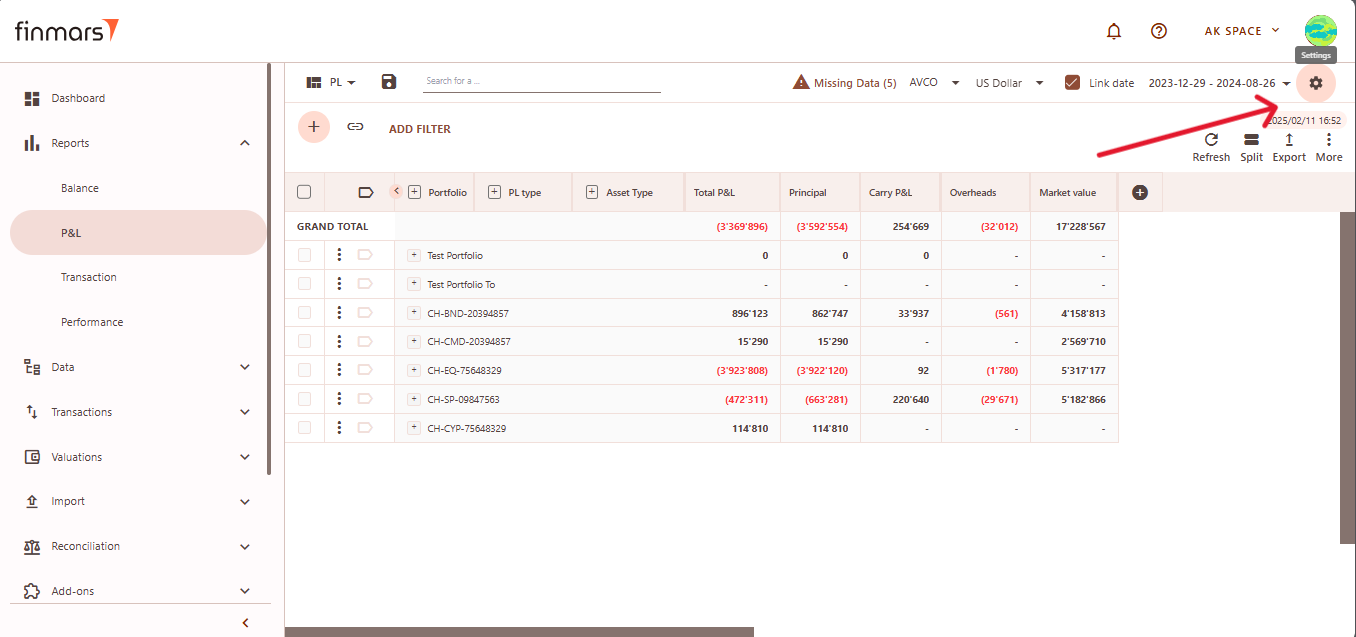
- In detailed report settings set the Report Date,
andand Cost Methodthethe Pricing Policy to determine how asset values are calculated (When selecting the Pricing Policy, you are choosing the set of prices and exchange rates to be applied.) ConfigureConfigure Portfolio Modeandand Account Mode
- Independent
- Ignore
For Example:IfIf Portfolio Modetoto Ignore, all portfolios will be merged into a single row. However,ifif Account Modetoto Independent, accounts will still be displayed as separate rows.
- Independent
- Click OK to apply the settings once all the necessary parameters are selected.
-
To apply the selected settings and view the updated report, simply refresh the page. Once refreshed, the report will be displayed with the updated parameters, reflecting the selected configurations.

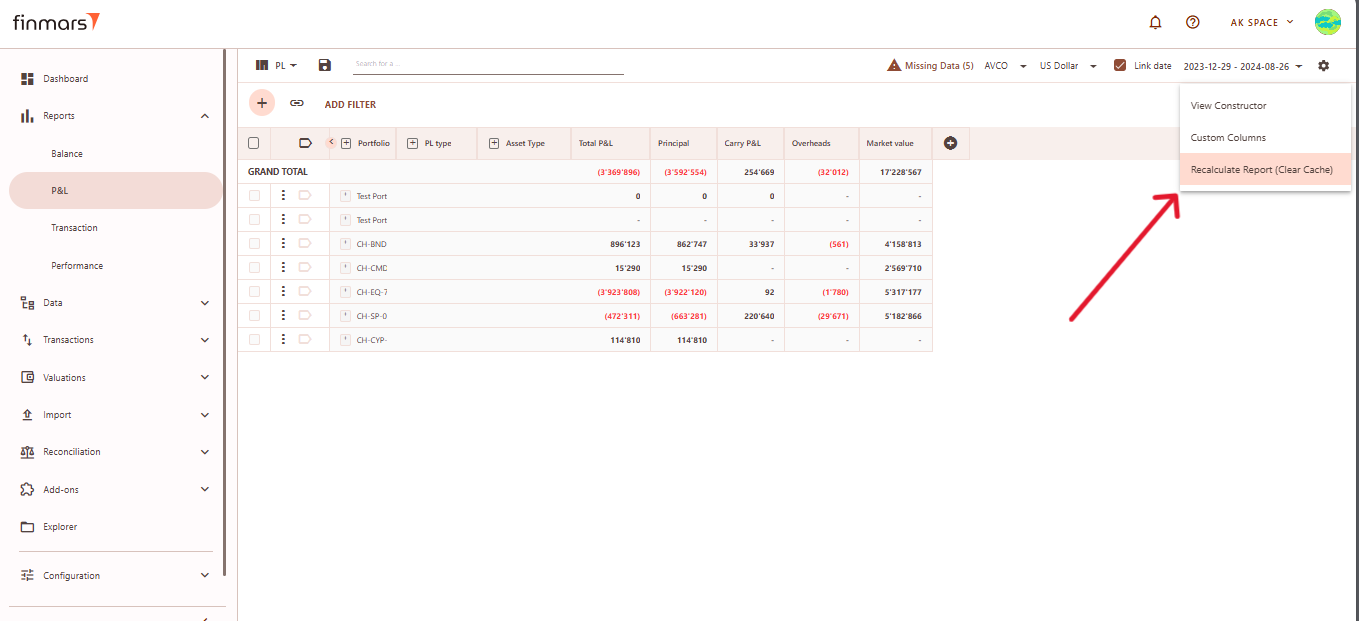
- If the data has changed, simply refreshing the page is not enough. You need to use the Recalculate Report (Clear Cache) option, found in the three-dot menu at the top-right corner next to the export icon. If the data hasn’t changed, clearing the cache is not required.
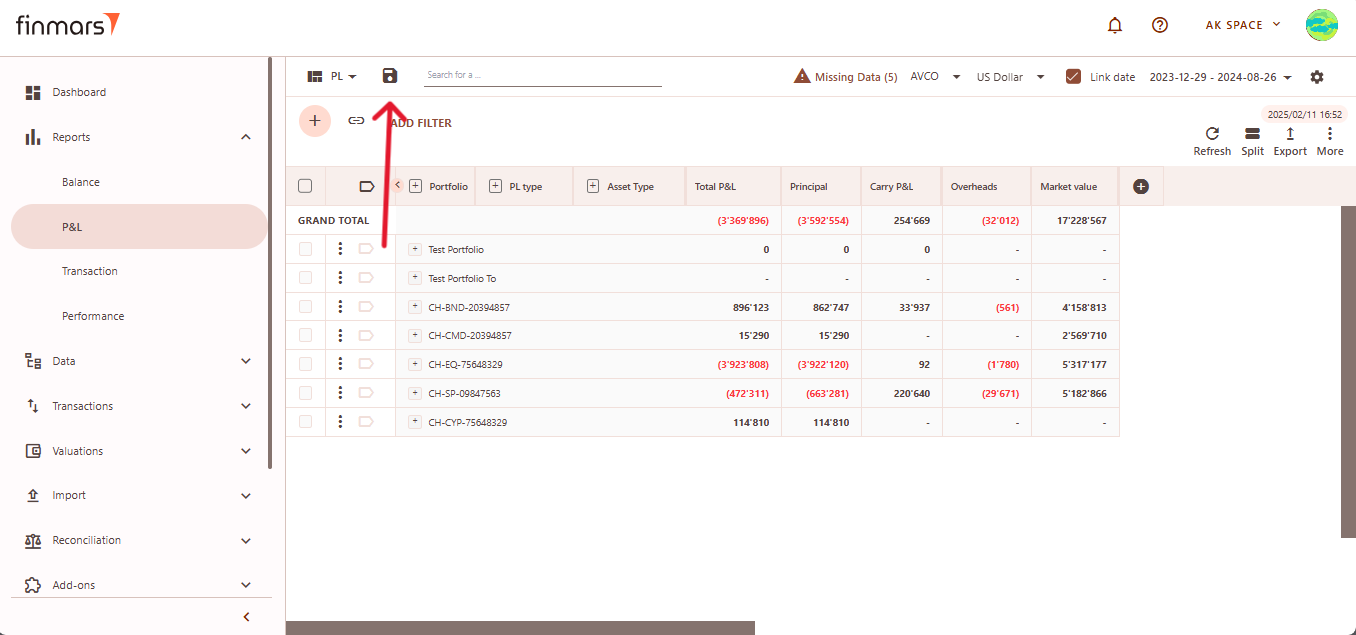
- Once the report has been prepared, verify the displayed information to ensure that the
TotalTotal and individual portfolio data are correct. If mistakes are discovered, review the imported data to ensure that all relevant files were included through the import process. If changes are required, return to the - After verifying the report, you can either save it within the system for future reference or export it for external use. To do this, locate
thethe Save
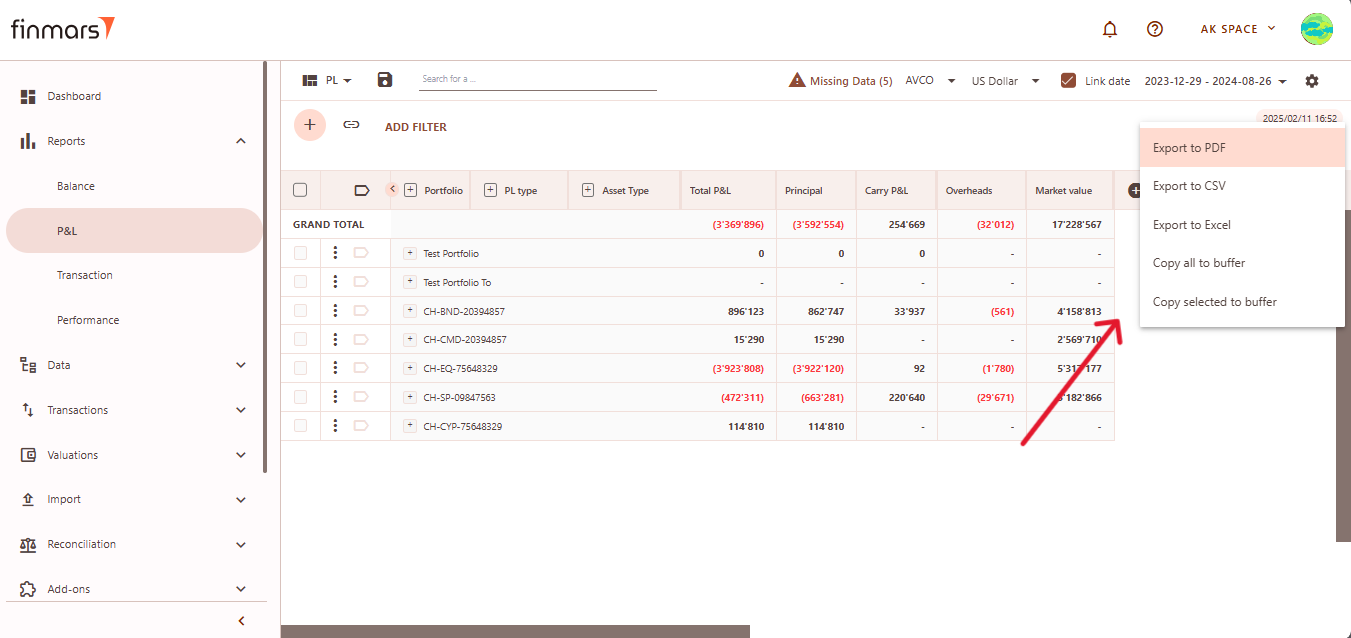
TheThe Exporttoto Export to PDF,oror Export to Excel, depending on the preferred format for further analysis. Additionally, there are options to Copy all to bufferoror Copy selected to buffer, allowing you to quickly copy report data for use in other applications. Ensure that the exported or copied data accurately reflects the report before using it for financial reporting or analysis.
- In case of any errors or missing data warnings, check that the required
thethe P&L