How to Invite a User into a Workspace
Prerequisites
We assume you have all prerequisites you may need, including:
- If needed: the VPN is configured to access the Finmars resources
- If needed: access to the Virtual Machine to work with the sensitive information
- Must have: registered in Finmars in the needed region environment (self-registered or registered by Finmars)
- Must have: having permissions set to allow continue with the Action in the Guide
- Must have: to create a new Workspace you must have a License Key (provided by Finmars)
Inviting a User into a Workspace
- Ask the the User to sent you their Username.
- They can find their Username in the upper right corner of the Profile page
- That is the exact Username they use as a login
- Please refer to the How to get Access to the Workspace (points 1-3)
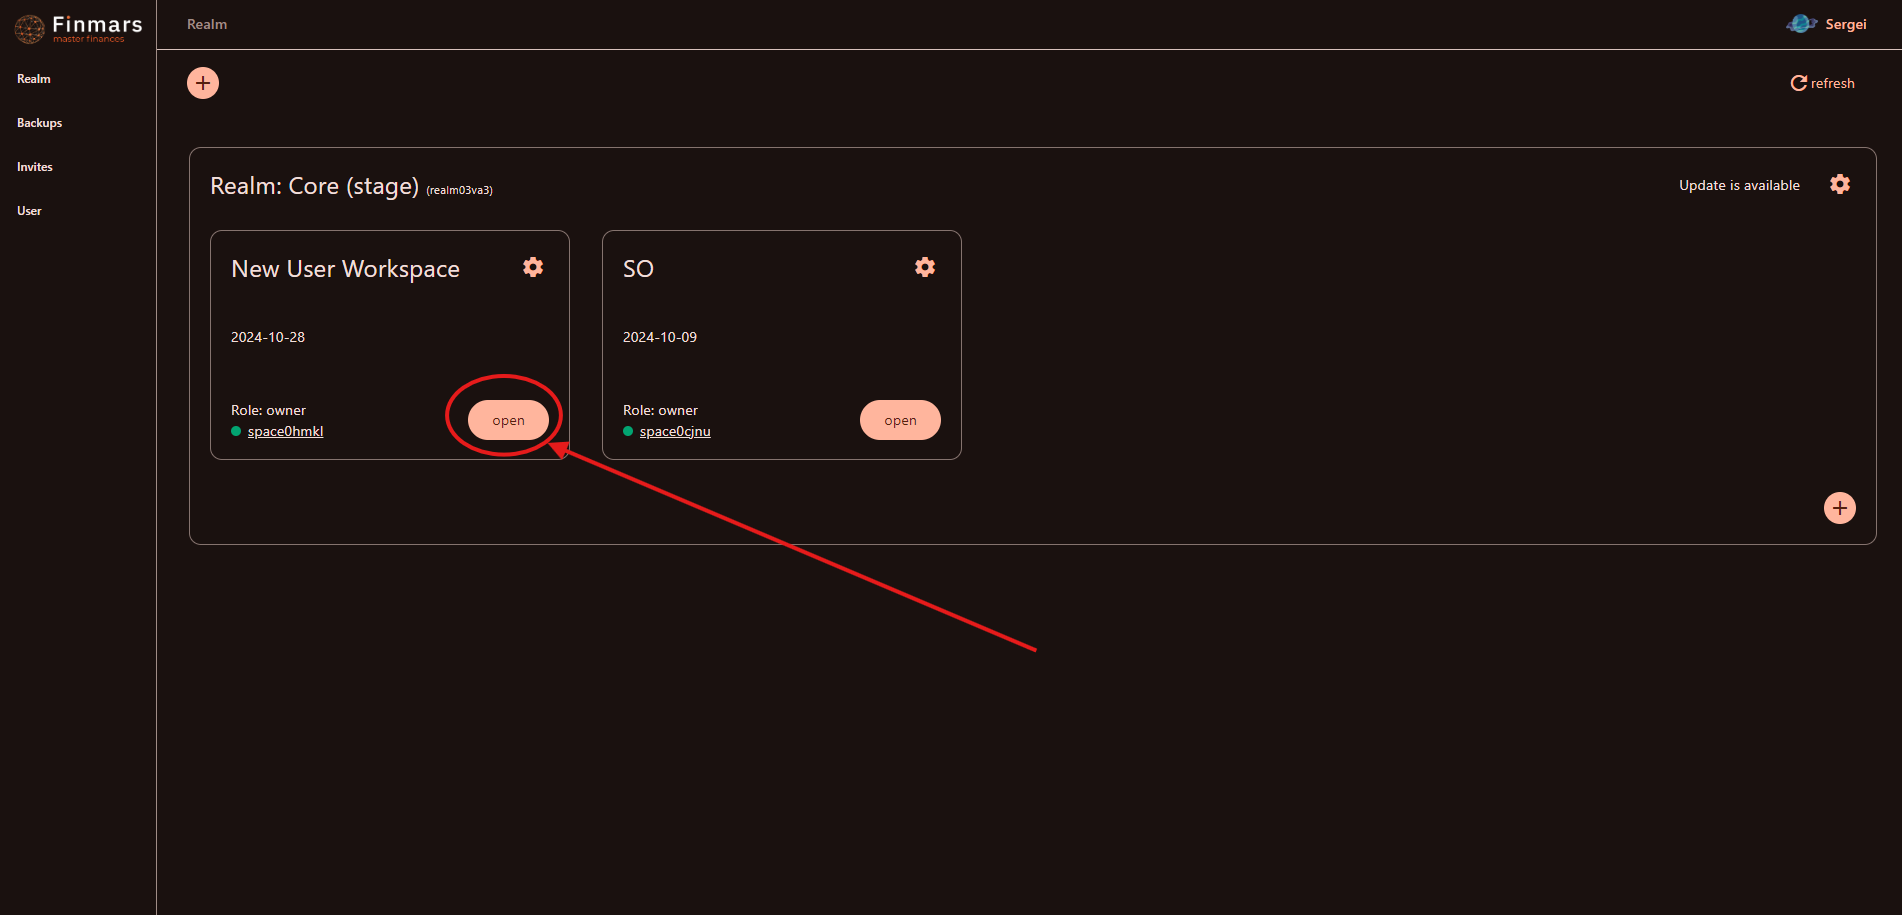
- Go to the Profile page and click "Open" button on the card of the needed Workspace (you must have an access to the Workspace)
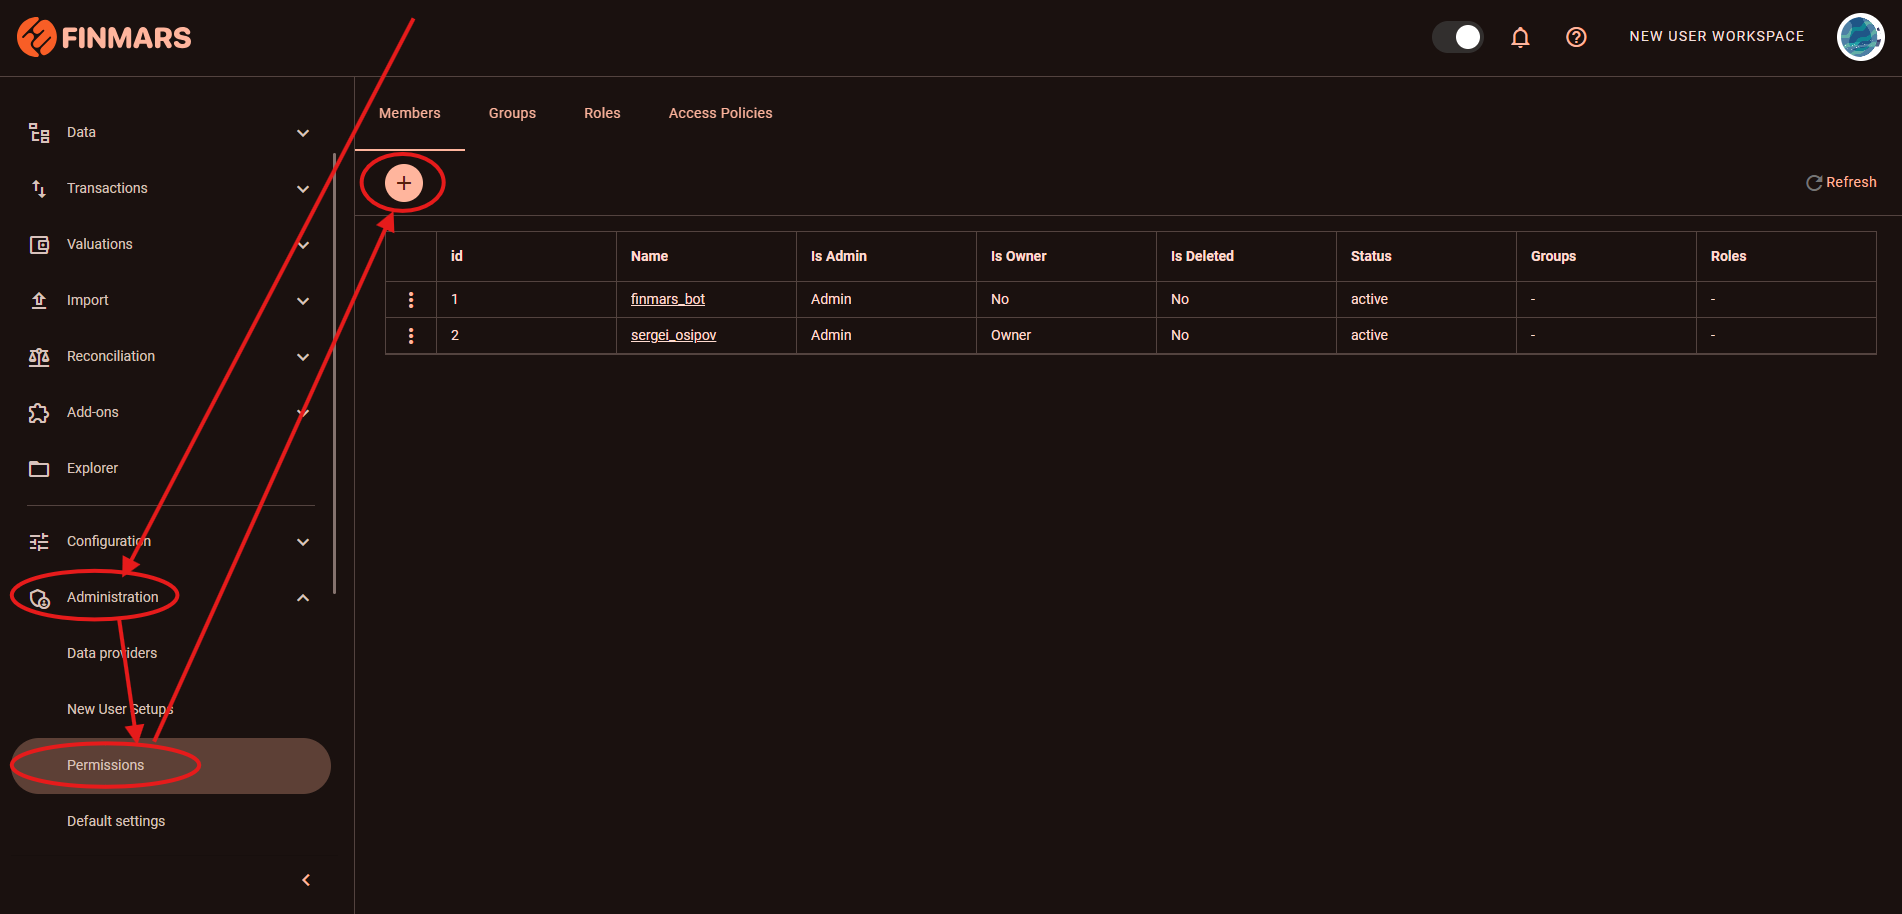
- You will be redirected to the Home page of the Workspace. You need to use the navigation menu on the left side: Administration -> Permissions, - you will be redirected to the Members tab of the Permissions page, then just click "(+)" plus button.

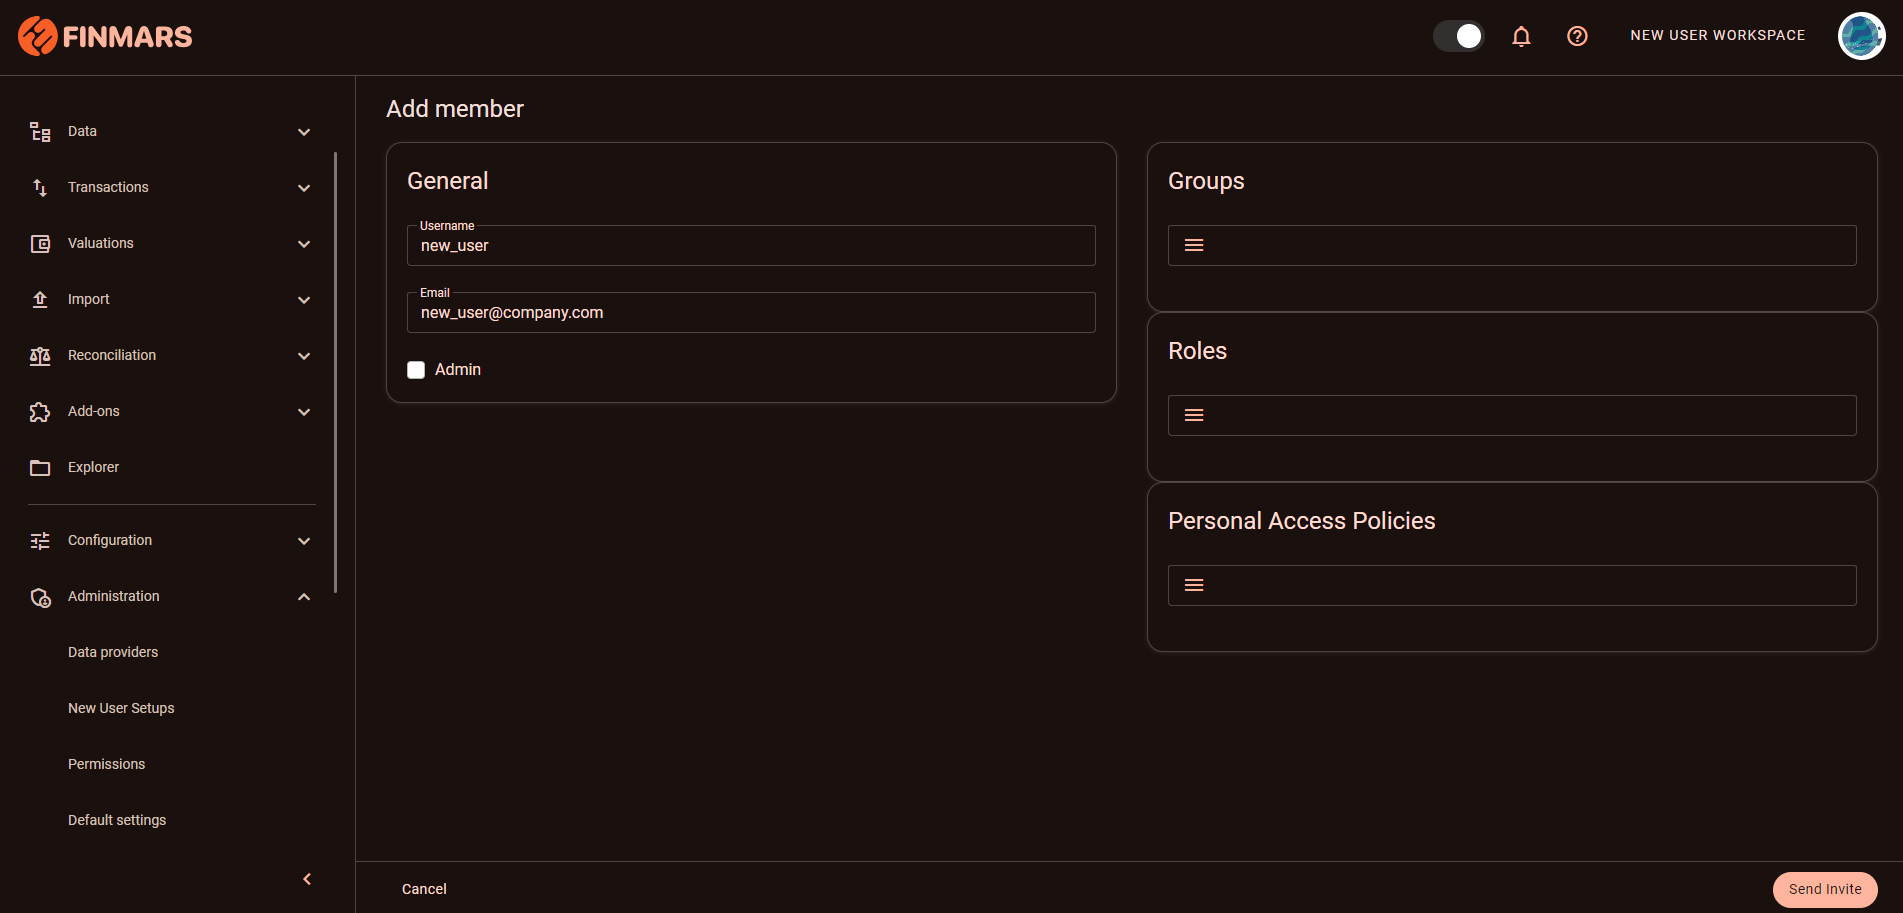
- You will be redirected to the Add Member page

- username
- Setup user's permissions:
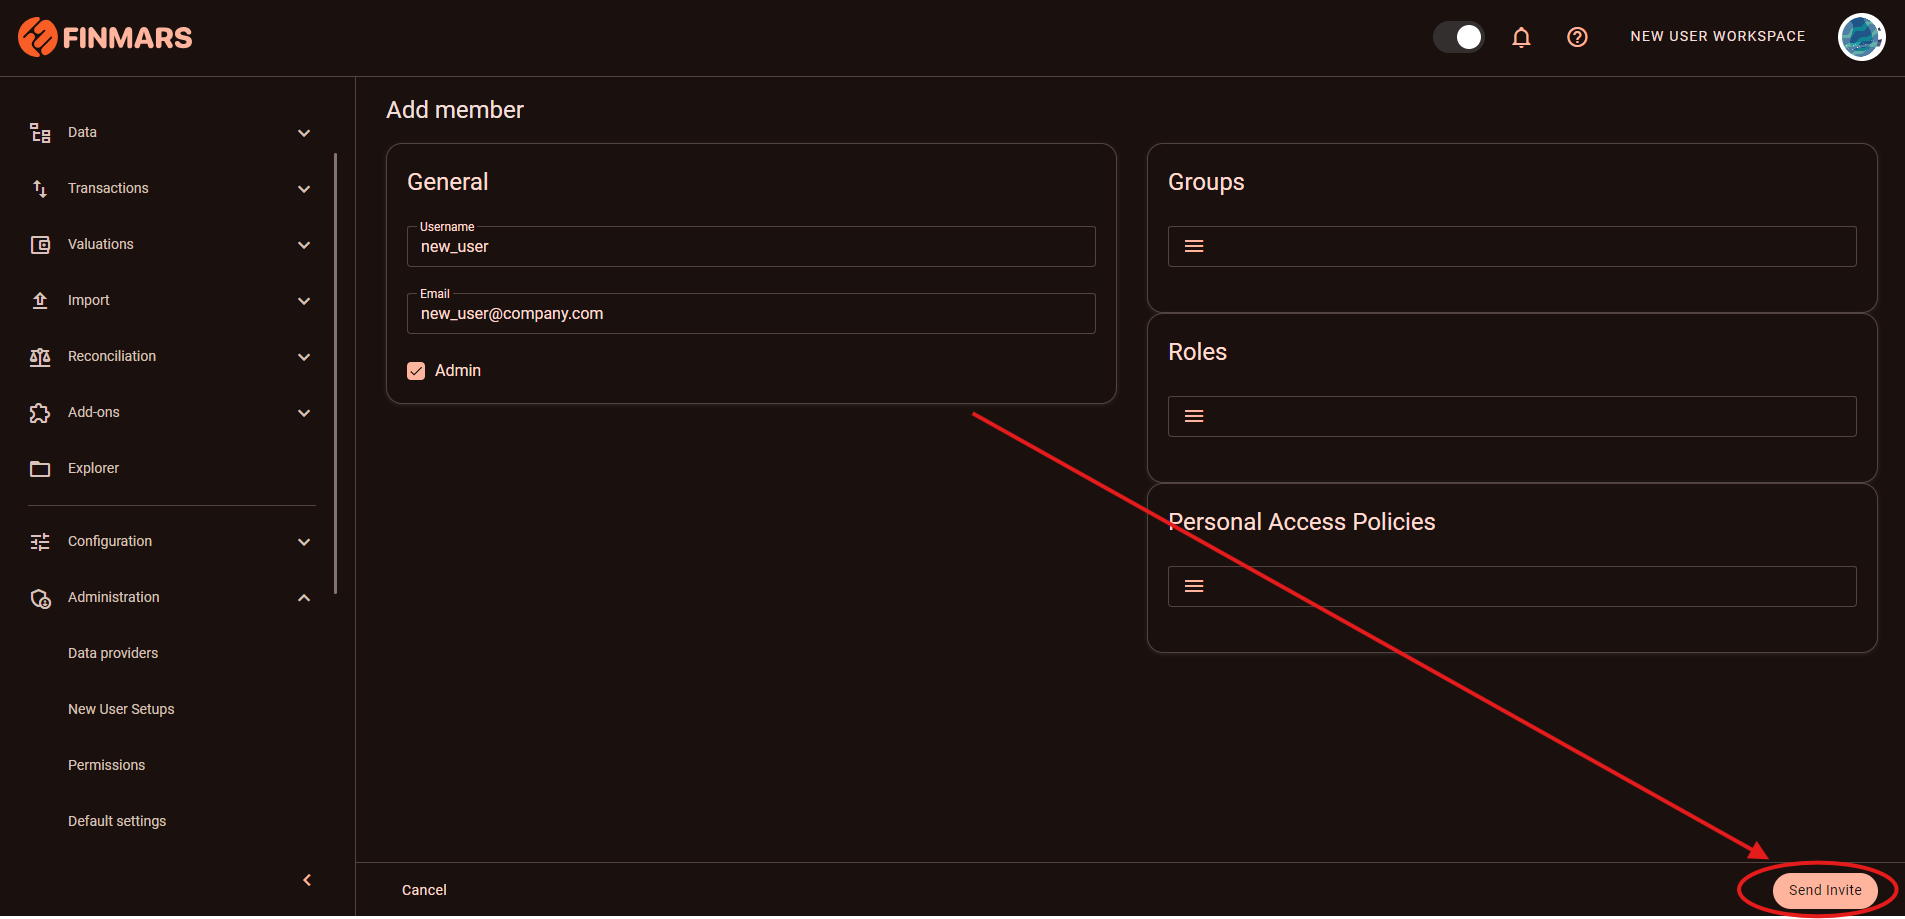
- Full Access:
- If you are adding a user with the full access to the workspace -> just click checkbox Admin, you may omit other selectors
- Specific Access Policies
- Groups -> Select from existing
- Roles -> Select from existing
- Personal Access Policies -> Select from existing
- Full Access:
- After you filled in user's info & selected user's permissions just click "Send Invite" button
- You will be redirected to the Permissions page's Member tab, you will see that the user is now added to the members list with the status "invited".
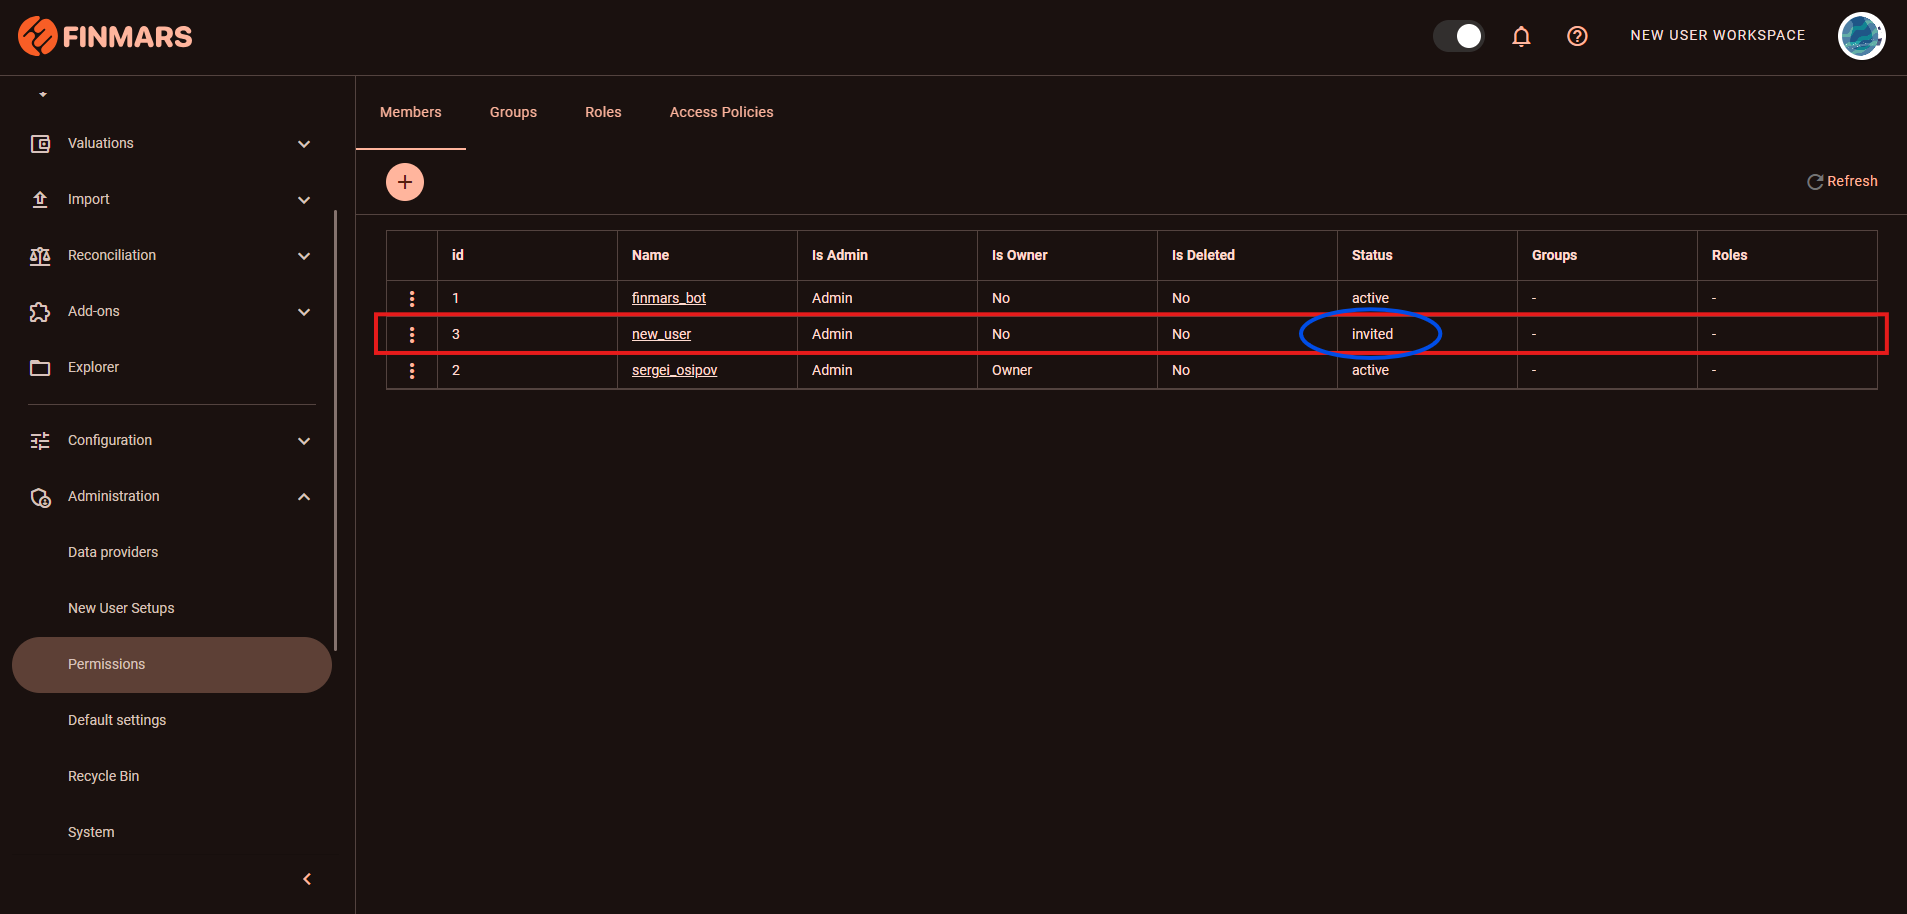
- After the user received and accepted the invitation (refer to the How to get Access to the Workspace - points 4-5) their status will change to "active"