How to Create Instrument Type
Prerequisites
We assume you have all prerequisites you may need, including:
- If needed: the VPN is configured to access the Finmars resources
- If needed: access to the Virtual Machine to work with the sensitive information
- Must have: registered in Finmars in the needed region environment (self-registered or registered by Finmars)
- Must have: having permissions set to allow continue with the Action in the Guide
- Must have: to create a new Workspace you must have a License Key (provided by Finmars)
How to Create Instrument Type
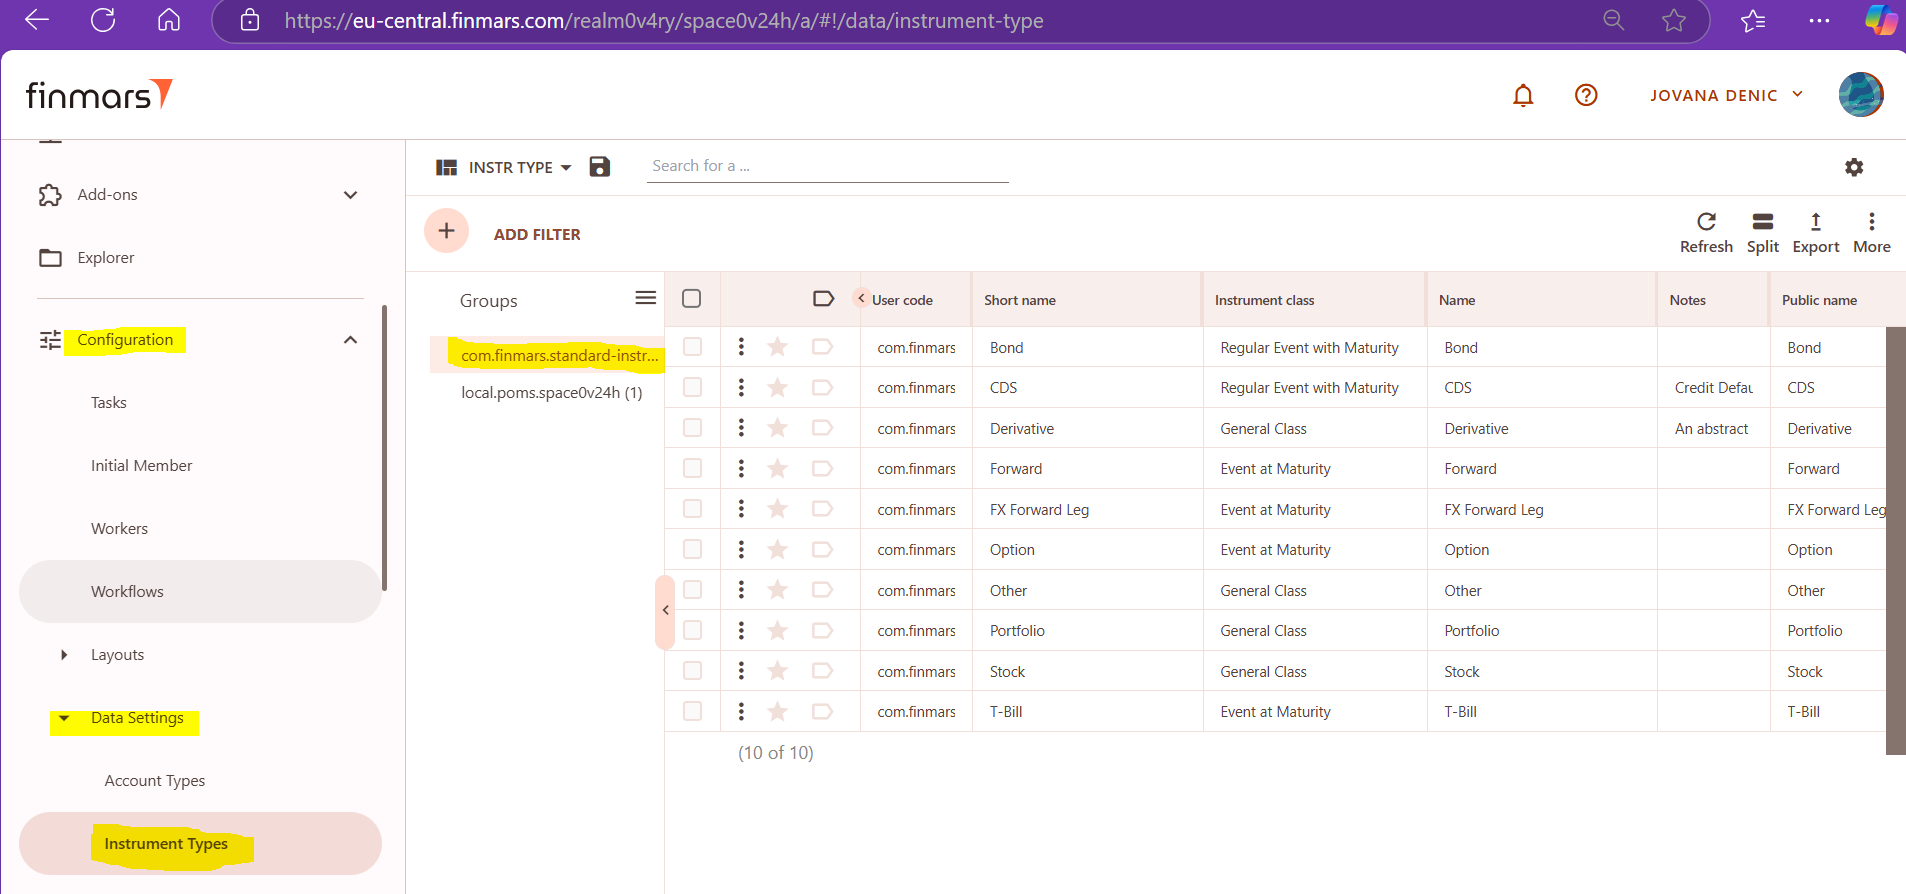
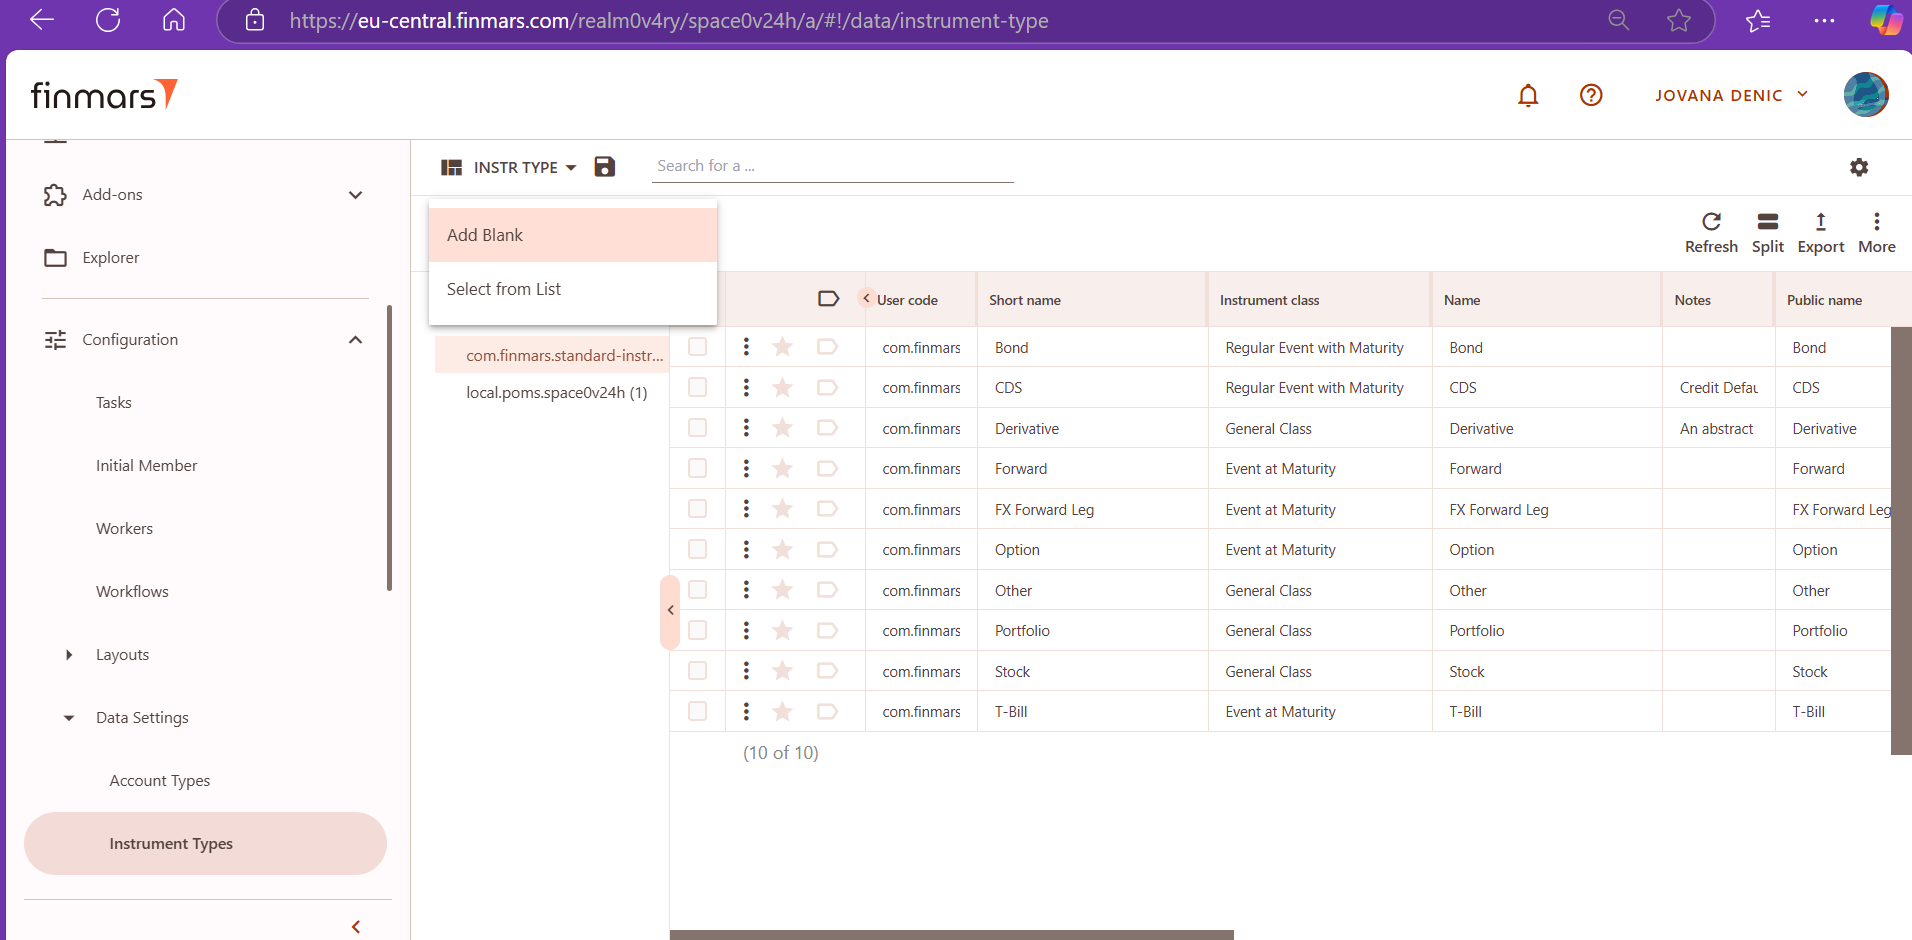
1. Open the Workspace, go to Configuration section, Data settings and select Instrument Types.
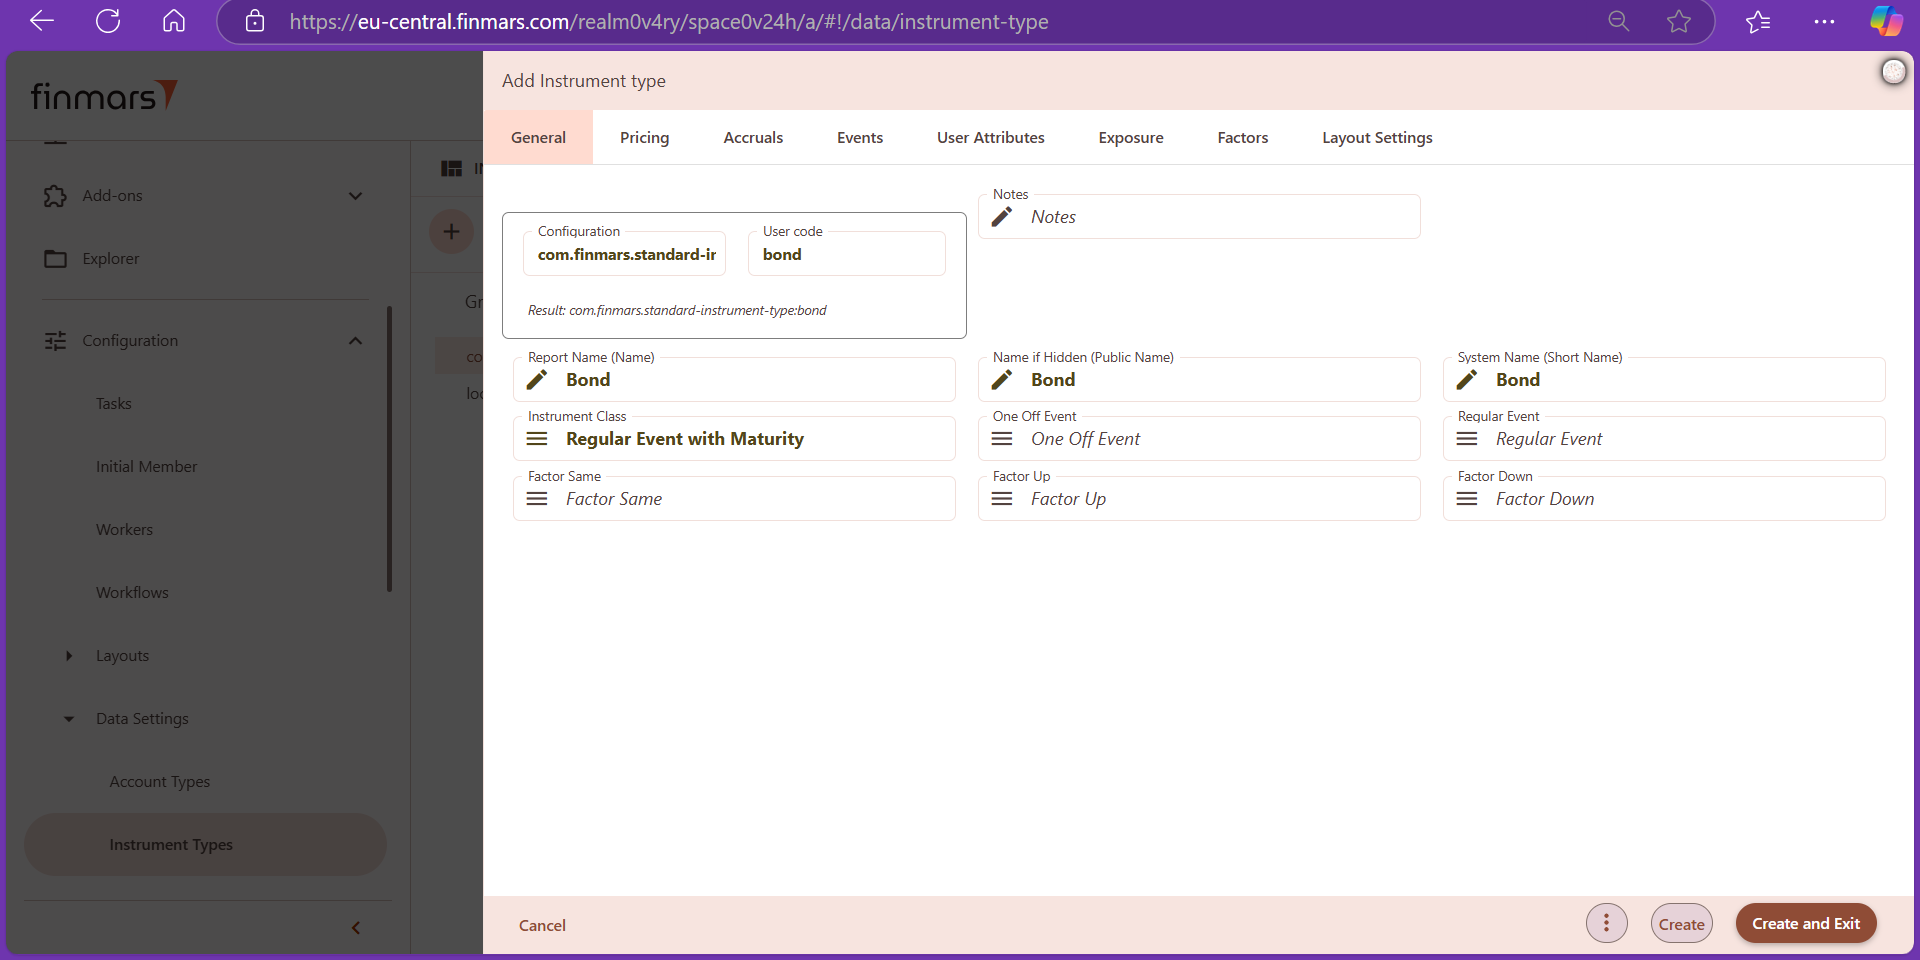
3. In General tab, we select "com.finmars.standard-instrument-type"as a configuration. Please note that configuration should reflect the module in which this instrument type is created, it can be not only standard. In this particular example, we were working with standard configuration.
For User code, we use respective instrument type name (bond, stock, t-bill, forward, etc.). This name is also used for the following fields: Report Name (Name), Name if Hidden (Public Name) and System name (Short Name). We have convention for a singular form in user code and in Names.
Instrument Class can be different, but for the bond in this illustrative example, we have chosen "Regular Event With Maturity". Kindly note that "Regular Event" and "One-Off Event" are deprecated instrument classes, thus no longer in use.
We don't make any selections for Factor Same, Factor Up and Factor Down.
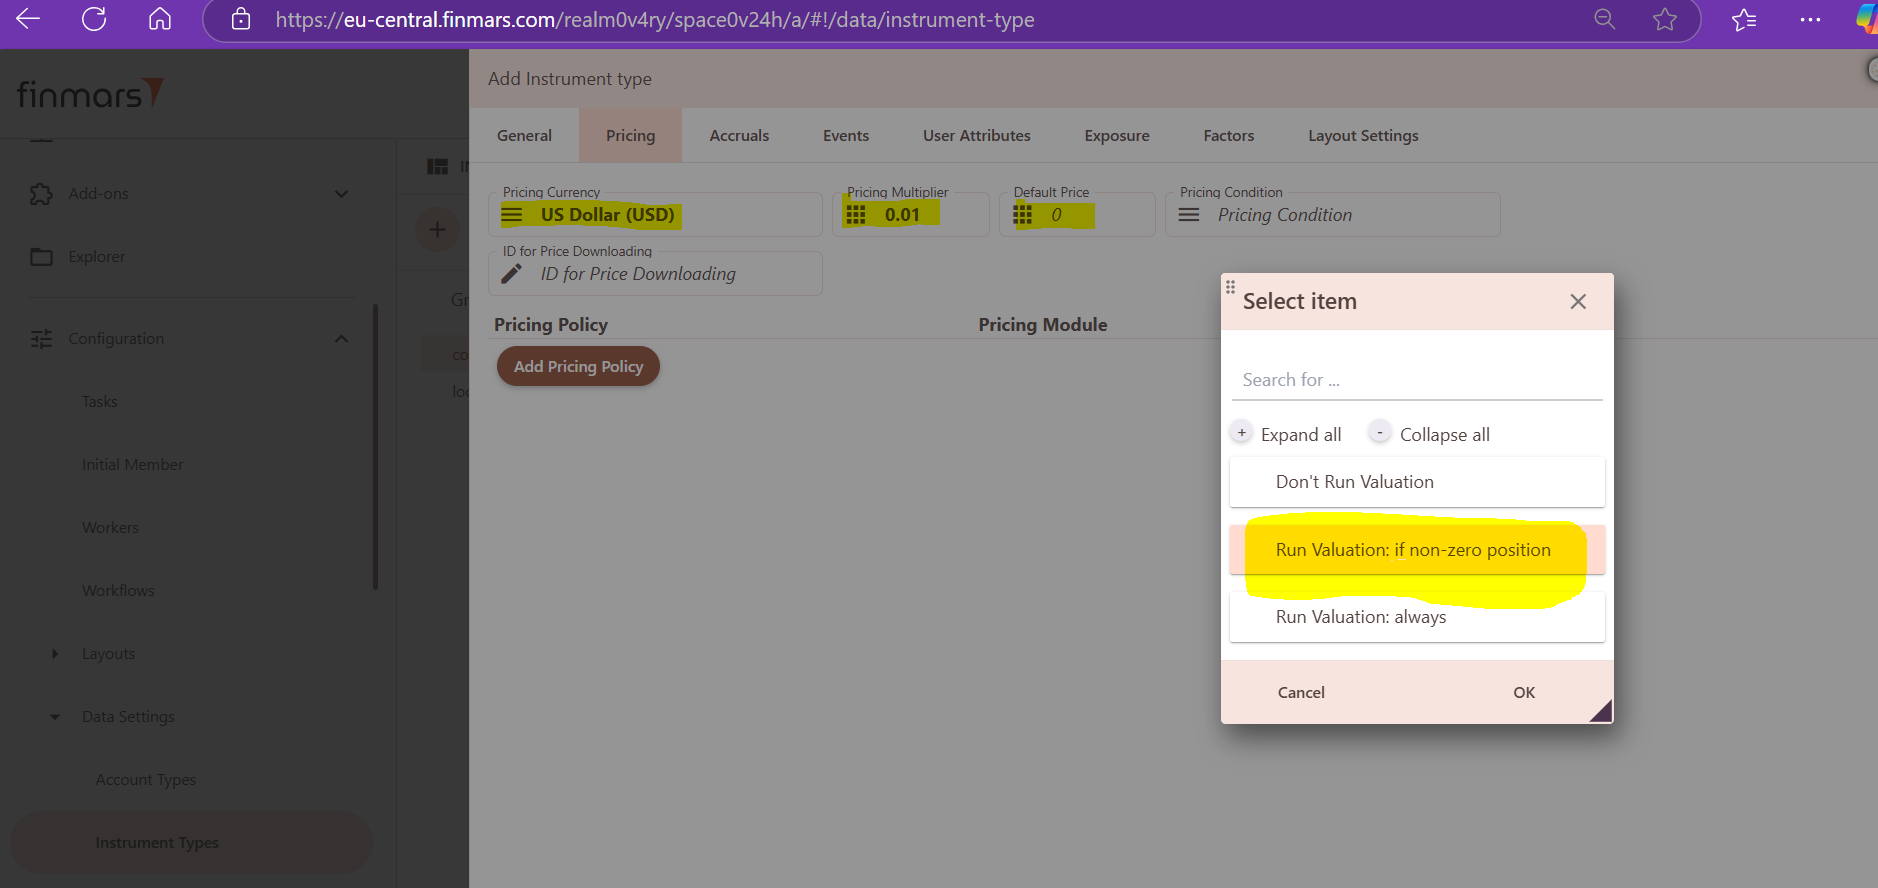
4. In Pricing Tab, from the drop-down menu, we select USD for pricing currency. When it comes to Price Multiplier, we use 1 for all instrument except for the bonds and t-bills, where we use 0.01 as a Price Multiplier. We set "0" (zero) as Default Price. Default price can have different values (not only 0); it is just a price which will be used in pricing if no price was provided for importing.
For Pricing Condition, from the drop-down menu we select: Run Valuation: if non-zero position.
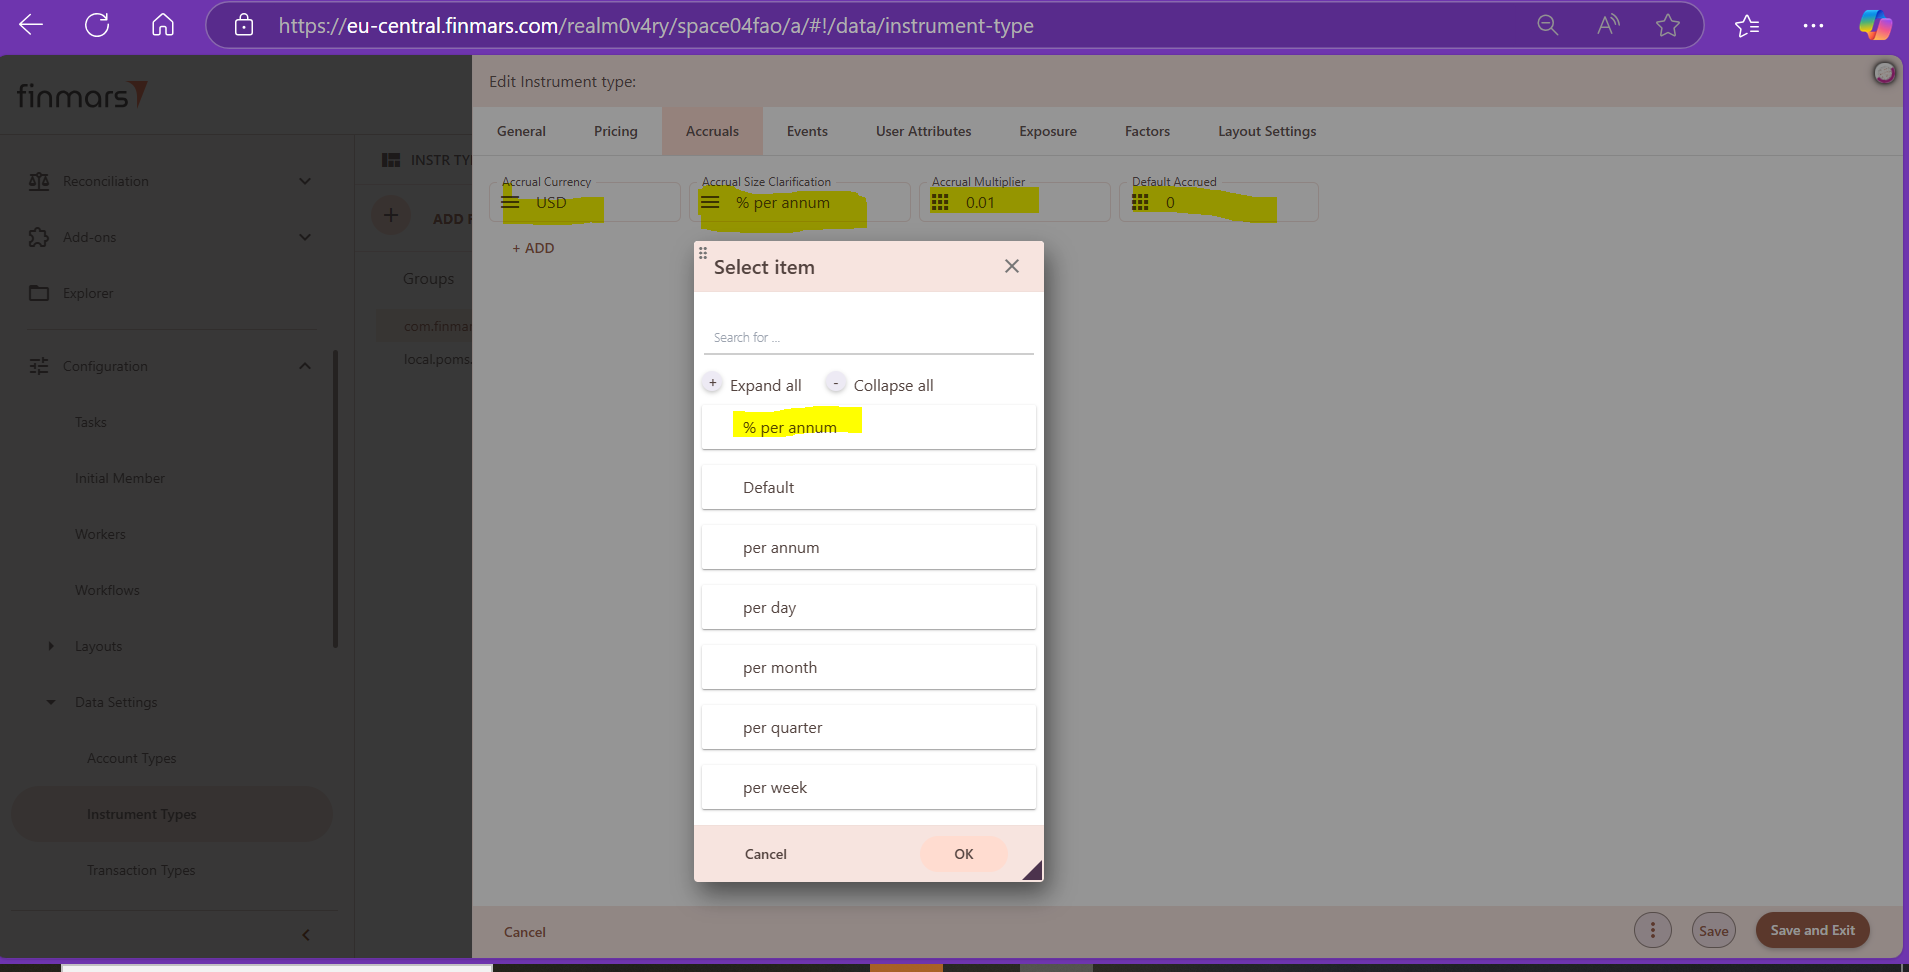
5. In Accruals tab, from the drop-down menu, we select USD as Accrual Currency. Further, from the second drop-down menu, we select % per annum as Accrual Size Clarification. Only for portfolio, we select Default as Accrual Size Clarification. Accrual Multiplier is set at 1 for all instruments except bonds and t-bills, for which Accrual Multiplier is set at 0.01. For all instrument types, we use 0 (zero) as Default Accrued. Default Accrued can have different values (not only 0), depending on particular instrument type.
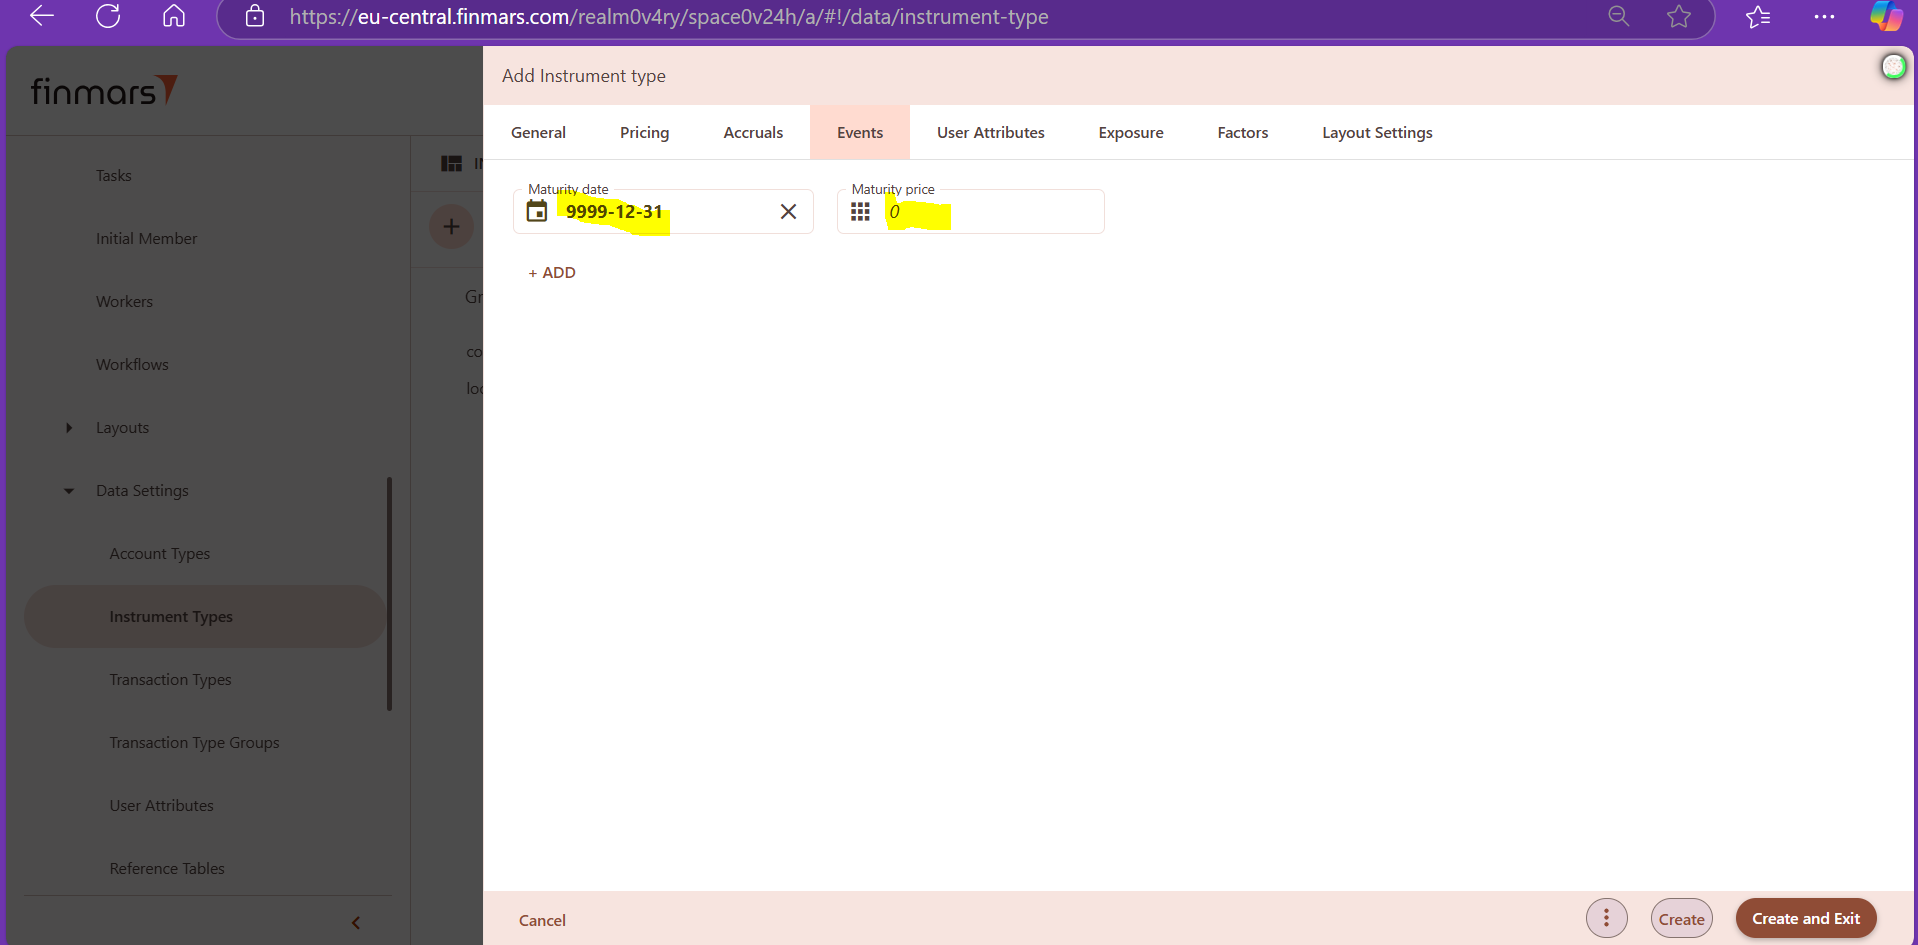
6. In Events tab, we set 9999-12-31 as a maturity date and 0 (zero) as maturity price. It is important to mention that for each instrument, maturity date and maturity price have to be updated to reflect actual contractual terms (this is done before importing data sets).
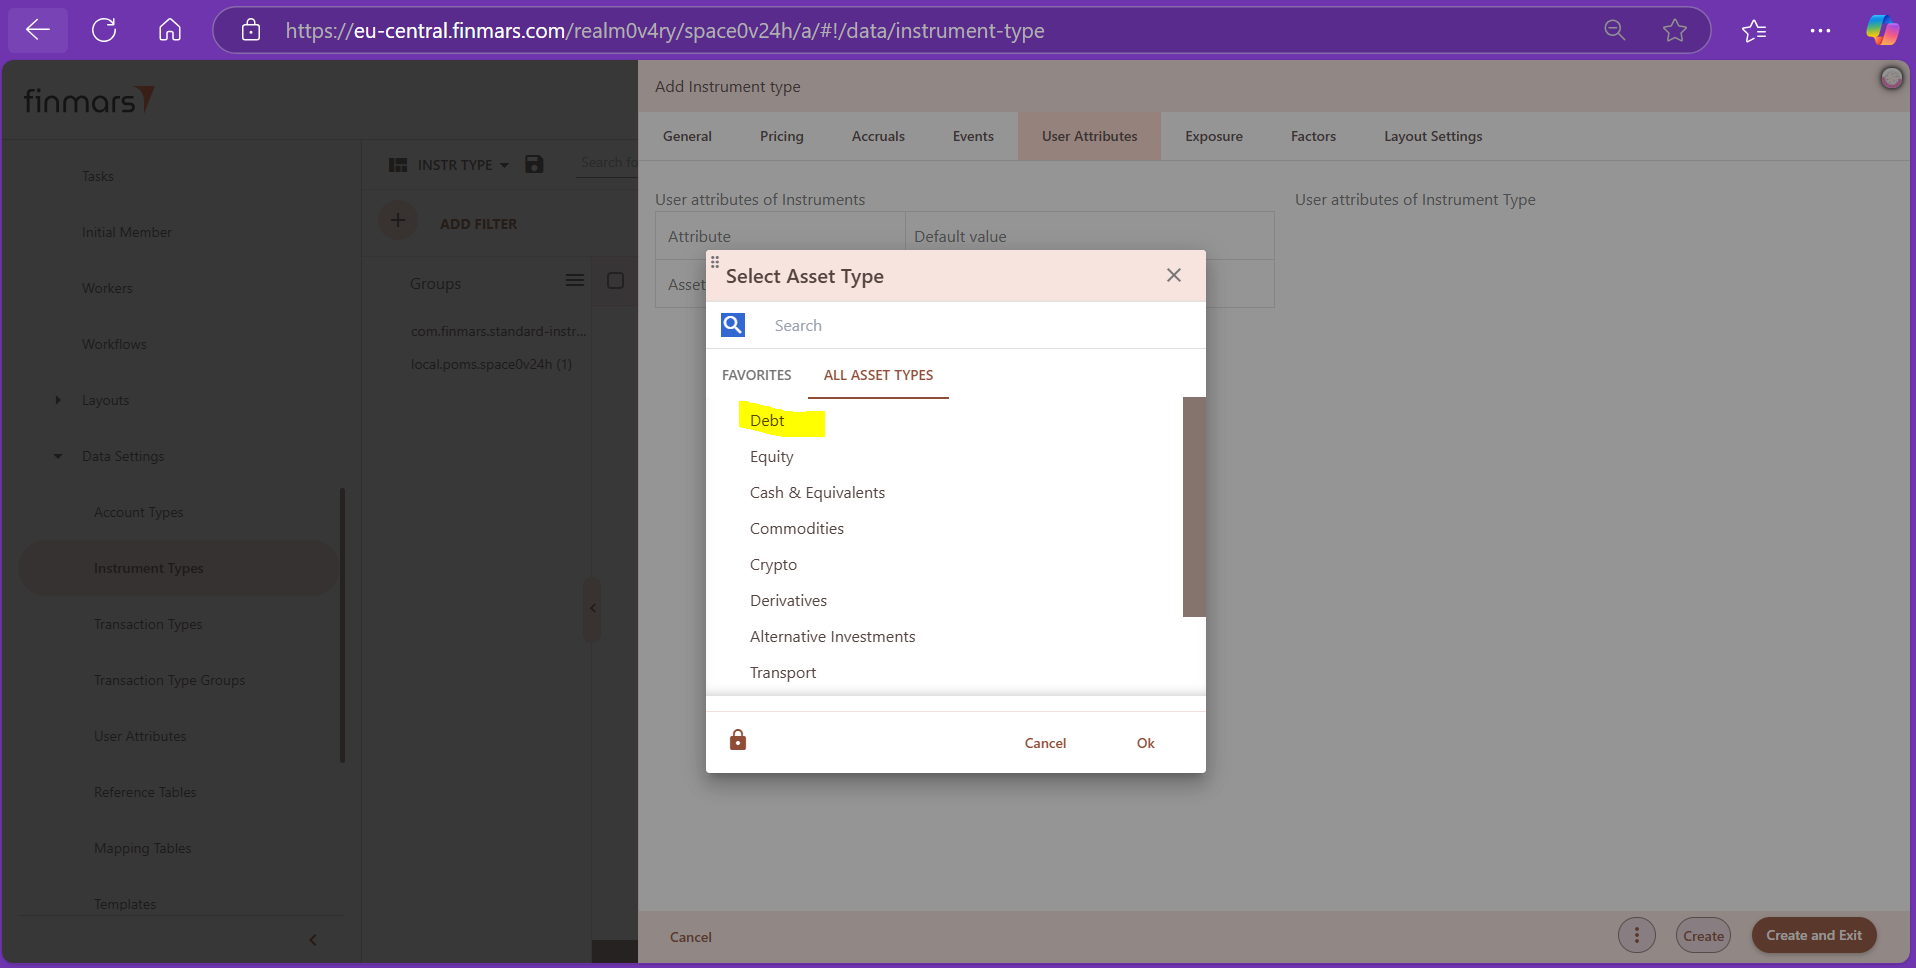
7. In User Attributes tab, from the drop-down menu we select Asset Types for respective instrument type. Bonds and t-bills are classified as debt; stocks are classified as equity; options, CDS, forward, FX forward leg are classified as derivative; portfolio and other are classified as other asset type.
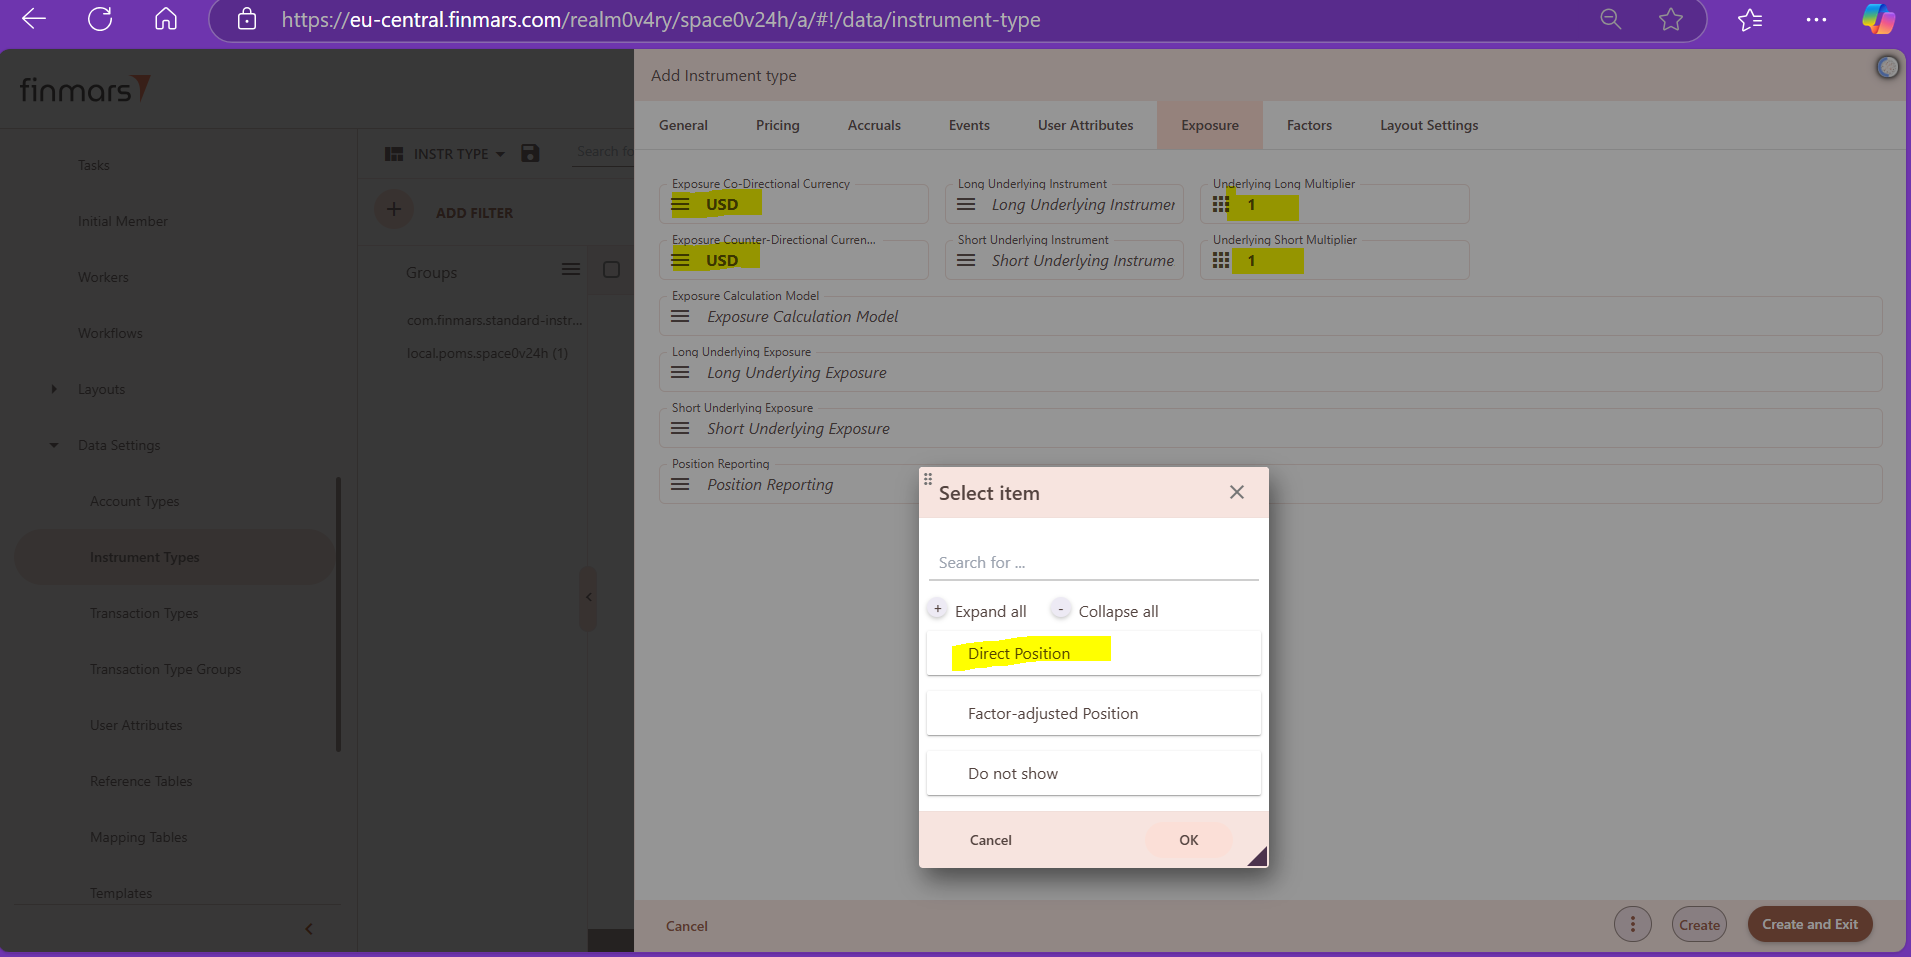
8. Exposure tab is deprecated. In Exposure tab, for Exposure Co-Directional Currency and Exposure Counter-Directional Currency, we select USD from the drop-down menu. Please note that we don't make any selection for currencies for FX forward leg, forward, option and derivative in this respect. We set Underlying Long Multiplier and Underlying Short Multiplier at 1. For Position Reporting, we select Direct Position from the drop-down menu. For other fields relevant for exposure calculation, we don't make any selections.
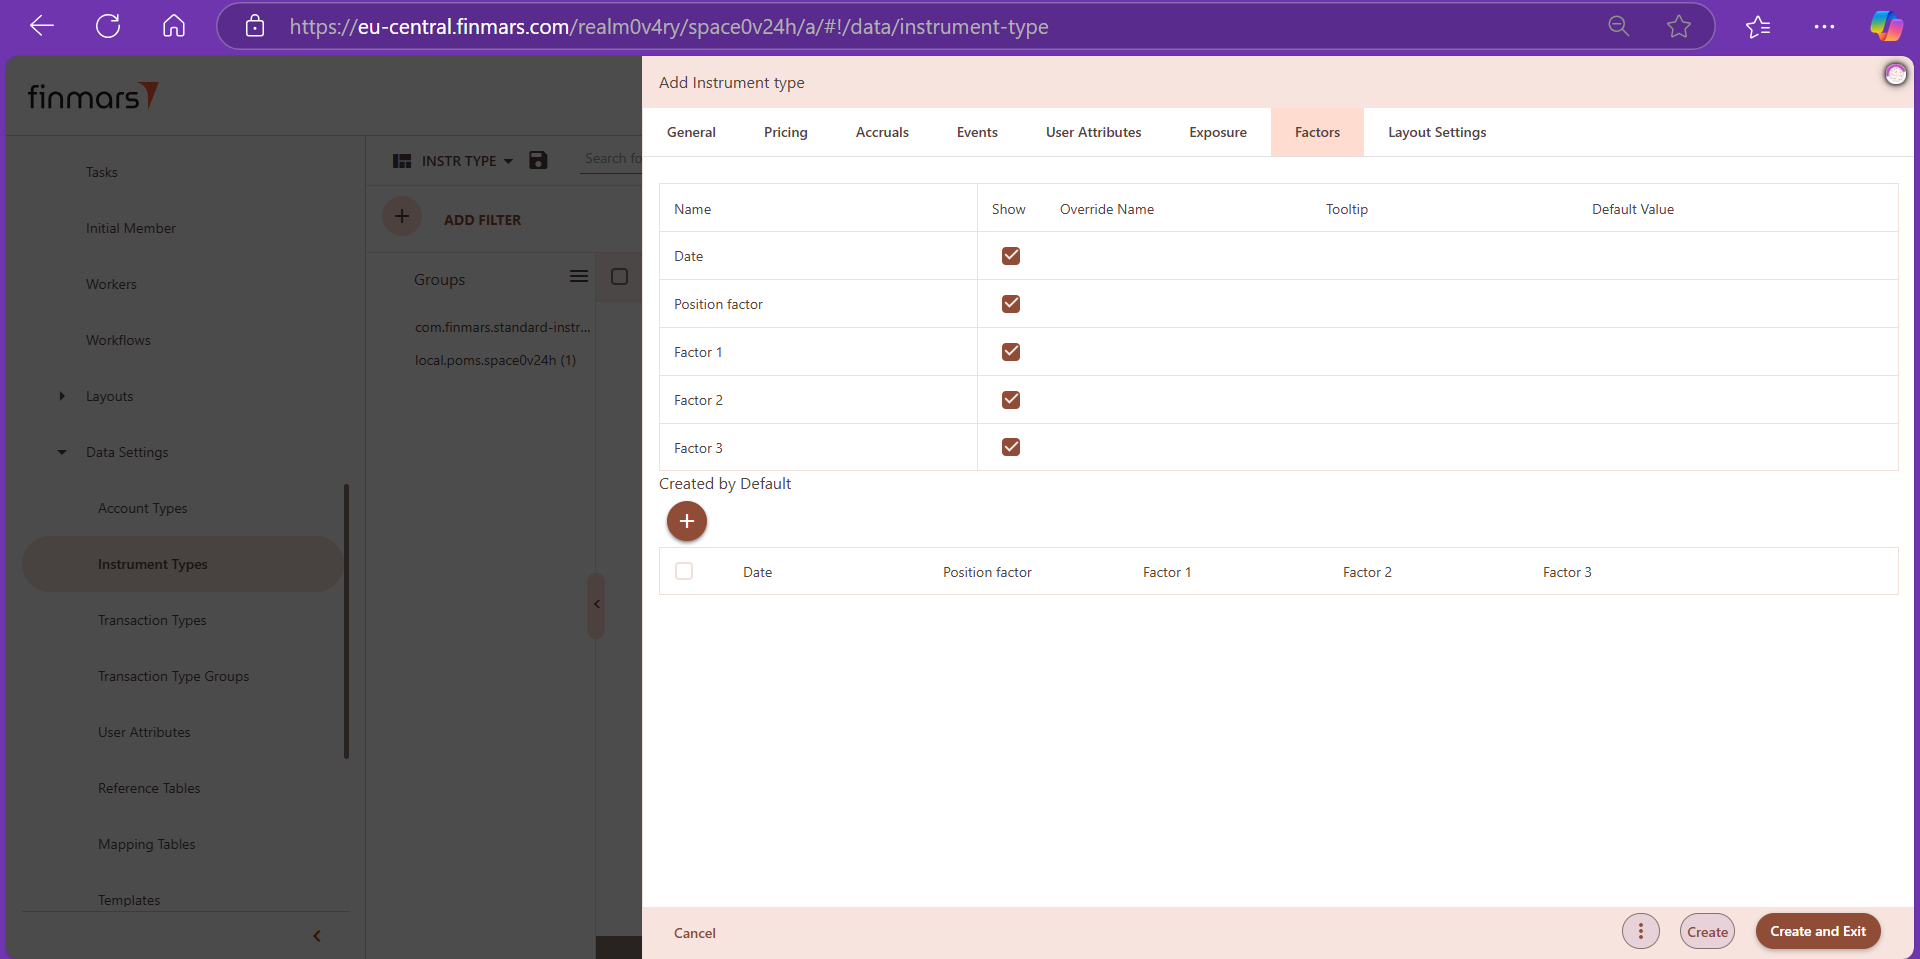
9. Factors tab is deprecated. In Factors tab, we currently do not make any selections.
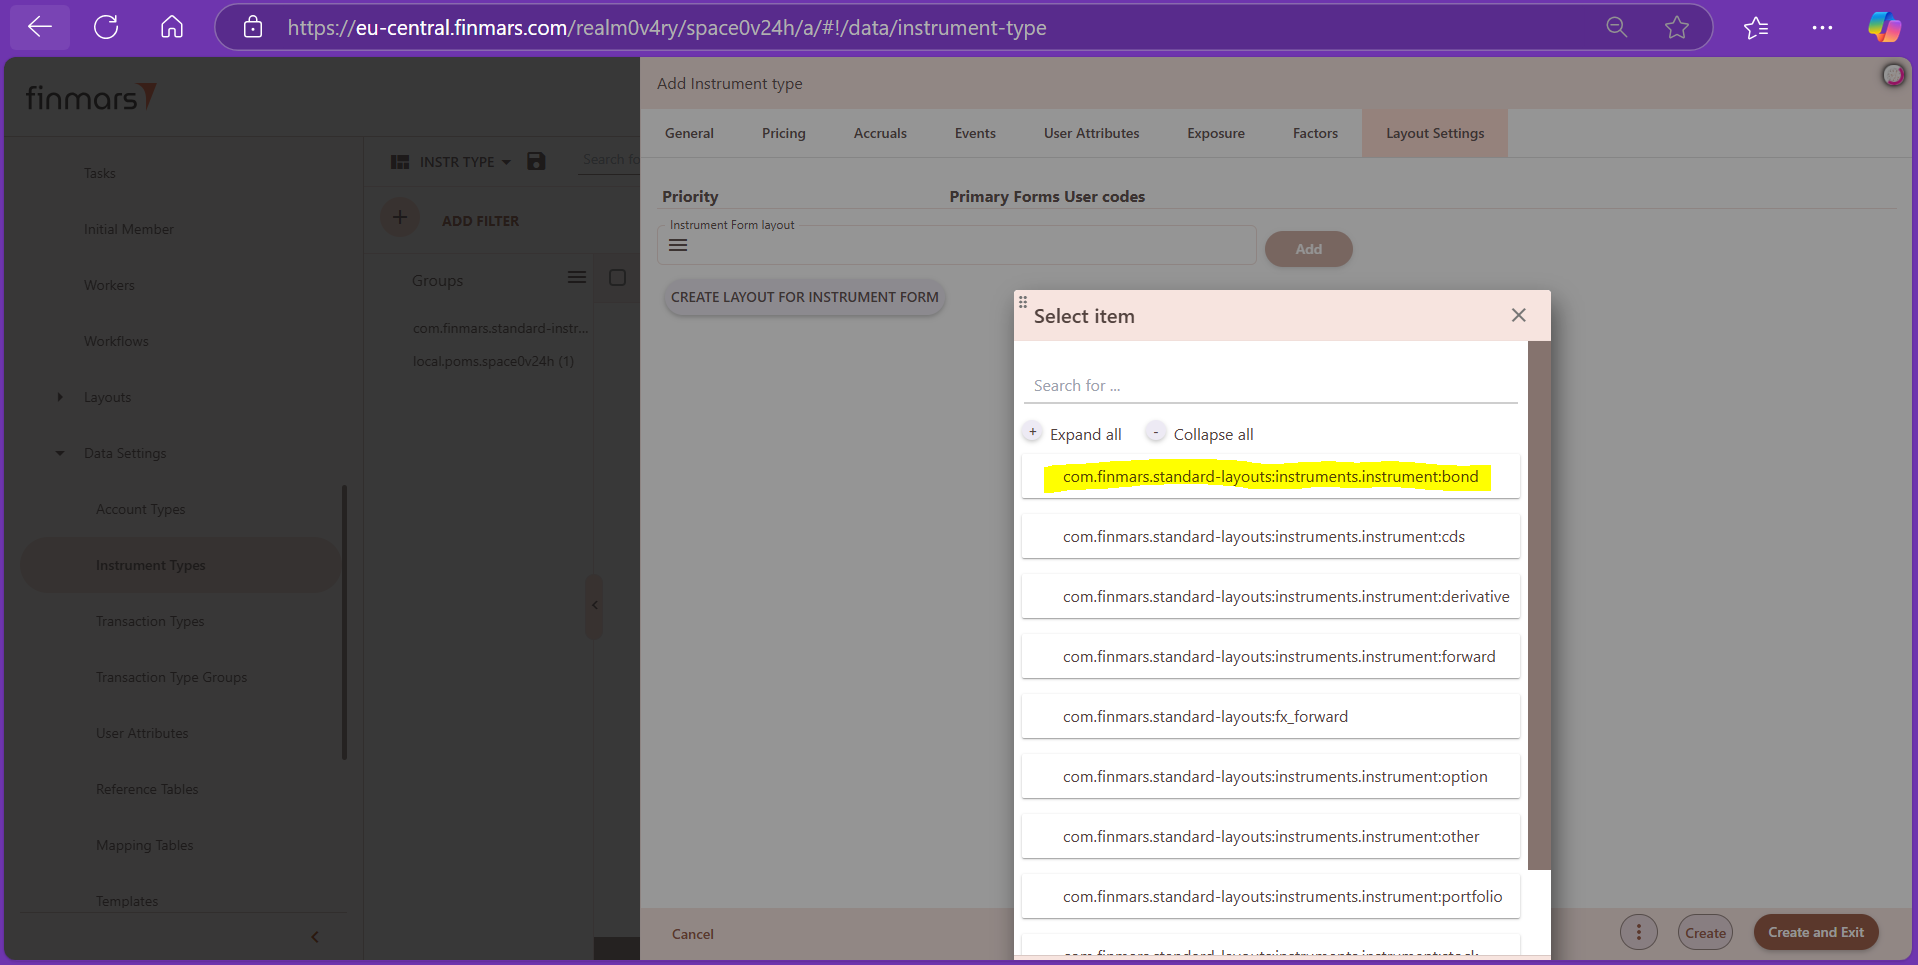
10. Layouts should be created beforehand, and they will affect the creation form. In Layout Settings tab, we select the layout of the respective instrument type, from the drop-down menu.
11. Final step is to click on "Create and Exit" button, after which all changes are saved, and new instrument type is displayed with existing instrument types in configuration section (Data Settings > instrument Types) of the platform.