Register in Cloud
- How to Register in Finmars
- How to Get an Access to the Workspace
- How to Create a New Workspace
- How to Navigate in a Profile page
- How to Invite a User into a Workspace
How to Register in Finmars
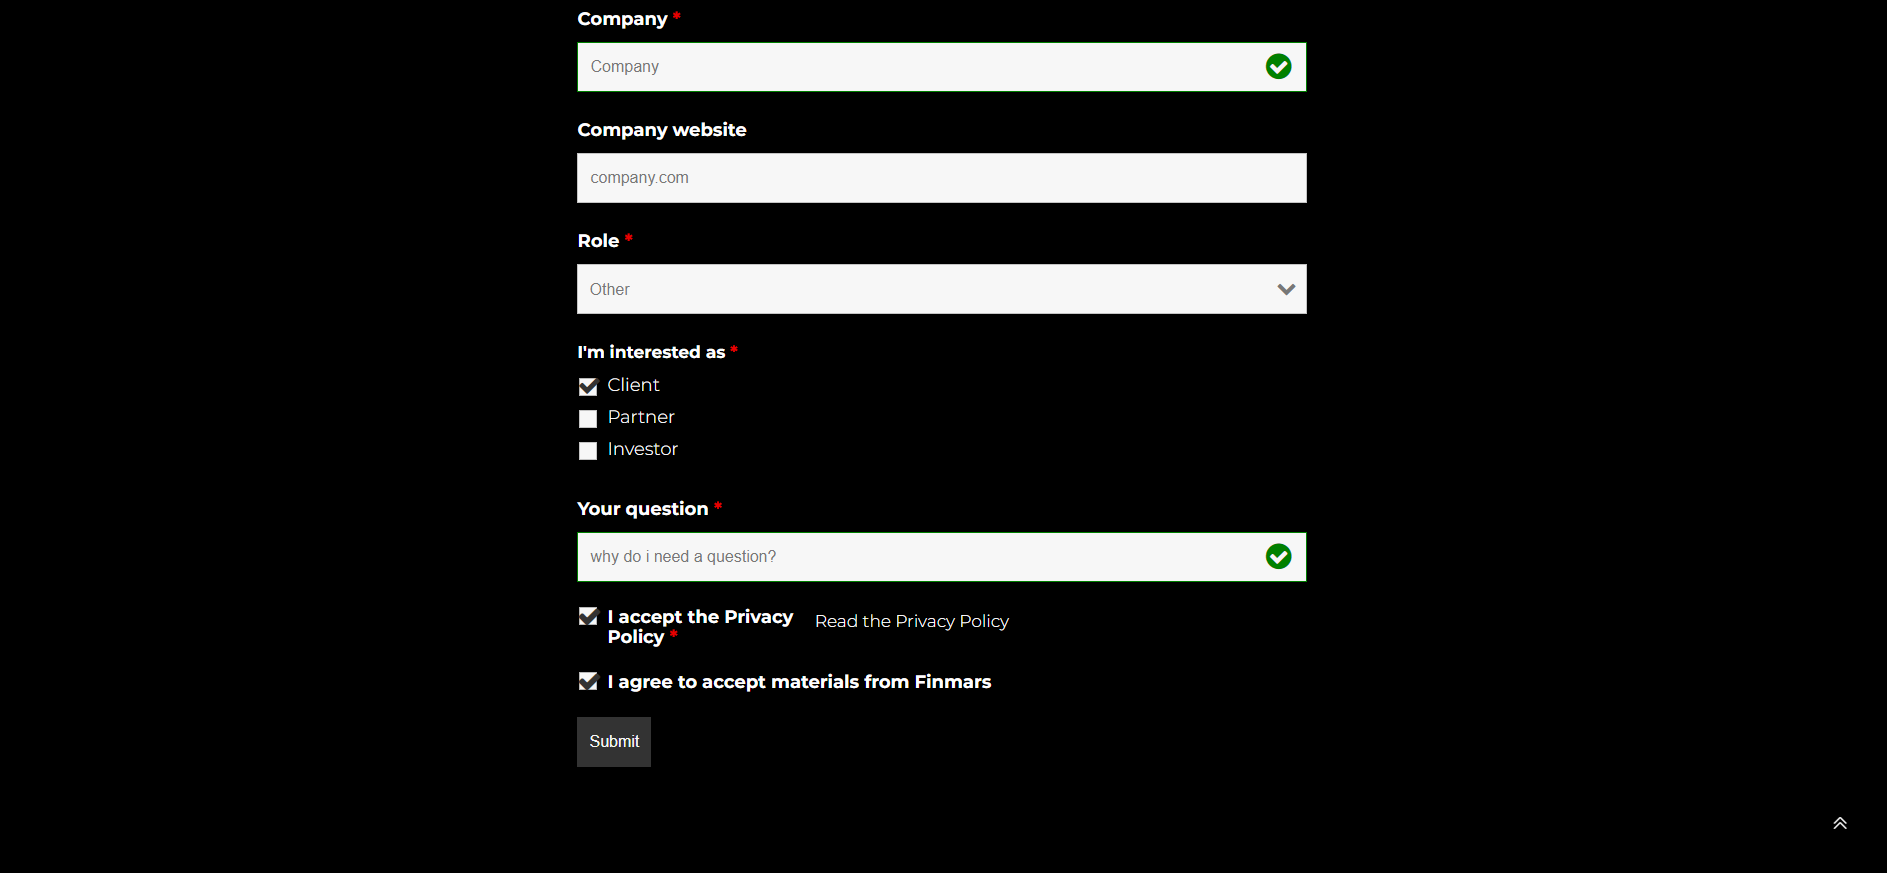
- To register at finmars.com you need to click to "SIGN UP" button

- It will direct you to the "CONTACT US" section

- You should fill in your information and click "Submit"

- Then you will get a confirmation message that your form was submitted successfully.

- After that Finmars will contact you for finishing the Registration.


How to Get an Access to the Workspace
Prerequisites
- Already registered in Finmars (see How to Register in Finmars)
- Received the credentials to use in the Finmars platform.
Getting an Access to the Workspace
- Go to your allocated Finmars URL (environment) which was as the part of your credentials and usually defined for a specific regions in accordance with the compliance requirements.
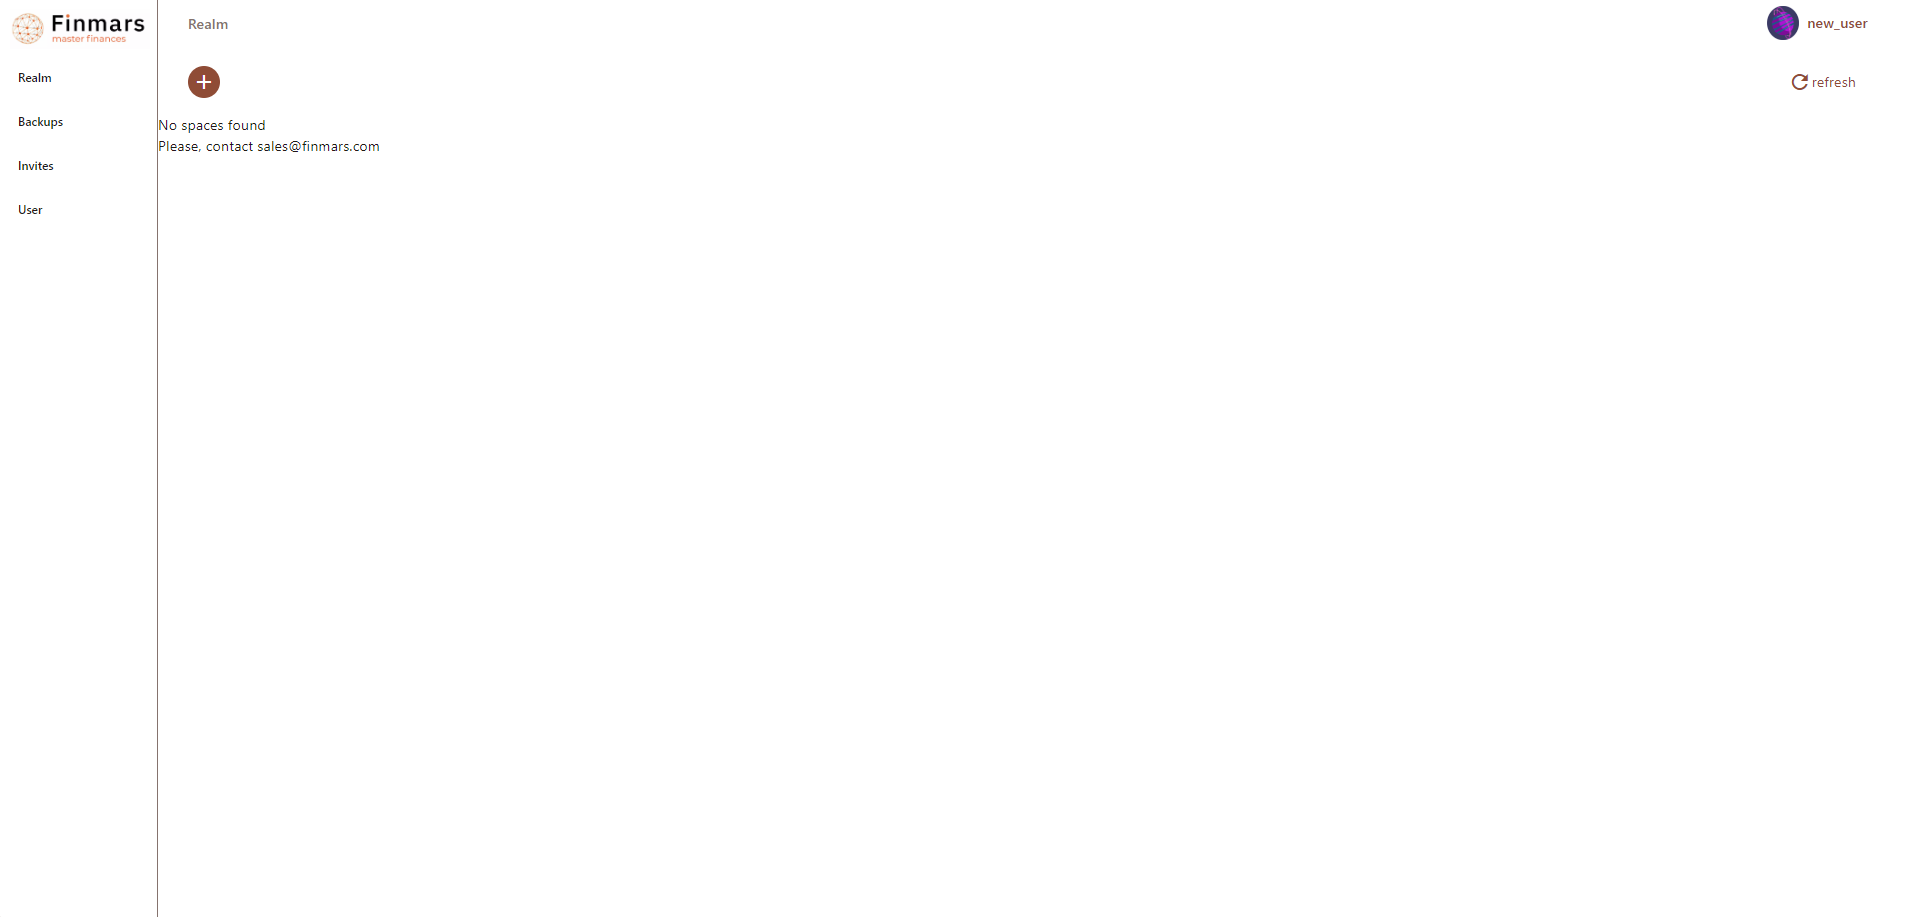
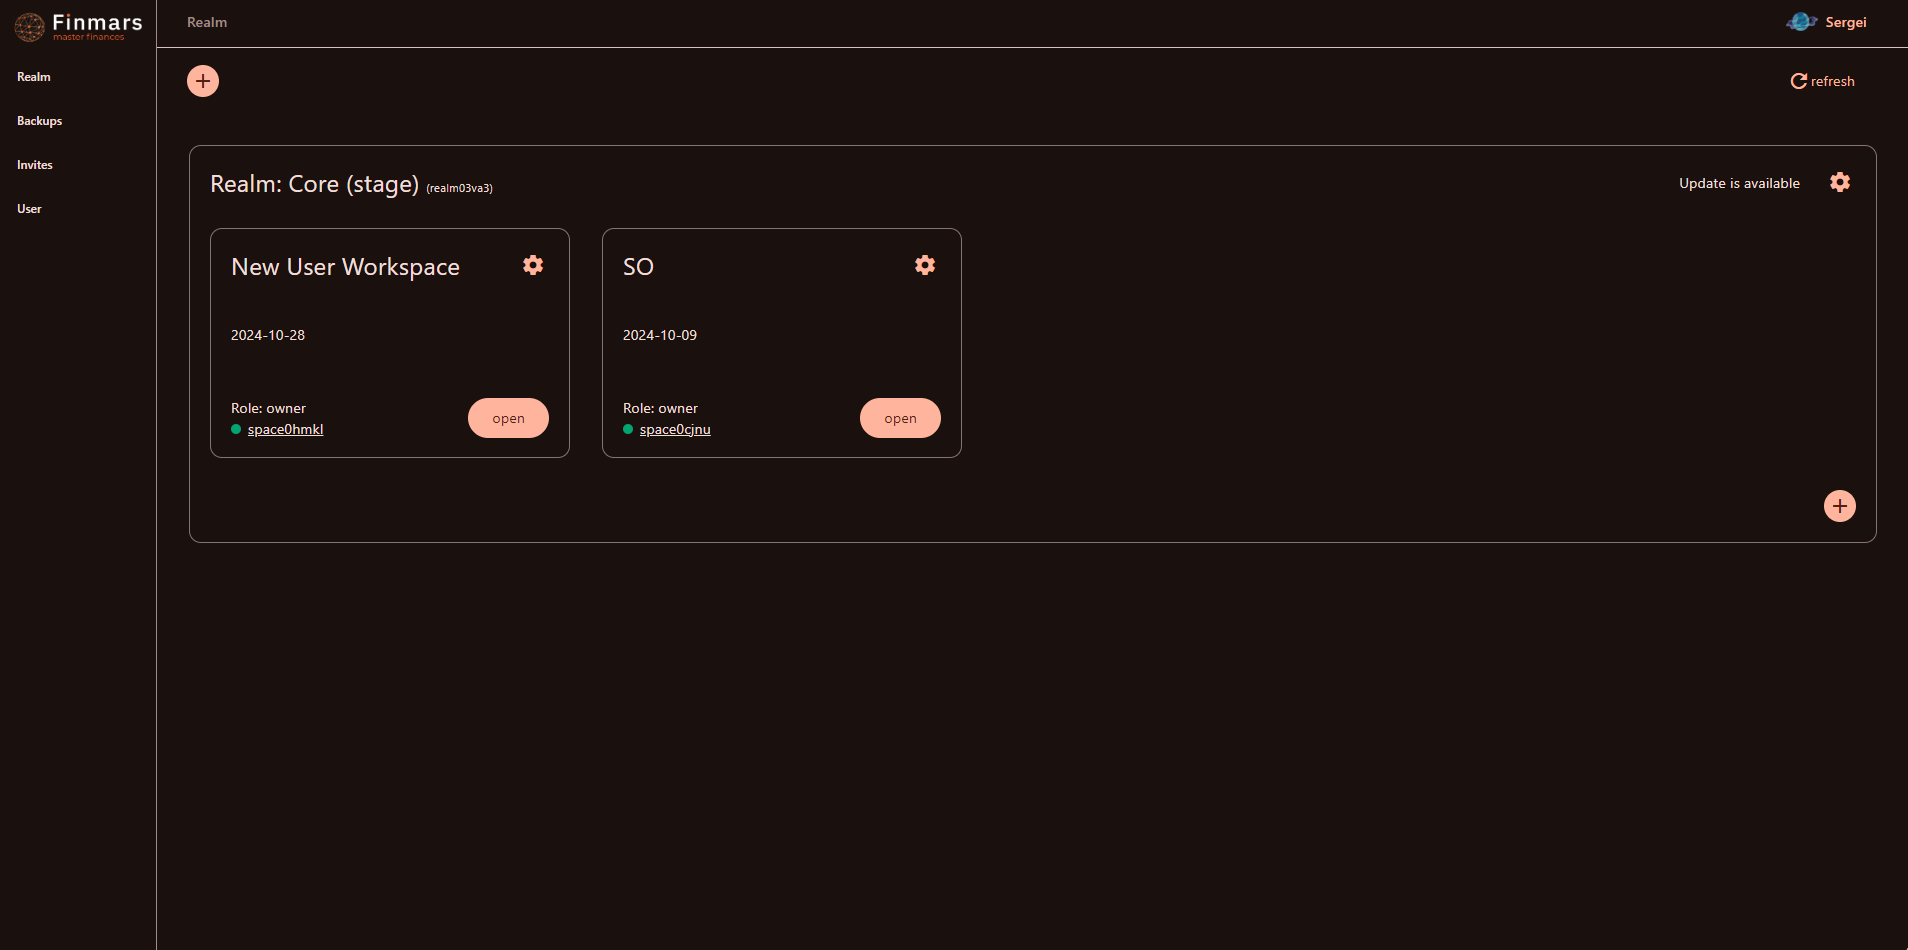
- You will access the Profile page which will contain your Workspace (an instance of your Finmars engine with your data).

- At the moment you may not have available Workspaces (like in the screenshot above). You should request Finmars to create your own Workspace, you should provide your Username to get an invitation to the Workspace.
- You can find your Username in the upper right corner of the profile page (
new_user- in the example above) - That is the exact Username you use as a login
- You can find your Username in the upper right corner of the profile page (
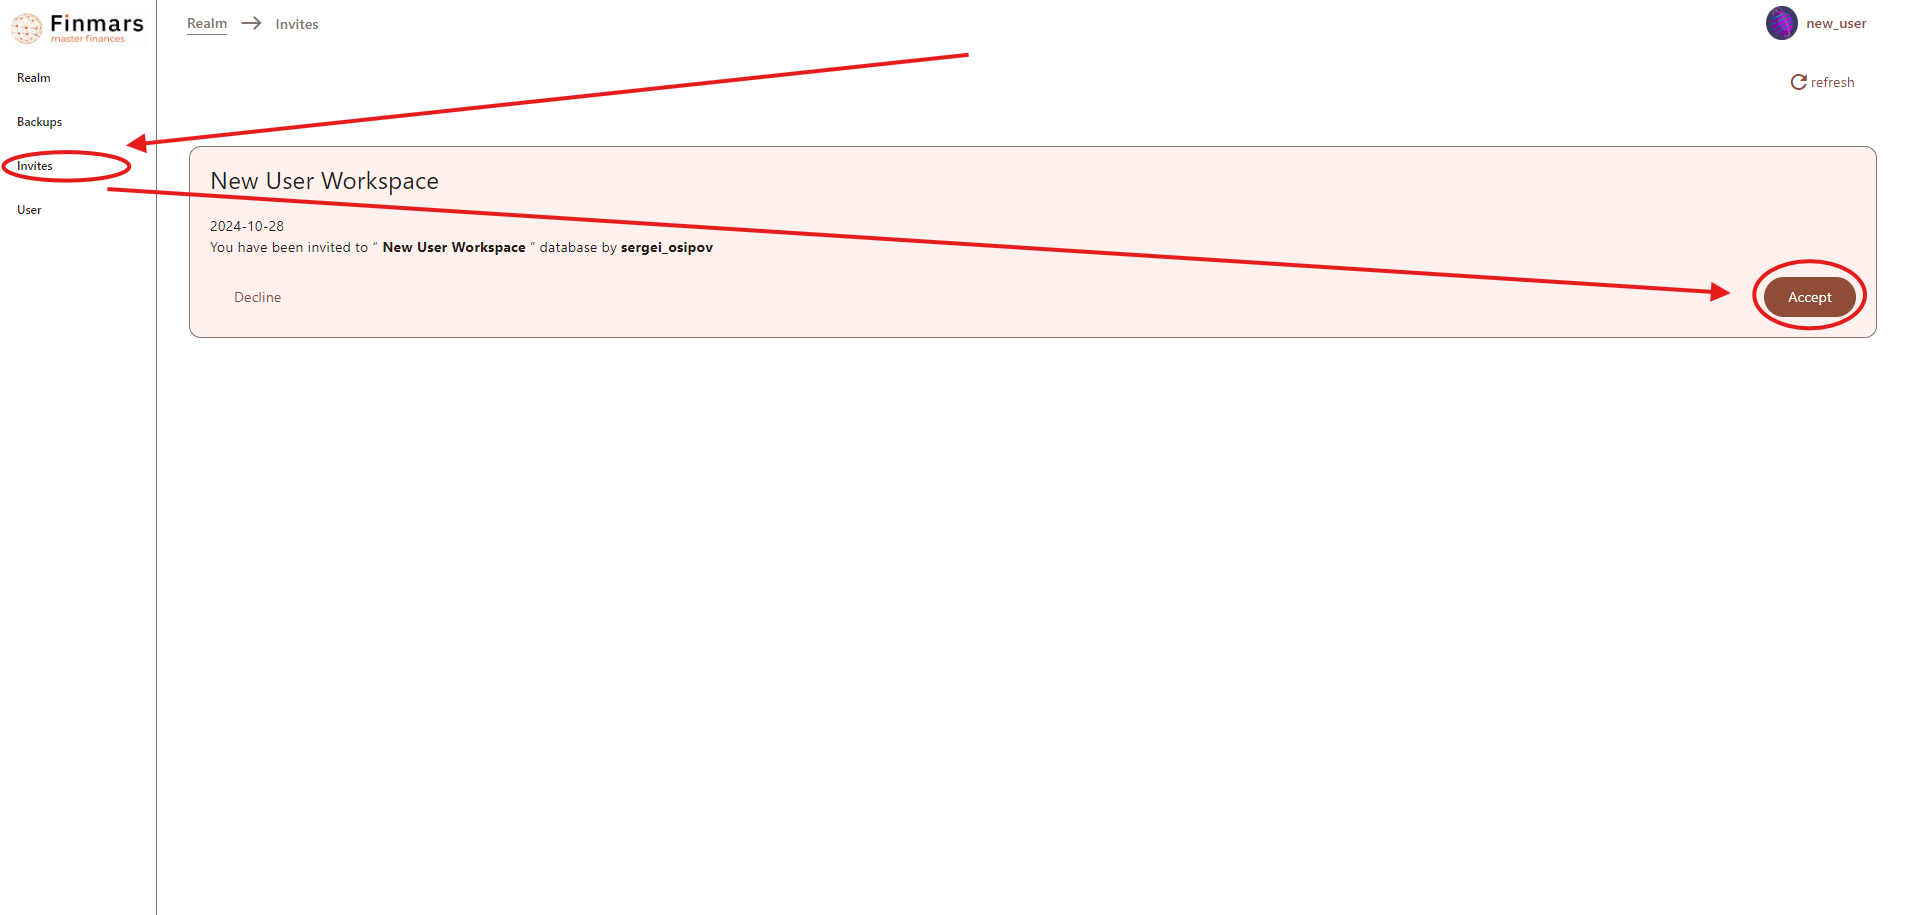
- Then Finmars will sent you an invitation, which can be found in the "Invites" section of the Profile page: you will see the card with the name of the Workspace, then click "Accept" button

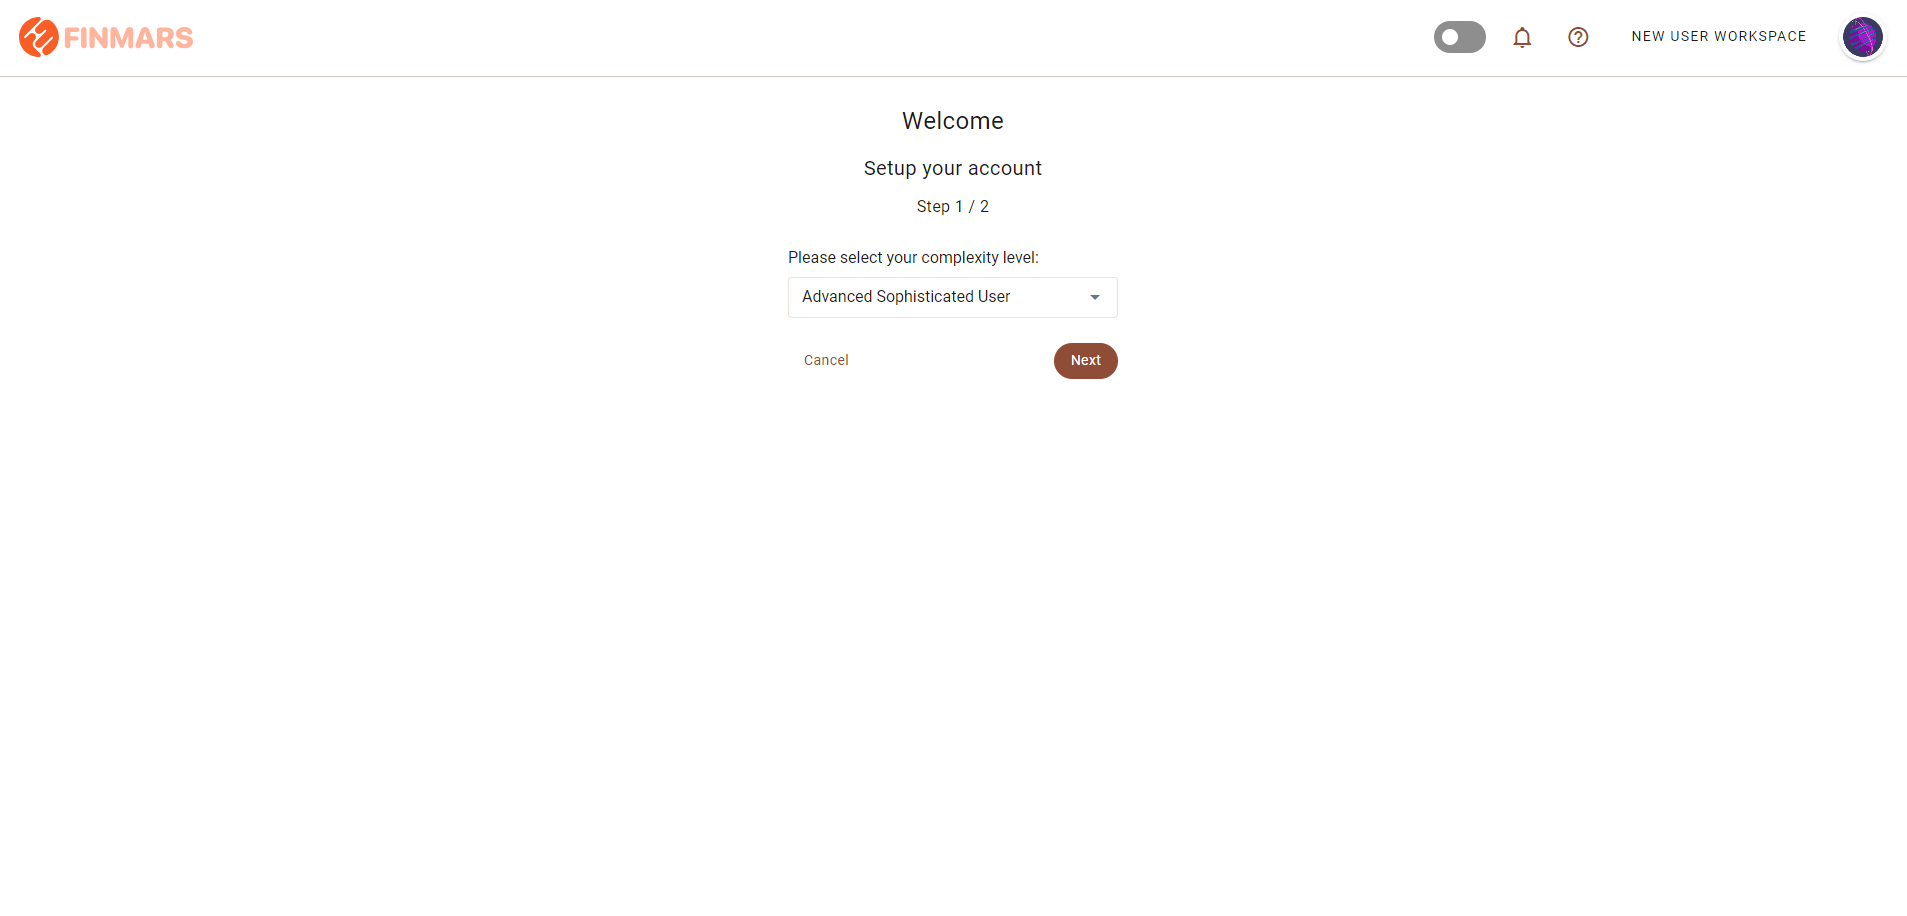
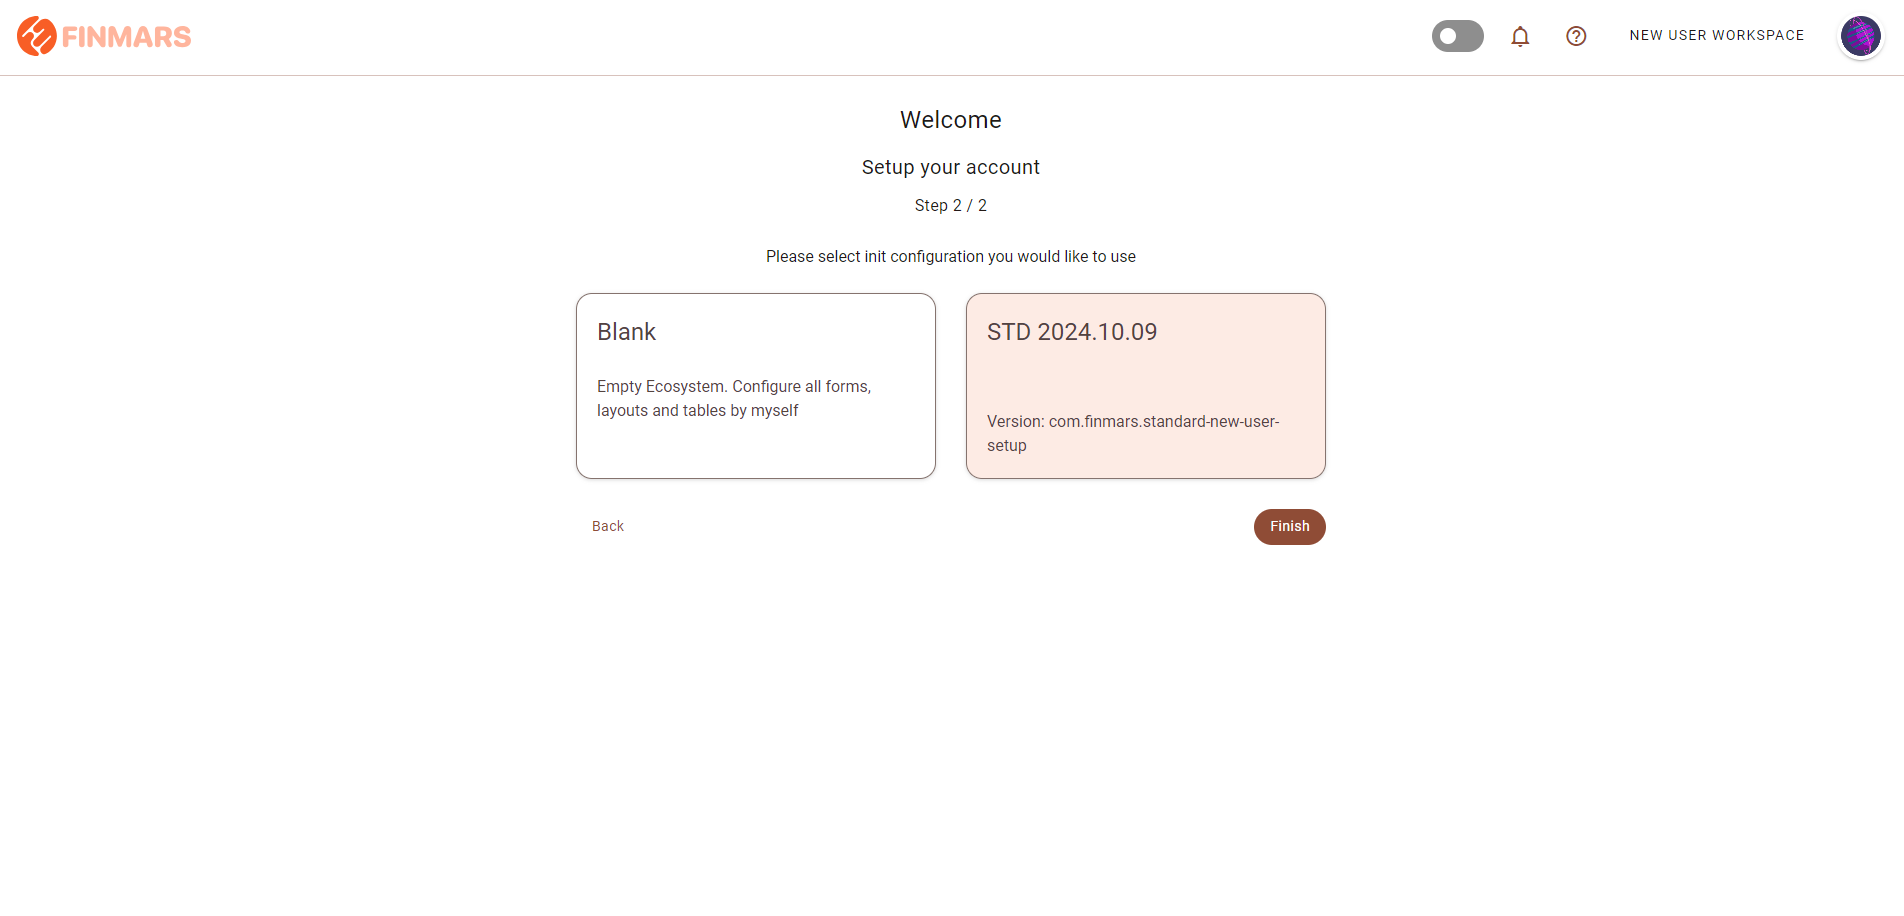
- After the "Accept" is clicked you will be redirected to the "New User Setup" page consisting of 2 steps:
- "Please select your complexity level" (deprecated setting) -> Always select "Advanced Sophisticated User"

- "Please select init configuration you would like to use" (selecting the layouts for reports) -> Select a card representing needed configuration and click button "Finish" (if no cards from the configurations you may select "Blank" card and install layouts directly from the Marketplace.

- "Please select your complexity level" (deprecated setting) -> Always select "Advanced Sophisticated User"
- Upon finishing installation you will be redirected to the "Home" page, meaning that now you have an access to the Workspace.

- Also the Workspace now will be listed in the "Profile" page

How to Create a New Workspace
Prerequisites
We assume you have all prerequisites you may need, including:
- If needed: the VPN is configured to access the Finmars resources
- If needed: access to the Virtual Machine to work with the sensitive information
- Must have: registered in Finmars in the needed region environment (self-registered or registered by Finmars)
- Must have: to create a new Workspace you must have a License Key (provided by Finmars)
- Must have: having permissions set to allow continue with the Action in the Guide
Creating Workspace
- Go to the desired environment (specific URL) and click "Login" button

- You will be redirected to the "Login" page, use your credentials to Login to your account.

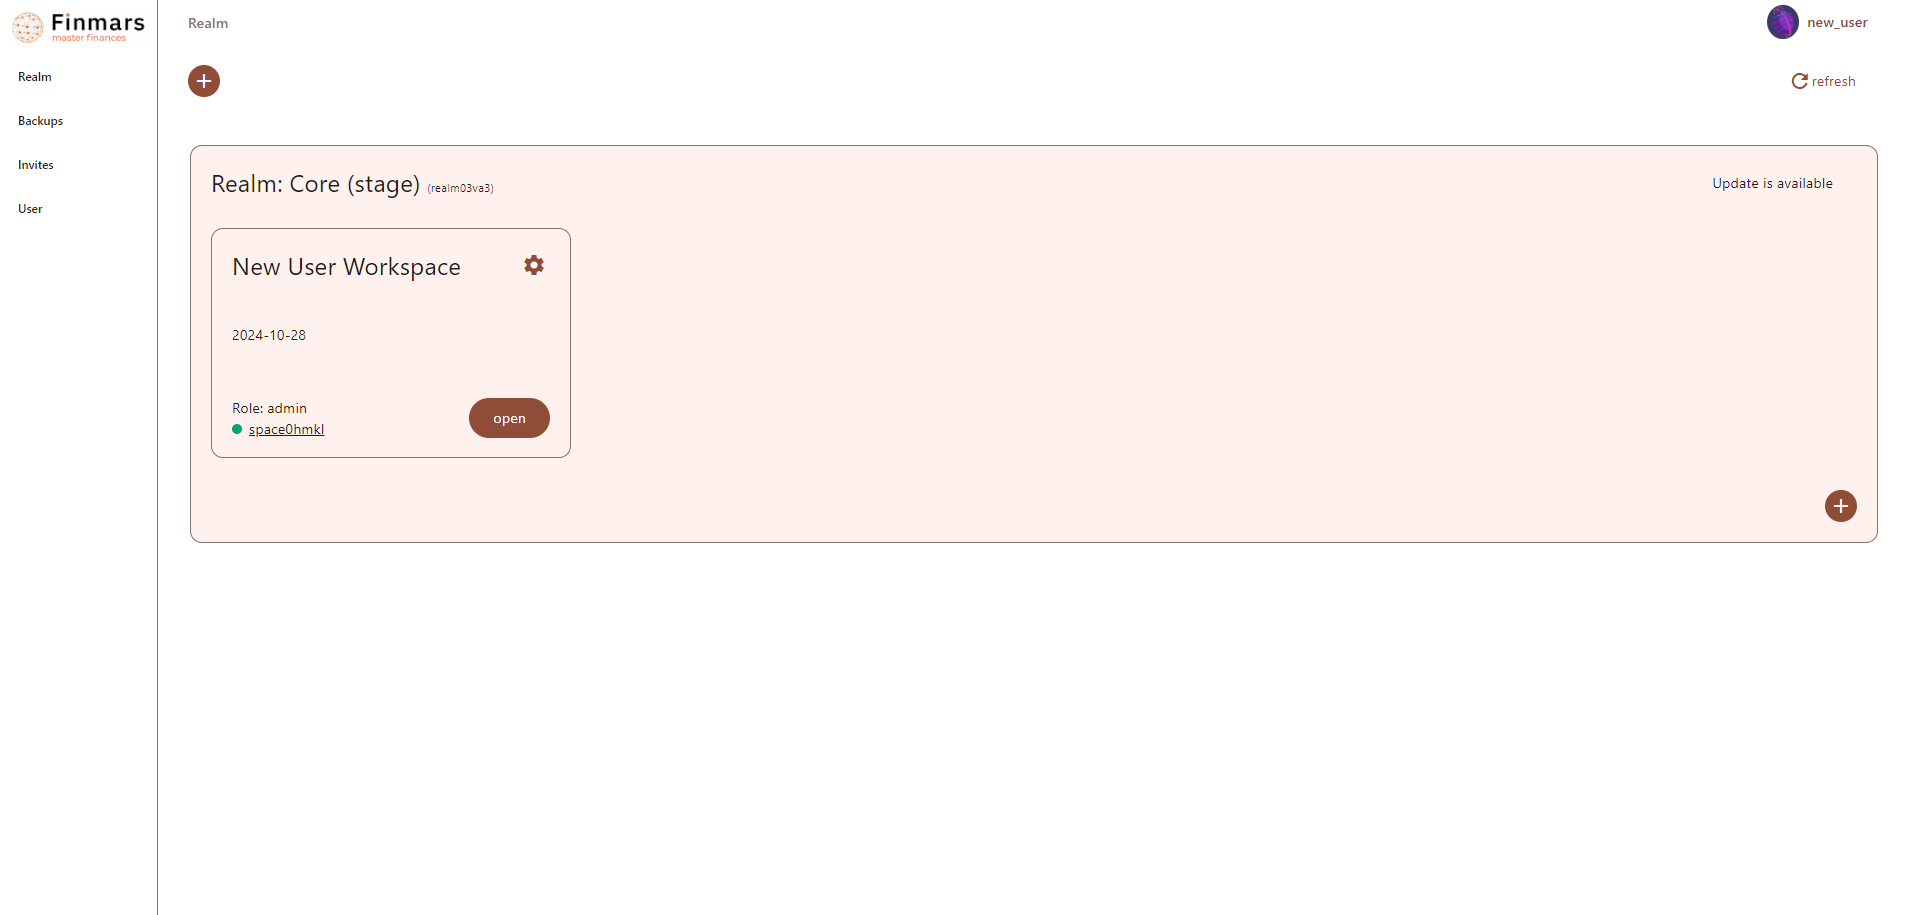
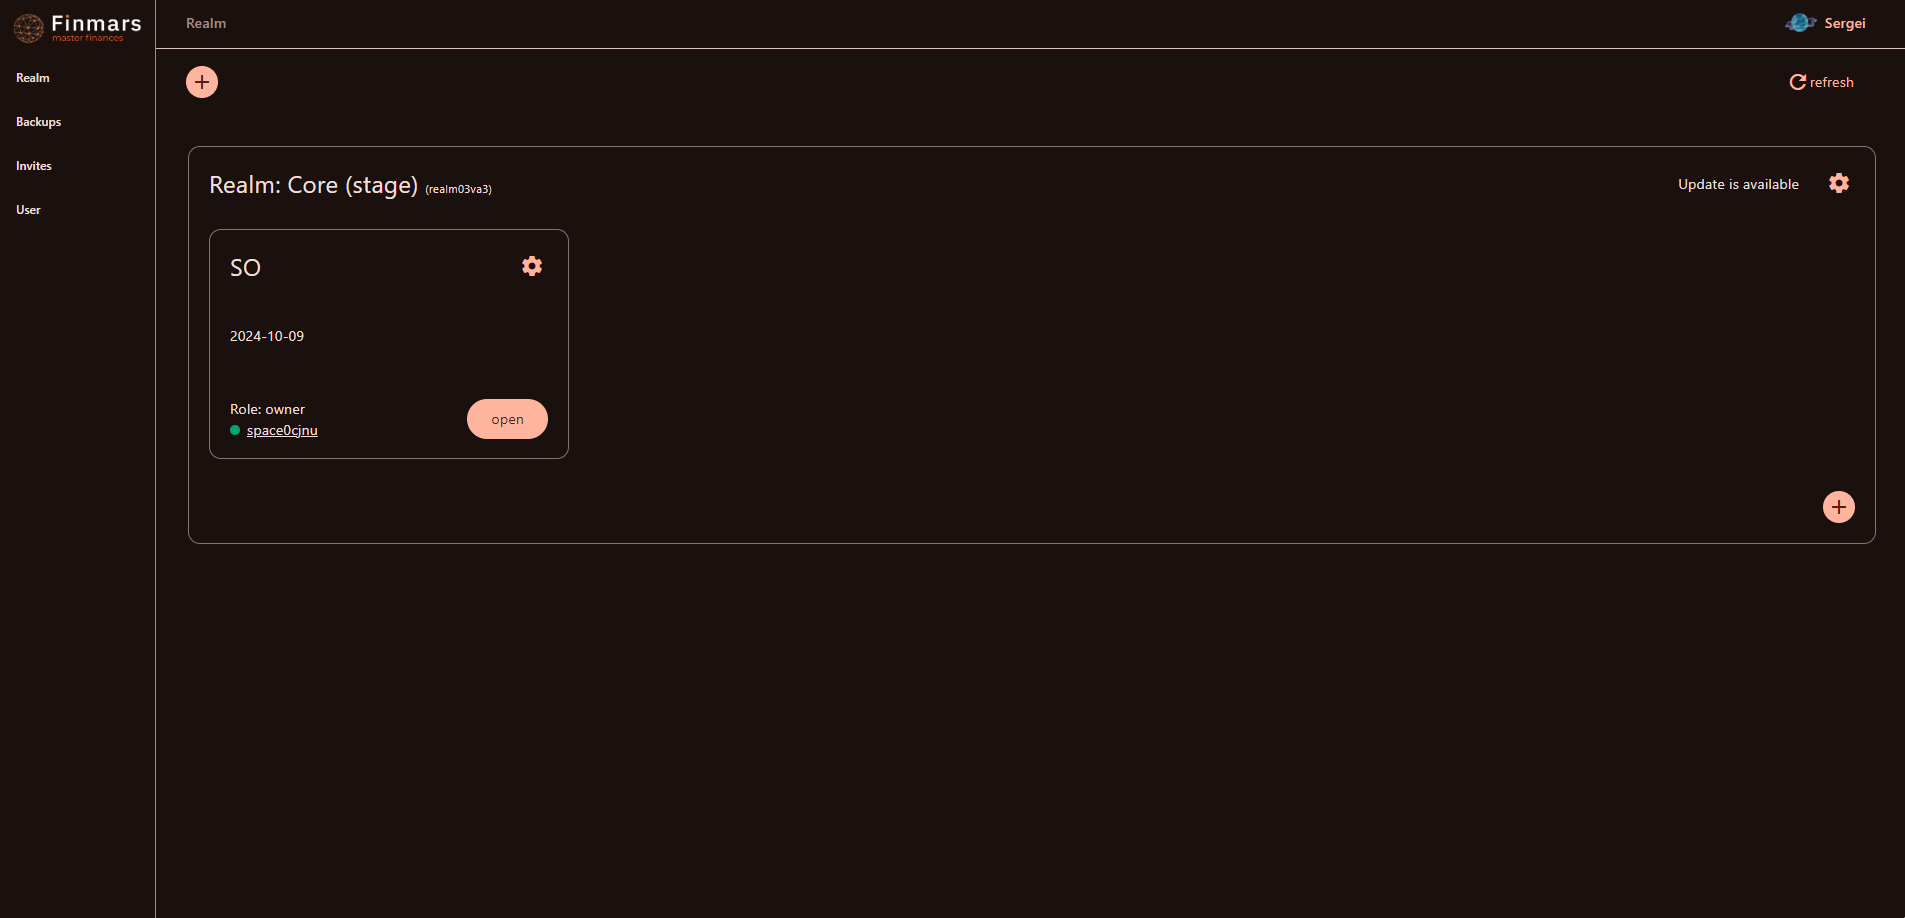
- You will be redirected to the "Profile" page. We suppose you already have the specific Realm (container of Workspaces sharing the execution resources called Workers), in our case it's called "Core" (see in the screenshot below)

- To create a new Workspace in the Core realm you need to click "(+)" plus button in the lower right corner and click "New Space"

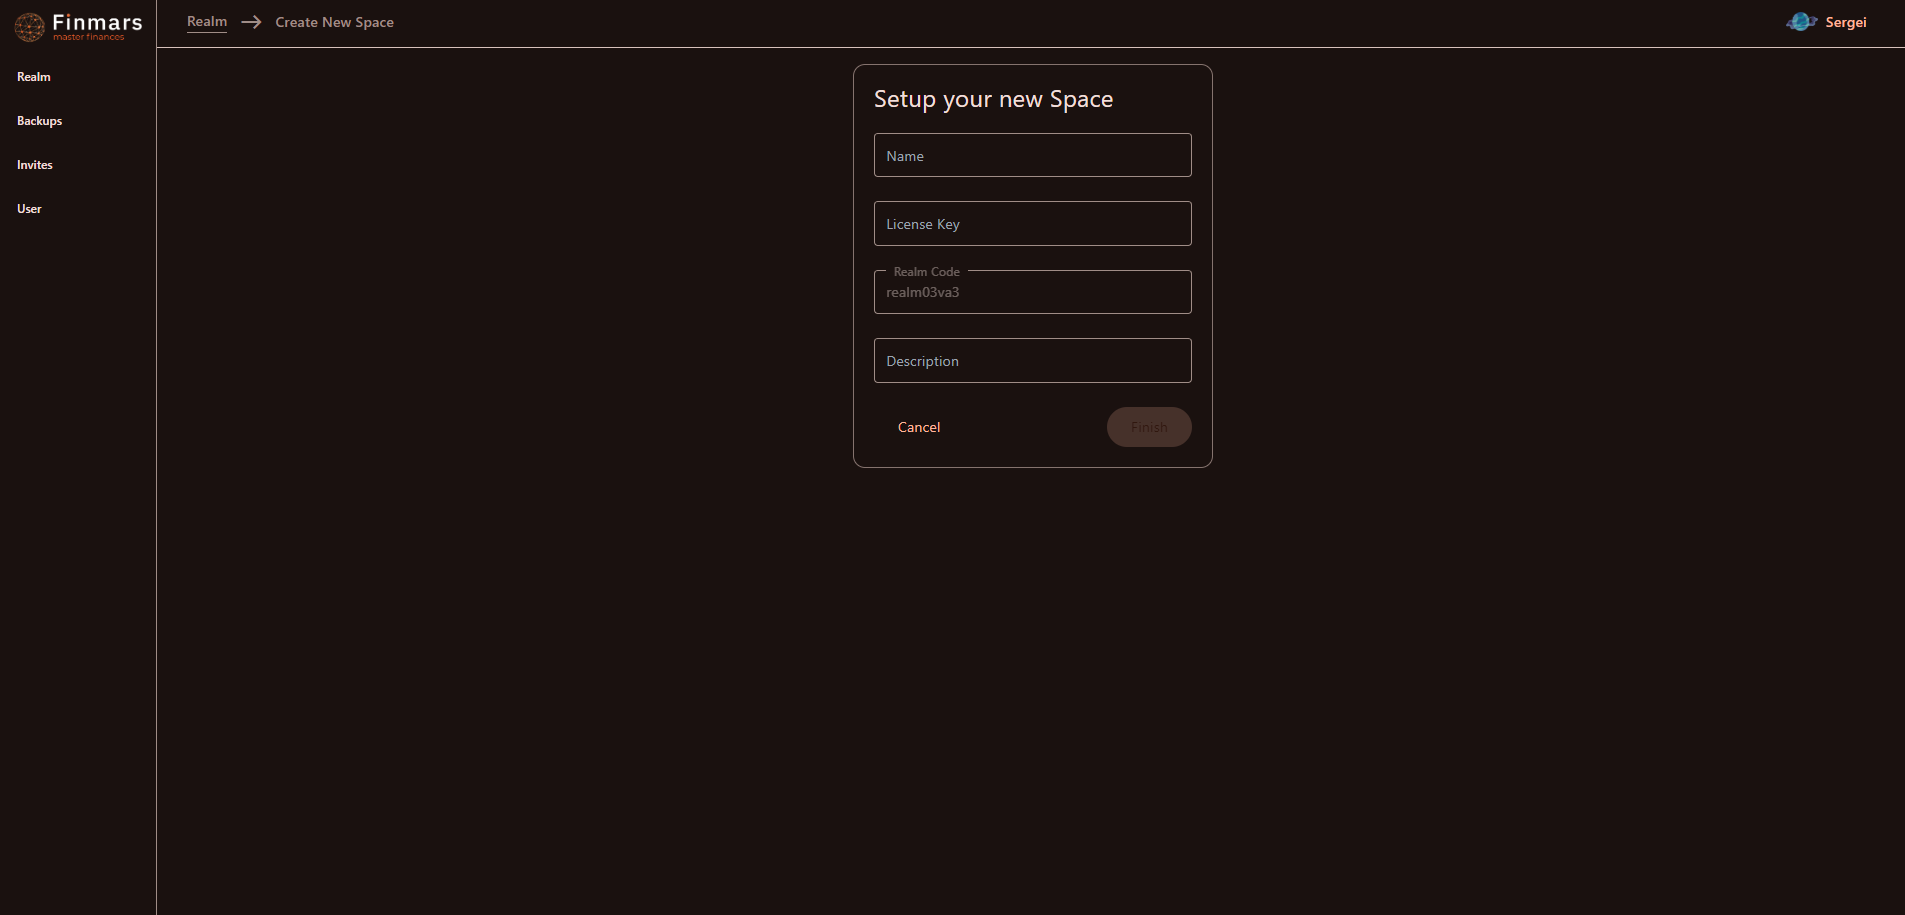
- You will be redirected to the "Create New Space" page where you need to fill in:
- Name of the Workspace
- Your License Key that allows you to create a Workspace
- Realm Code is predefined based on the specific Realm
- Description is an optional field for the created Workspace which will be shown for the people with the access in the Workspace card.

- When you enter everything and click "Finish" button, you will be redirected back to the Profile page which will show the Realm and the newly created Workspace.
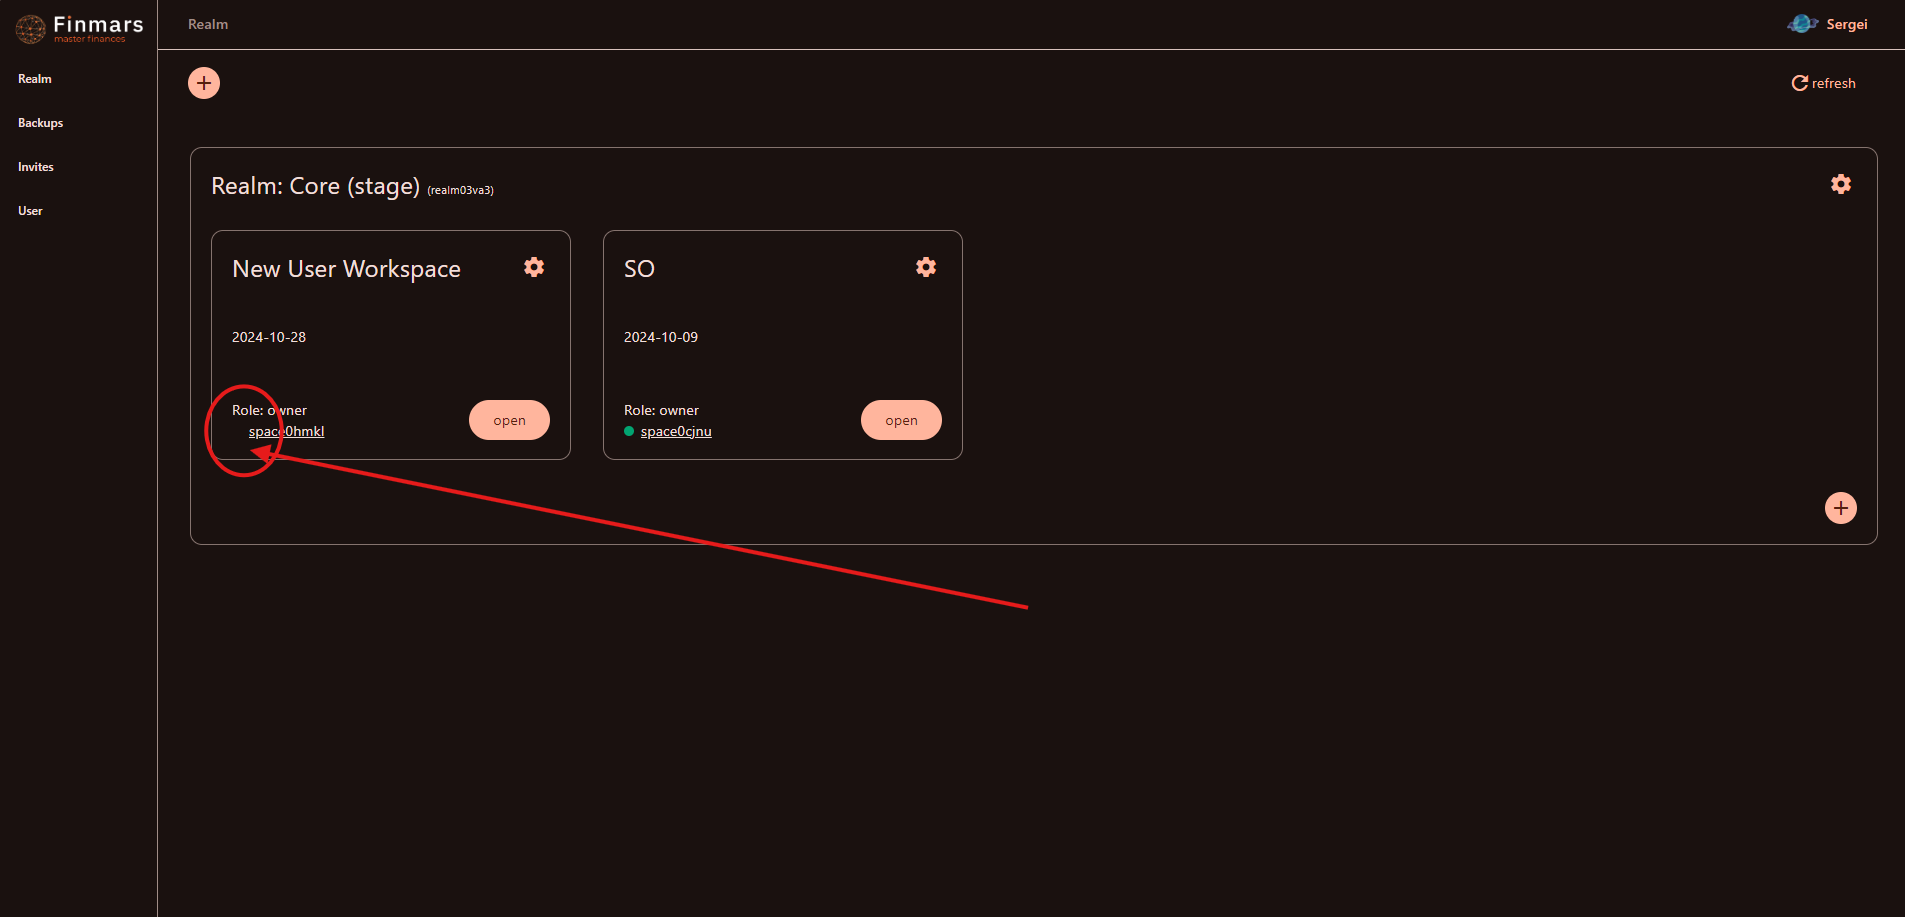
- The newly created Workspace is shown as one of the cards inside the Realm card
- It has the name and description we provided
- It was assigned a specific Workspace code (in our case it's "space0hmkl", see in the screenshot below)
- You can see that it has no green indicator near to the Workspace code, meaning the Workspace is currently being created (it usually takes some time no more than 10 min).

- The newly created Workspace is shown as one of the cards inside the Realm card
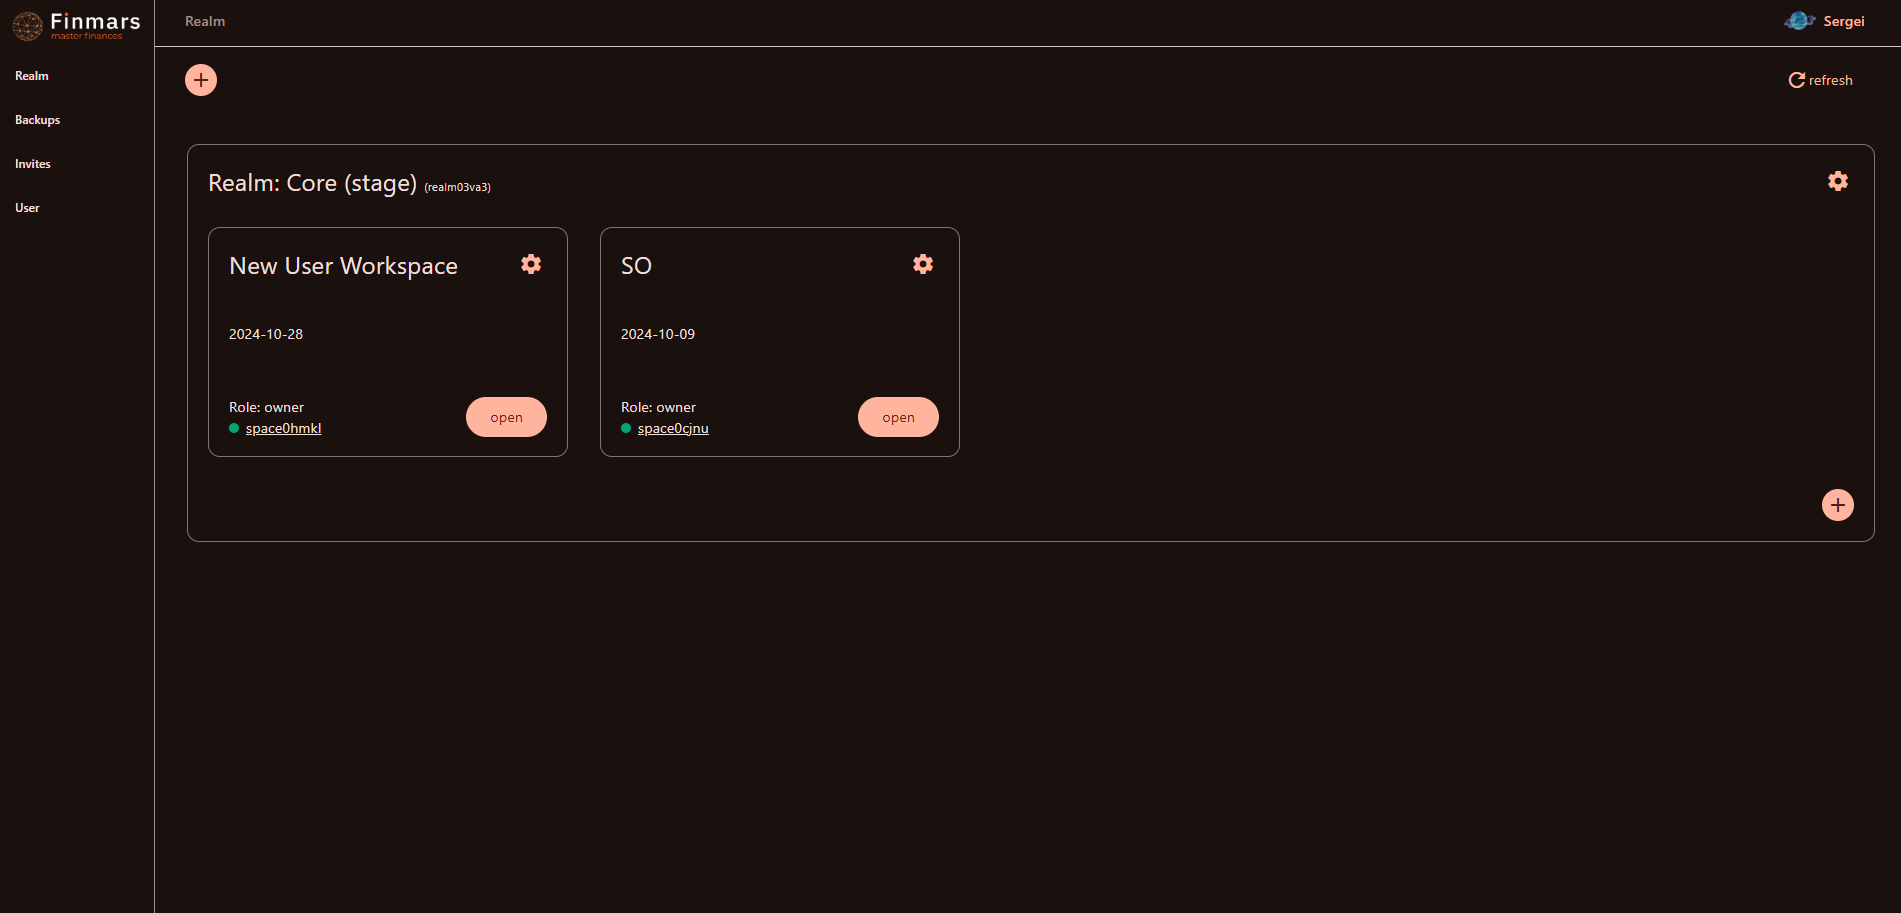
- After you wait for around 10 minutes the Workspace status should be "green" which means that your Workspace is ready for use.


How to Navigate in a Profile page
Prerequisites
We assume you have all prerequisites you may need, including:
- If needed: the VPN is configured to access the Finmars resources
- If needed: access to the Virtual Machine to work with the sensitive information
- Must have: registered in Finmars in the needed region environment (self-registered or registered by Finmars)
- Must have: having permissions set to allow continue with the Action in the Guide
Navigating in a Profile page
- Go to the needed region environment URL

- Login

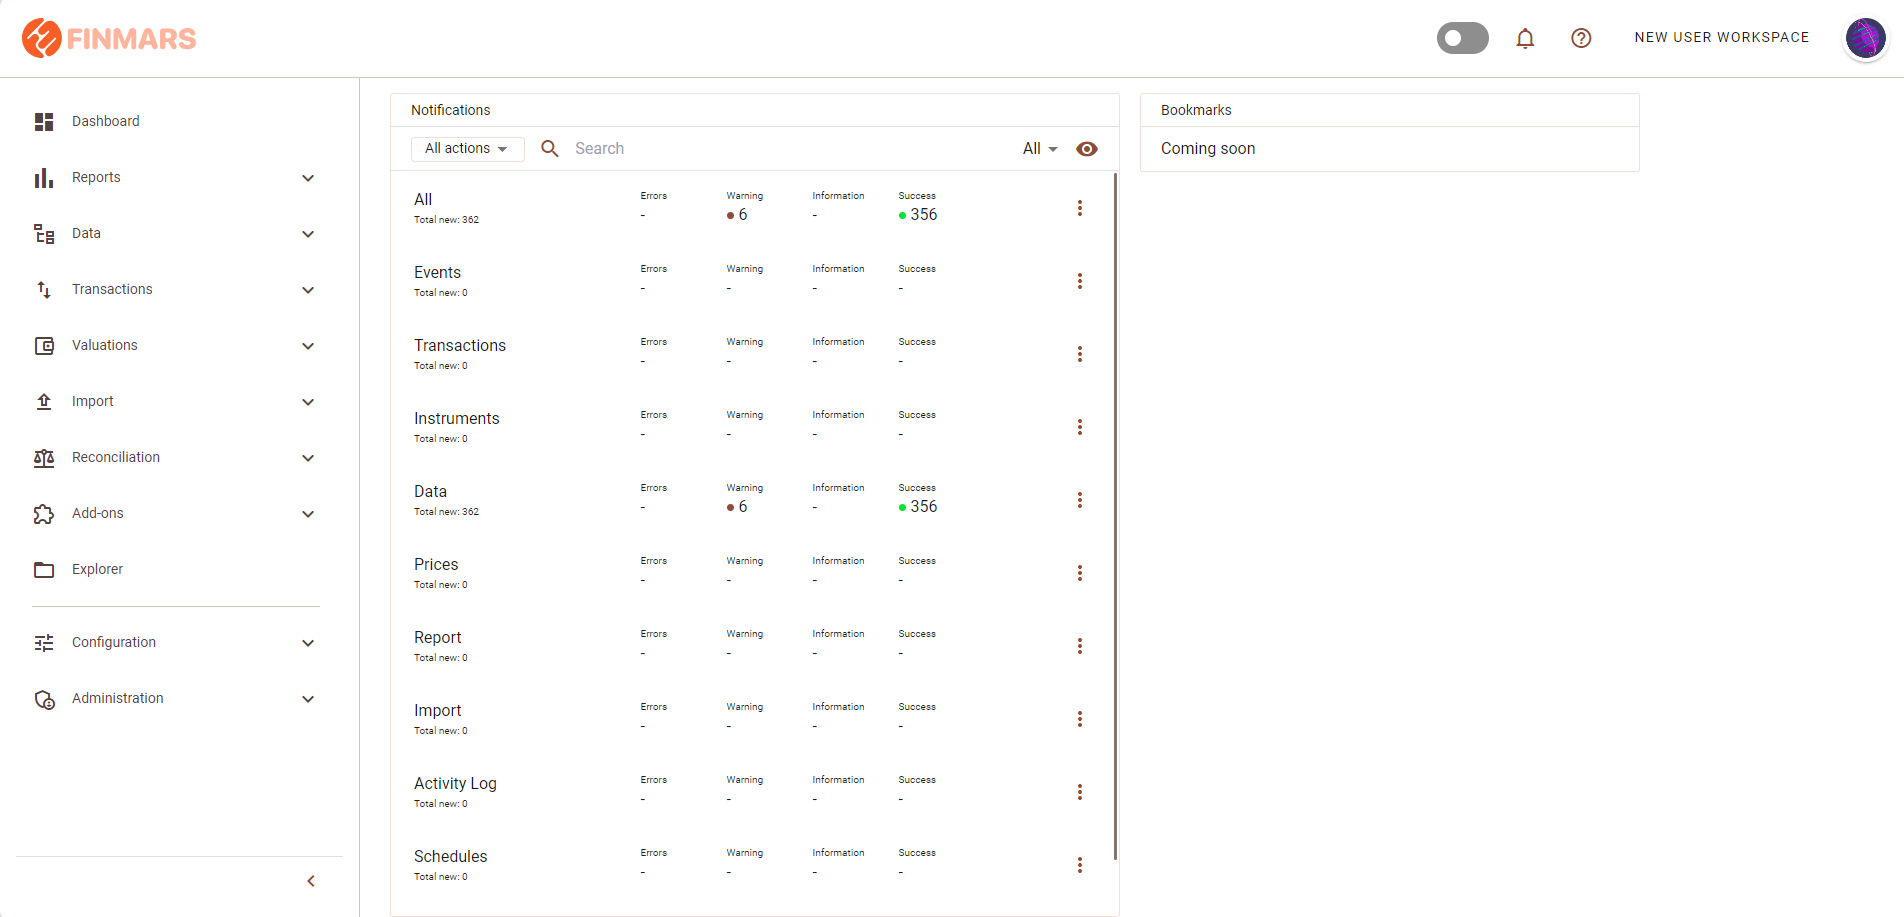
- You will be redirected to the Profile page: it's the page where you can find

- Profile page has a sidebar menu:
- Realm - default tab with Dashboard with all available Realm & Workspaces in them (see screenshot above). You can:
- open available workspaces by clicking "Open"
- click on cog icon on a workspace card to
- Export Backup
- Exit the Workspace (if you are not an owner of the workspace)
- Delete the Workspace (if you are an owner of the workspace)
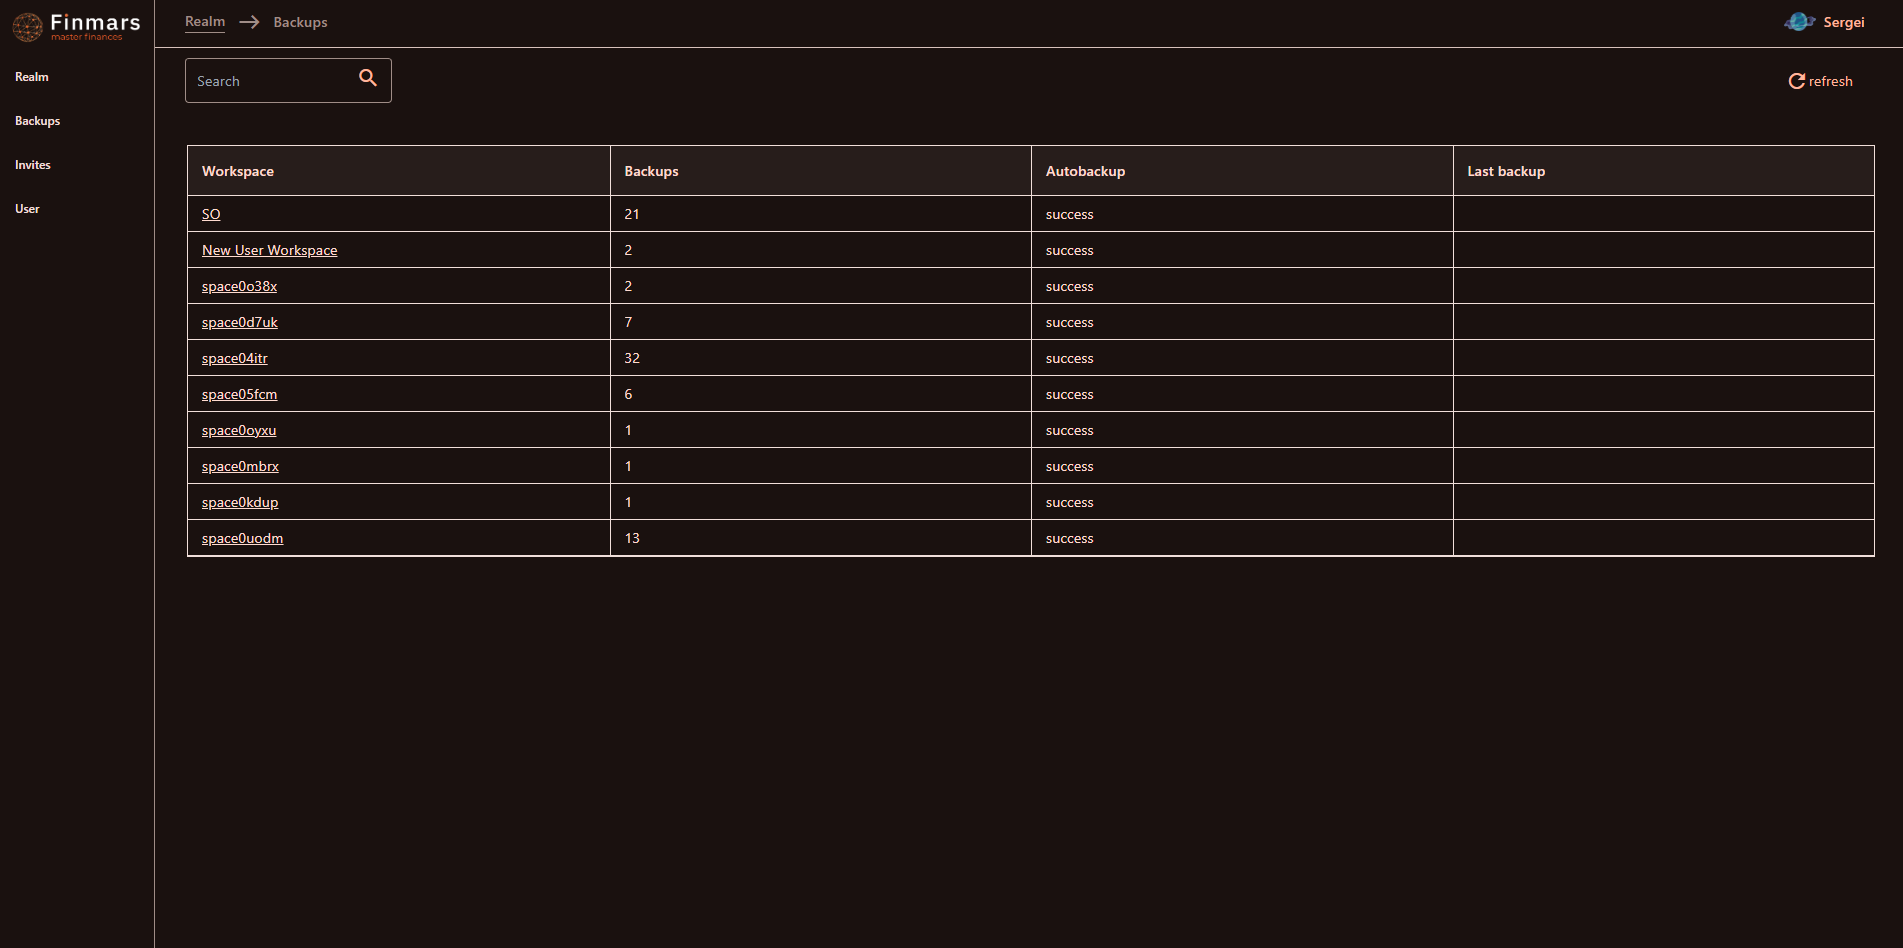
- Backups - list of all available workspaces and their backups statuses

- Invites - list of all pending invitations to join workspaces (reference to the How to get Access to the Workspace point 4)
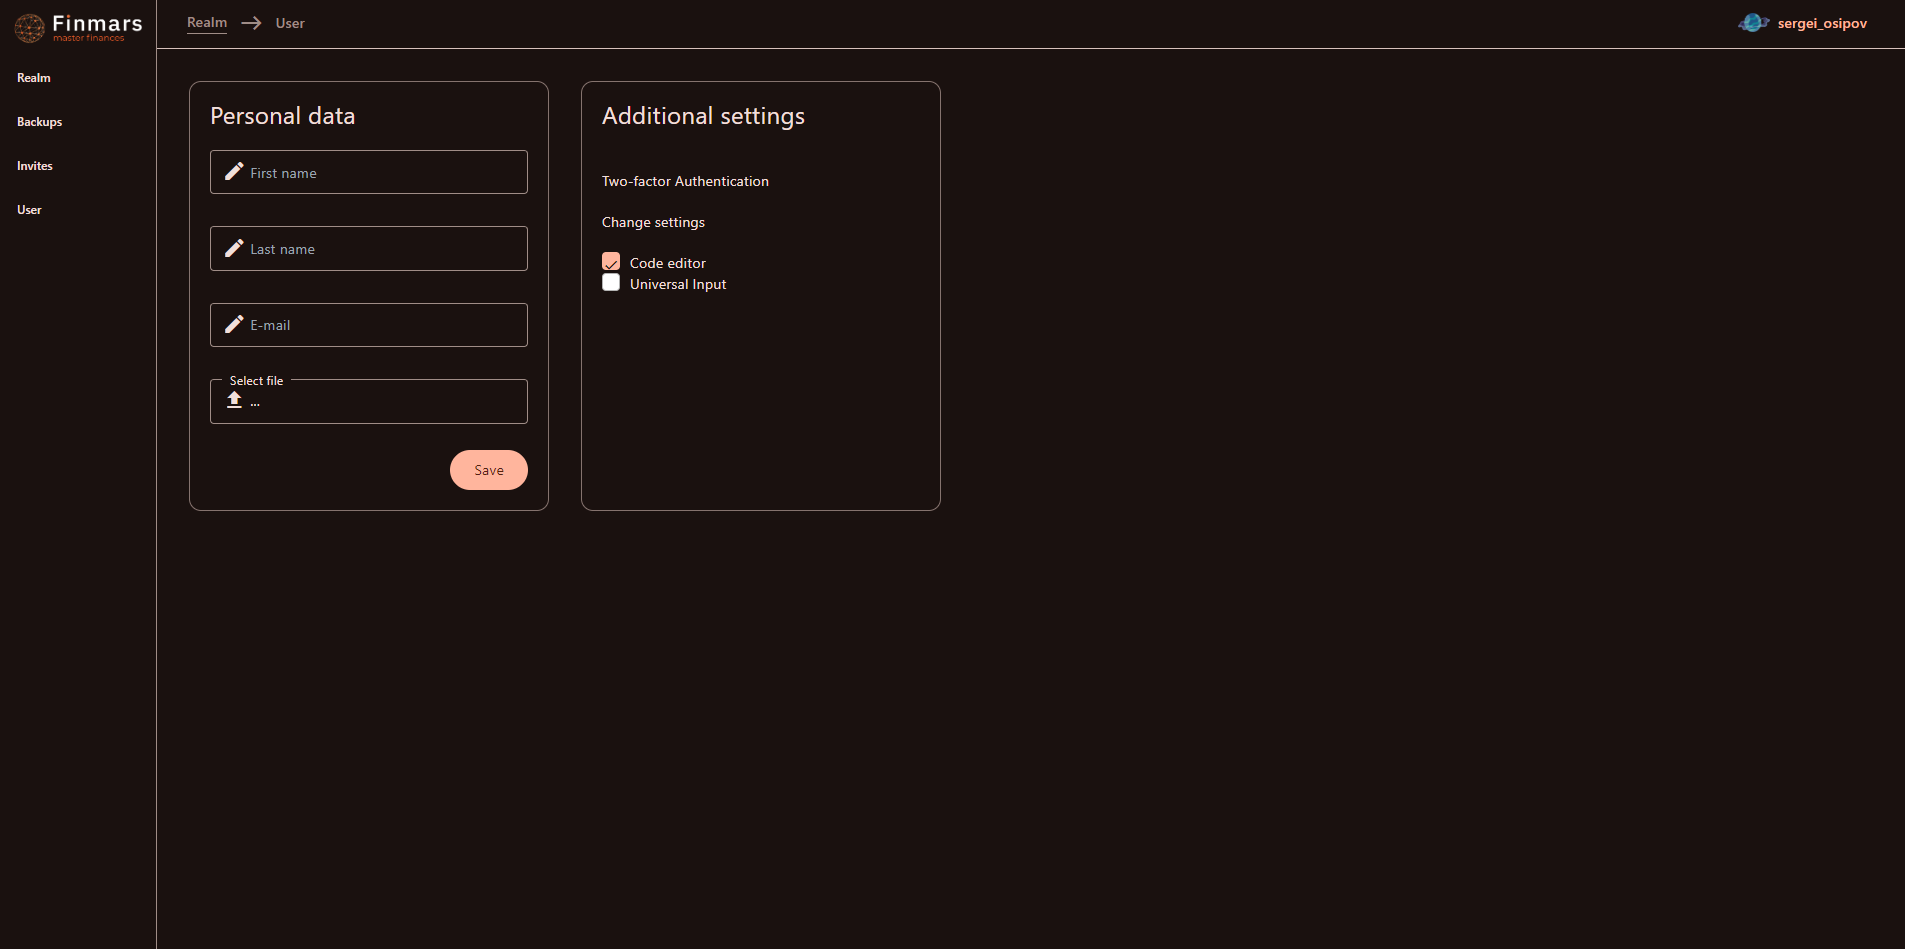
- User - tab with the user info

- Realm - default tab with Dashboard with all available Realm & Workspaces in them (see screenshot above). You can:

How to Invite a User into a Workspace
Prerequisites
We assume you have all prerequisites you may need, including:
- If needed: the VPN is configured to access the Finmars resources
- If needed: access to the Virtual Machine to work with the sensitive information
- Must have: registered in Finmars in the needed region environment (self-registered or registered by Finmars)
- Must have: having permissions set to allow continue with the Action in the Guide
- Must have: to create a new Workspace you must have a License Key (provided by Finmars)
Inviting a User into a Workspace
- Ask the the User to sent you their Username.
- They can find their Username in the upper right corner of the Profile page
- That is the exact Username they use as a login
- Please refer to the How to get Access to the Workspace (points 1-3)
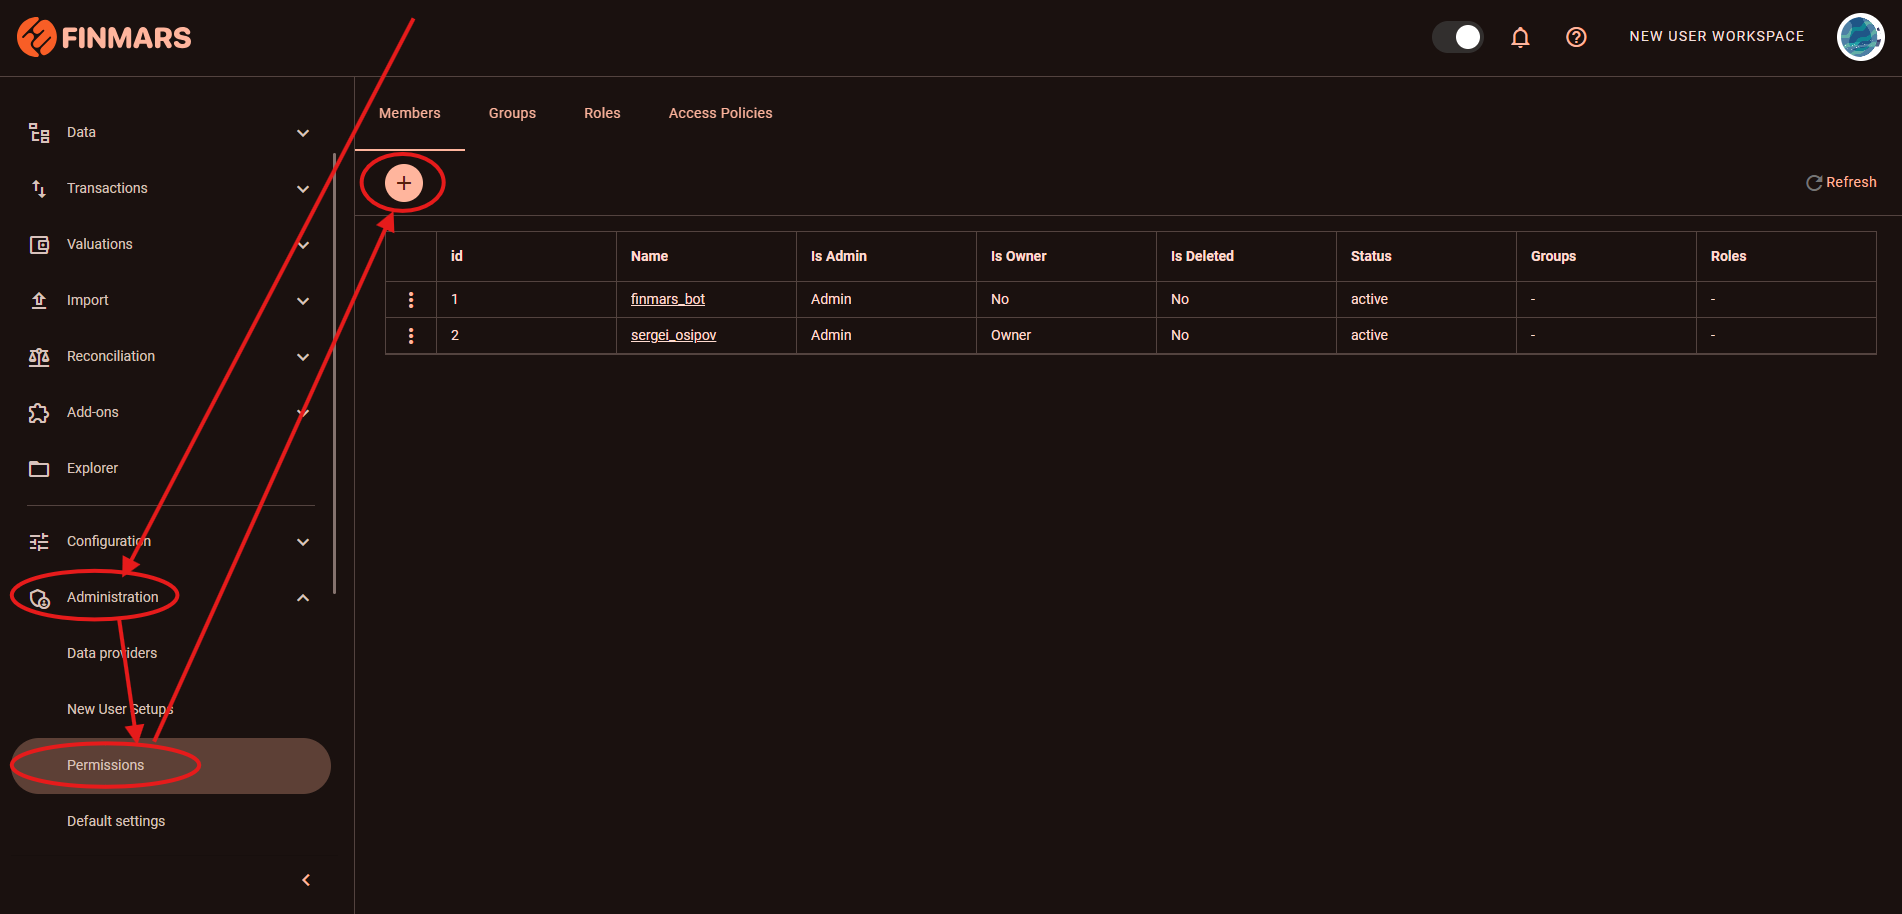
- Go to the Profile page and click "Open" button on the card of the needed Workspace (you must have an access to the Workspace)

- You will be redirected to the Home page of the Workspace. You need to use the navigation menu on the left side: Administration -> Permissions, - you will be redirected to the Members tab of the Permissions page, then just click "(+)" plus button.

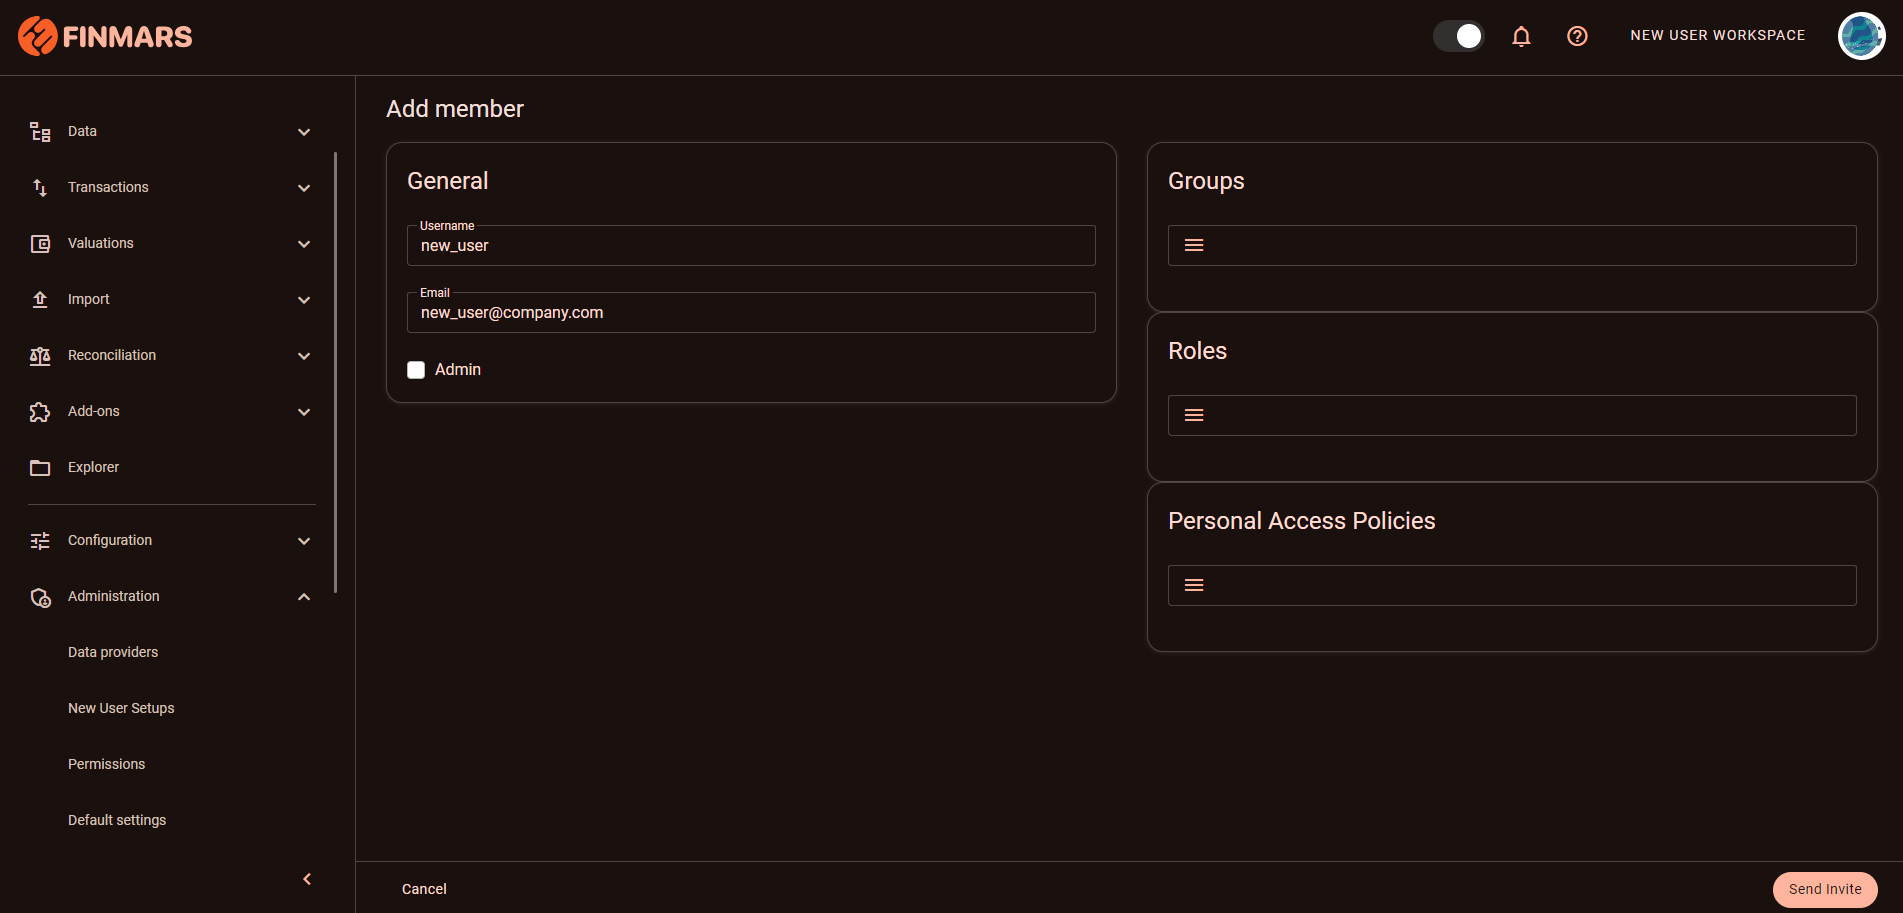
- You will be redirected to the Add Member page

- Fill in General section
- username
- Setup user's permissions:
- Full Access:
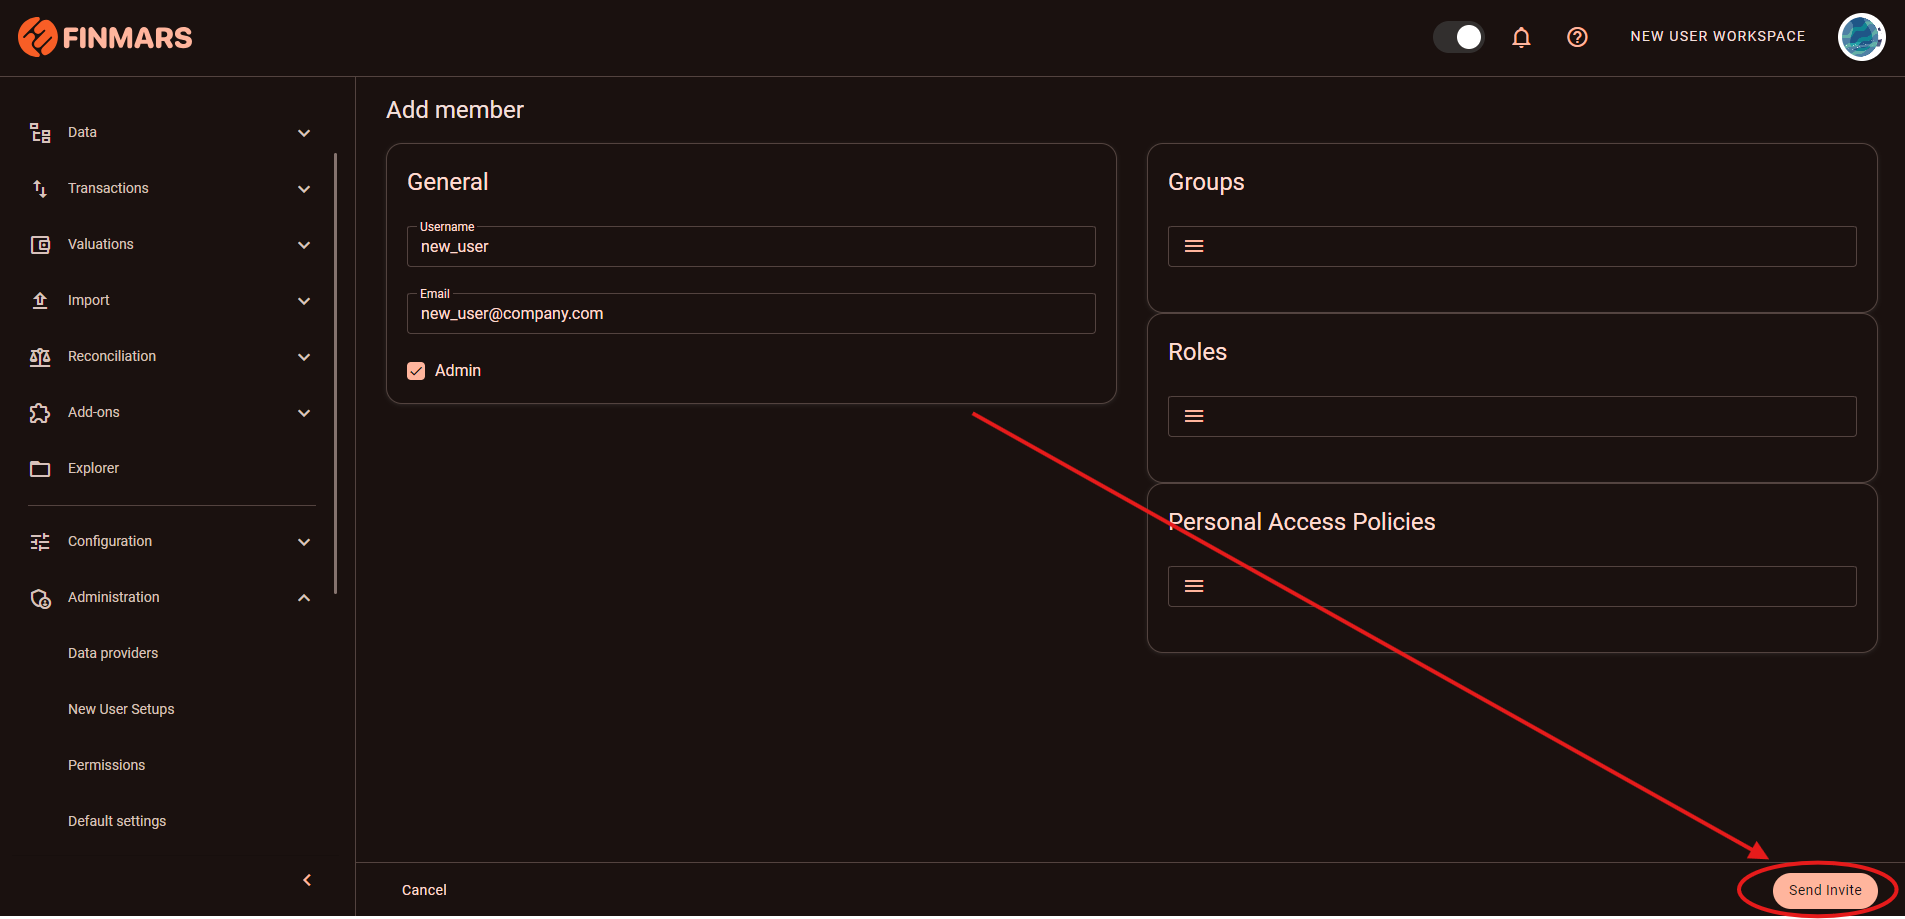
- If you are adding a user with the full access to the workspace -> just click checkbox Admin, you may omit other selectors
- Specific Access Policies
- Groups -> Select from existing
- Roles -> Select from existing
- Personal Access Policies -> Select from existing
- Full Access:
- After you filled in user's info & selected user's permissions just click "Send Invite" button

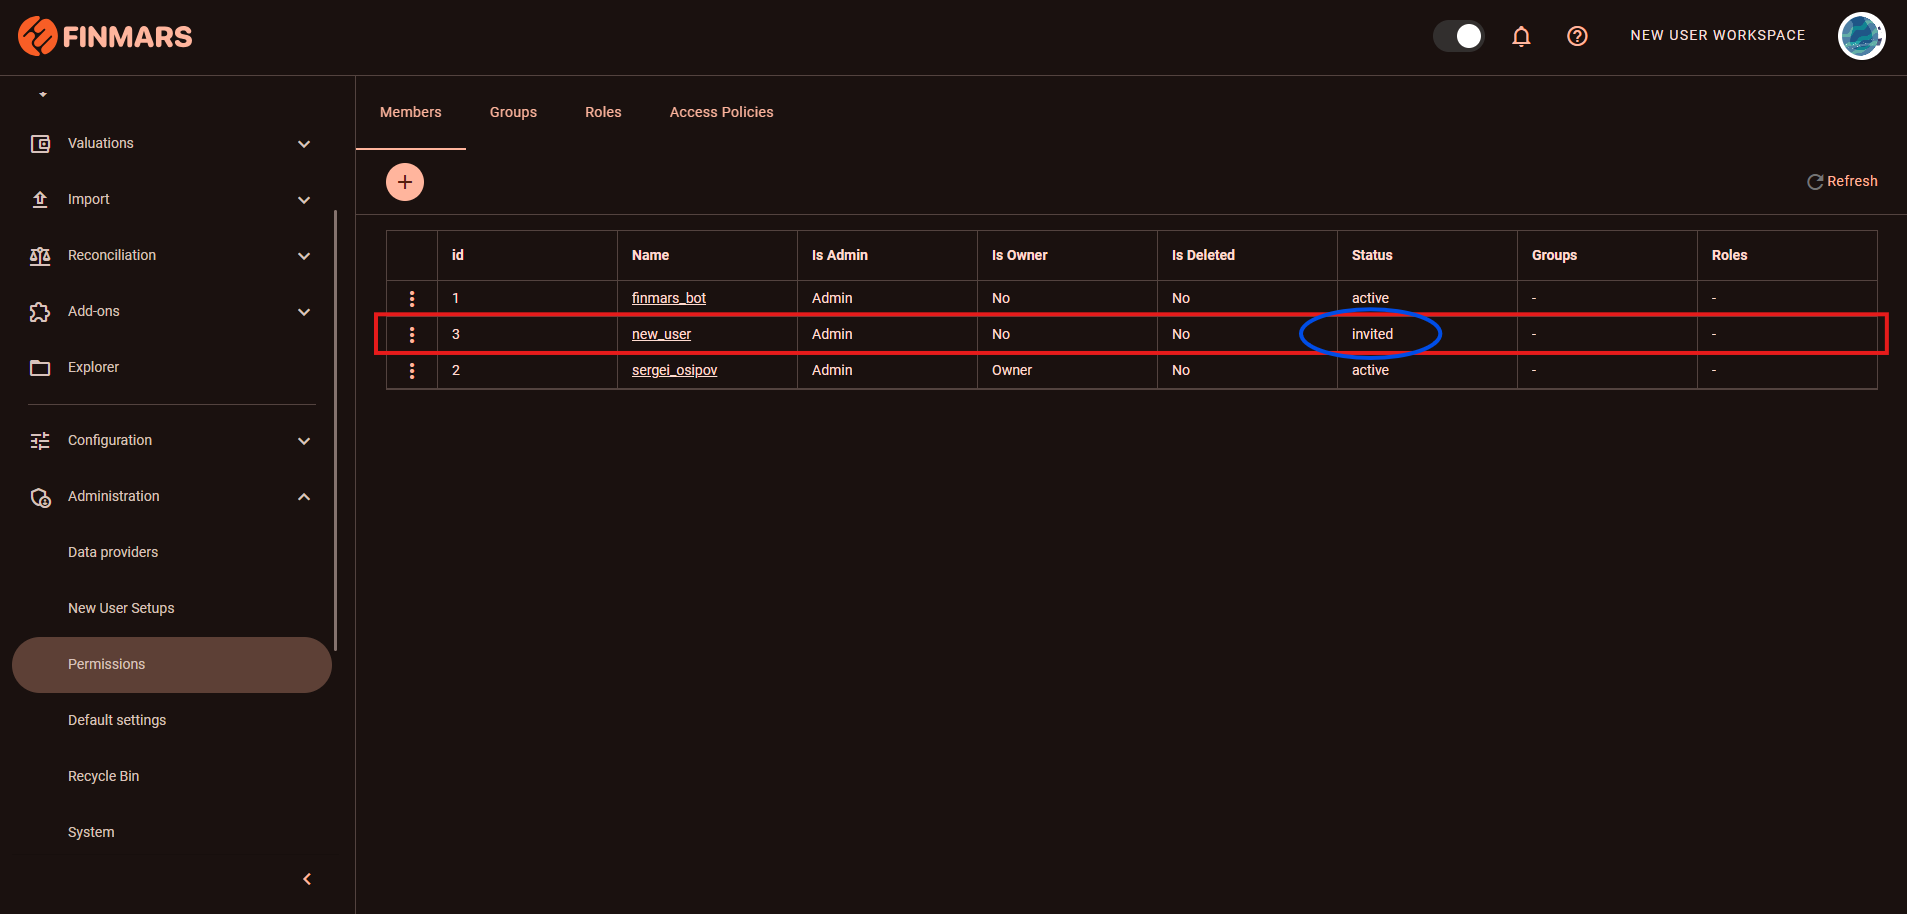
- You will be redirected to the Permissions page's Member tab, you will see that the user is now added to the members list with the status "invited".

- After the user received and accepted the invitation (refer to the How to get Access to the Workspace - points 4-5) their status will change to "active"