# How to Create an Account Entity
## Prerequisites
We assume you have all prerequisites you may need, including:
1. If needed: the VPN is configured to access the Finmars resources
2. If needed: access to the Virtual Machine to work with the sensitive information
3. Must have: registered in Finmars in the needed region environment (self-registered or registered by Finmars)
4. Must have: having permissions set to allow continue with the Action in the Guide
## Creation of Account Entity
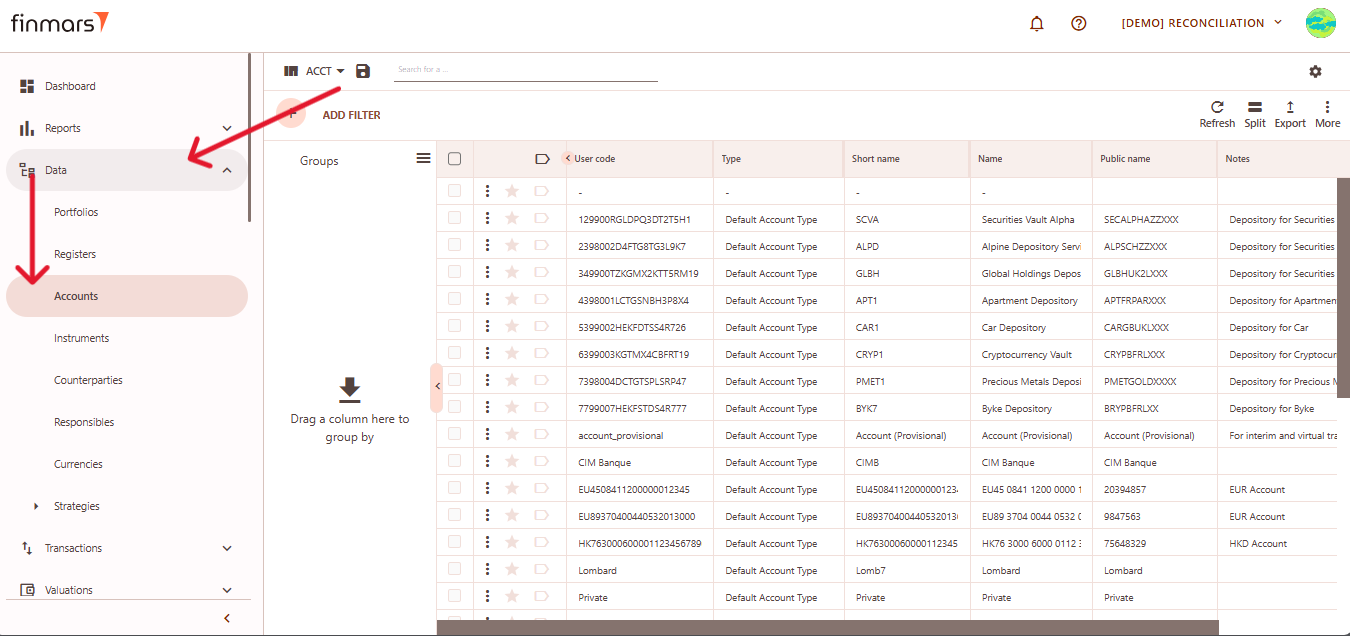
1. Open the ****“Data”**** section in the left-hand side menu. Select the ****“Accounts”**** entity from the list under ****Data****.
[](https://docs.finmars.com/uploads/images/gallery/2025-05/scaled-1680-/snimok-ekrana-2025-05-06-034052.png)
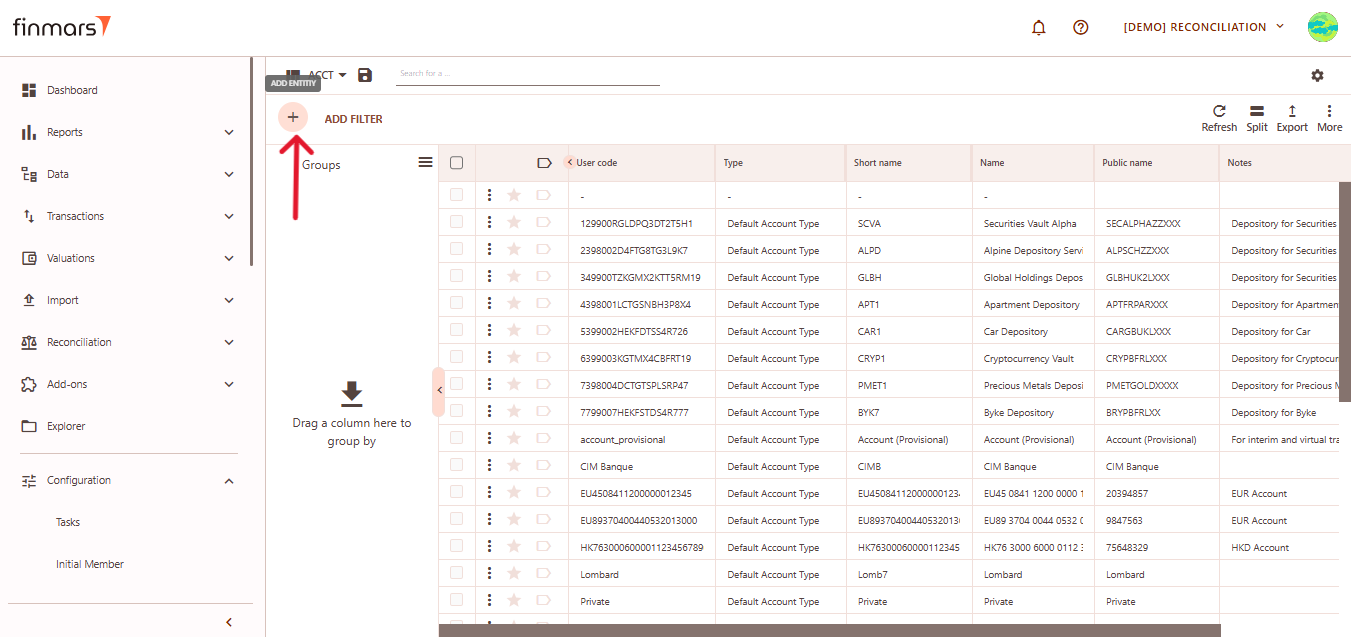
2. ****Click the “+ Add” button**** located in the top-left corner of the portfolio list view.
[](https://docs.finmars.com/uploads/images/gallery/2025-05/scaled-1680-/snimok-ekrana-2025-05-06-034133.png)
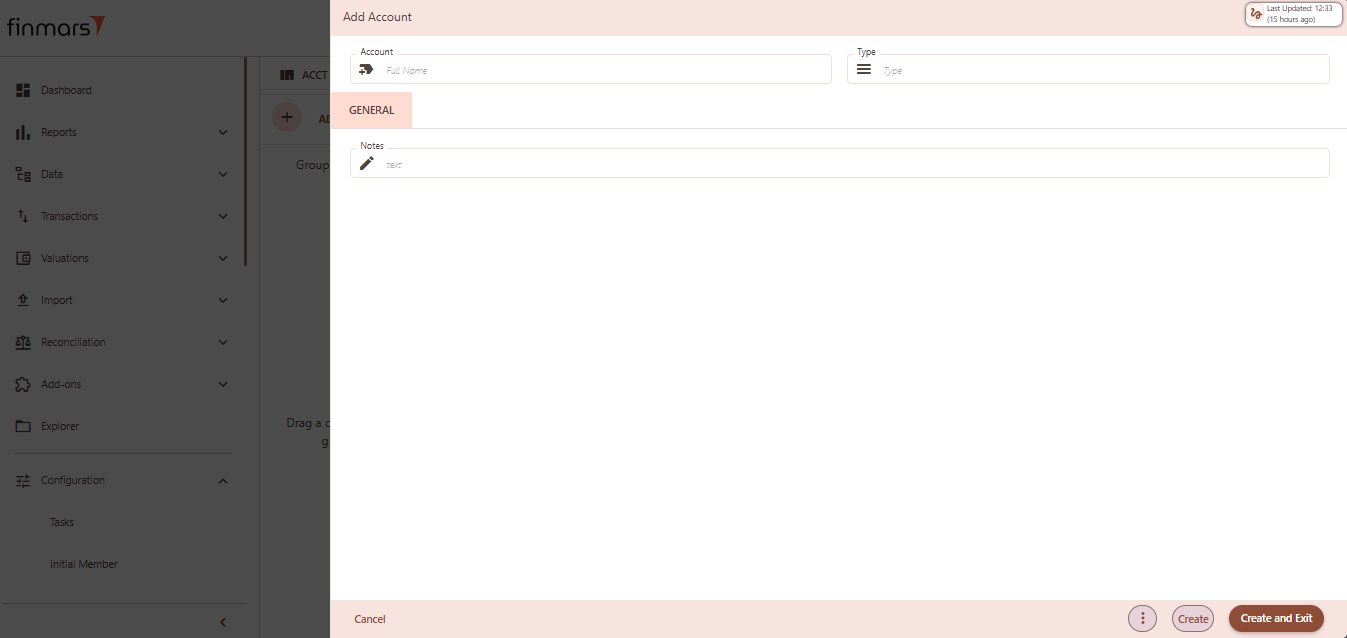
3. This action opens the ****Add**** ****Account**** form.
[](https://docs.finmars.com/uploads/images/gallery/2025-05/scaled-1680-/snimok-ekrana-2025-05-06-034143.png)
4. ****Fill in the required fields in the creation panel:****
1. ****Account**** – full name of the account. This will serve as the primary identifier in the interface and reports.
2. ****Type**** – choose the account type from the dropdown (e.g., Default Account Type, FX Buy/Sell, Provision). This determines behavior in flows, reports, and reconciliations.
3. ****Notes**** **(optional) –** any internal comments or descriptions related to the account setup.Any internal comments or descriptions related to the account setup.
[](https://docs.finmars.com/uploads/images/gallery/2025-05/scaled-1680-/snimok-ekrana-2025-05-06-03414.png)
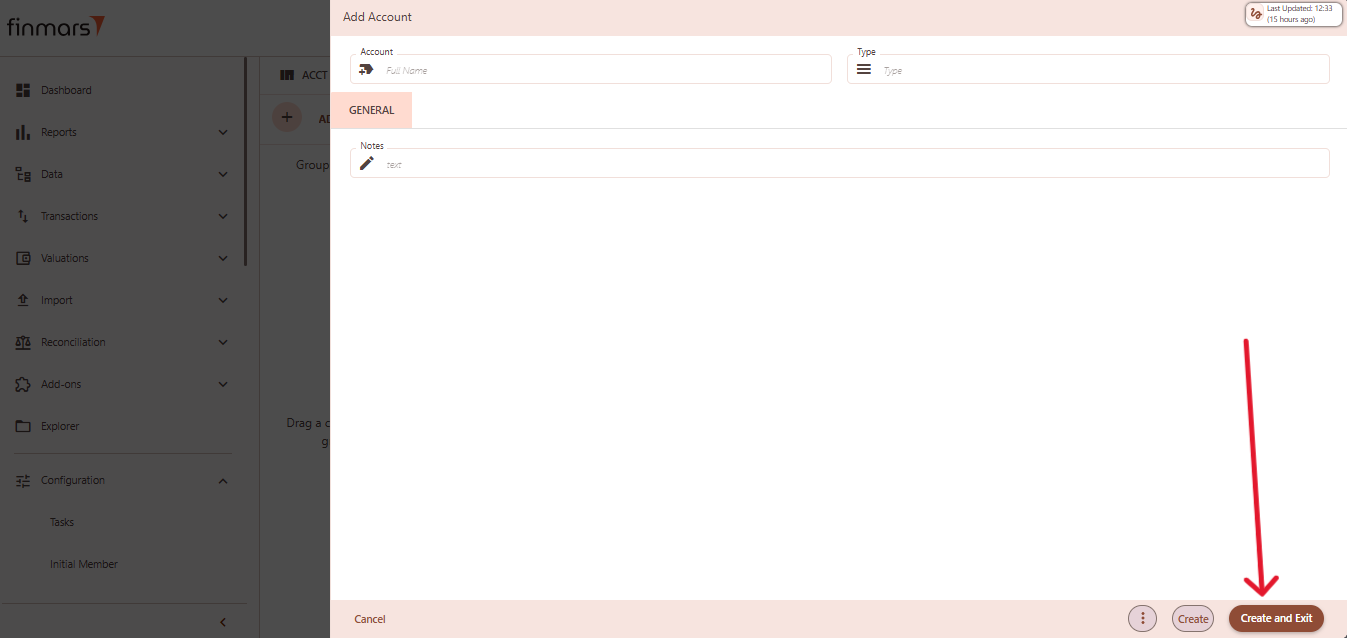
5. Click ****“Create and Exit”**** to save the portfolio and return to the list view. Alternatively, use ****“Create”**** to save and continue editing.